How to route an inset groove on irregular shapes? Without making a template?

Acrobat

Member
Joined
Jun 30, 2008
Messages
471
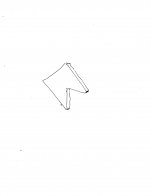
Hi, I need to route an inset groove about half inch in from all side on a shape that’s not straight edged as a rectangle, but closer to oval egg shaped. Is there a router bit/guide setup that does this? I’ve seen plenty of videos but they all show straight edges guides and that will not work for me here. I’m thinking of something with a bearing and arm to follow the shape but having the router bit about 12mm or half inch inside the edge. I’ve tried the of1010 Festool arm with bearing attachment, but it will not let me extend it to half inch and I think it’s not designed for what I need, unless I’m not understanding how it works.
I don’t want to have the extra time and hassle of making a template to follow so figured someone must have the solution, after all Festool a motto is faster easier better isn’t it?
Any ideas appreciated.
 
If I understand you correctly you might have a look at the Festool WA-OF (486052) / KT-OF (486534) combination. I used it to route a recess for the LED-strip in a handrail of our stairs. Worked like a charm.
 
Or instead of spending $100+ you could just make a router base with a pin sticking out from a piece of scrap wood.
 
Yeah thanks Alex, the Festool angle arm and bearing attachments do not work where one needs to route and inset groove AWAY from the edge, seems to only route the edge itself so no use for me. I like your idea. Thanks
 
The pin idea would work if the guide had two pins. The two pins and the hole for the router bit form a triangle. The two pins slide along the edge of the work piece  and always keep the router bit at the same distance from the edge. The user has to exert some force to keep the pins against the edge.
 
If you can put together a base with two pins or fingers then you will gain stability.  Perhaps even a base stuck with double sided tape to the router base?

[attachimg=1]
 

Attachments

  • router base idea.jpg
    router base idea.jpg
    127.7 KB · Views: 1,027
[member=15289]Birdhunter[/member] , sorry.  You were typing while I was scanning.

Peter
 
Ehm, just to be sure. I routed a groove parallel to the edge of a curved handrail, but a few mm from the edge with this. So I know it can be done.
 
HDV, when using the setup you mention, you have only a single point of contact to the edge of the workpiece correct? This would require careful attention to ensure you did not allow the router to pivot on the point of contact which would reduce the distance from the contact point to the bit.
 
A little labor and material intensive, but maybe copy your piece to a piece of MDF with a template bit. Then run a rabbeting bit on the MDF template to create your offset, then flush trim the rabbeted edge so it's flat again. You can repeat that step until you reach your desired offset. Then you can clamp the now smaller and offset MDF template onto your piece and template route your offset detail.

Edit: Just read the whole "without making a template" part. Disregard my whole post.
 
Birdhunter said:
The pin idea would work if the guide had two pins. The two pins and the hole for the router bit form a triangle. The two pins slide along the edge of the work piece  and always keep the router bit at the same distance from the edge. The user has to exert some force to keep the pins against the edge.

Yeah, two pins work better than one, as long as the curvature is not too steep.

I routed this groove along the roman ogee with a base with a single pin, two pins would not have fitted here as the groove would go wrong in the upward curve. I routed very carefully and got the groove at the proper distance everywhere, but it is a bit like you're drawing with the router.

OP's workpiece is probably much bigger and then two pins will work better as you always have two contact points

View attachment 1

And yes it's been 7 years, I need to paint that again.  [embarassed]
 

Attachments

  • 20190726_124229.jpg
    20190726_124229.jpg
    344.3 KB · Views: 268
Hi Bob,

You are 100% correct. It does require some attention to make sure the pivot point was always the same distance from the edge, but in the end it proved to be not as difficult as I feared. As a matter fact after that "test" I have done it several times again. But I have to admit this was mostly on hidden parts of a workpiece and the grooves were shallow enough to do in one run. All those grooves were nice and even-spaced from the edge. I would not fear doing it on a more visible piece of work in the future. As long as the curvature is smooth (no sharp angles) it is quite doable.
 
Birdhunter said:
The pin idea would work if the guide had two pins. The two pins and the hole for the router bit form a triangle. The two pins slide along the edge of the work piece  and always keep the router bit at the same distance from the edge. The user has to exert some force to keep the pins against the edge.
This sounds like a good idea. I will need to test it but I believe it’s the best solution in my case. Luckily the oval I’ve made is large (750 mm) and as such has fairly gentle arcs so running the two pins along the edge with a good offset for the router bit should work well, as long as I keep the pins running along the edge.
Thanks to everyone giving their ideas and input. Love this sharing of ideas. Here’s a sample of what I’ve made. Sign and post for my driveway entrance.
 

Attachments

  • 8DF9B464-904E-4412-B4F6-3BA2EEC10056.jpeg
    8DF9B464-904E-4412-B4F6-3BA2EEC10056.jpeg
    3.2 MB · Views: 348
Back
Top