How to undercut fireplace bricks for flooring

webpp

Member
Joined
Aug 23, 2015
Messages
65
Hey guys,

I hope you're all doing good. I, yet again, need your help and expertise because I know some of you're very savvy.

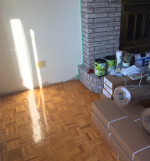
As you know, I’m installing walnut hardwood flooring over parquet flooring with cork underlayment. My question is that I’m trying to figure out how to undercut the fireplace bricks so that I can slide in the hardwood floors as shown in the following video:


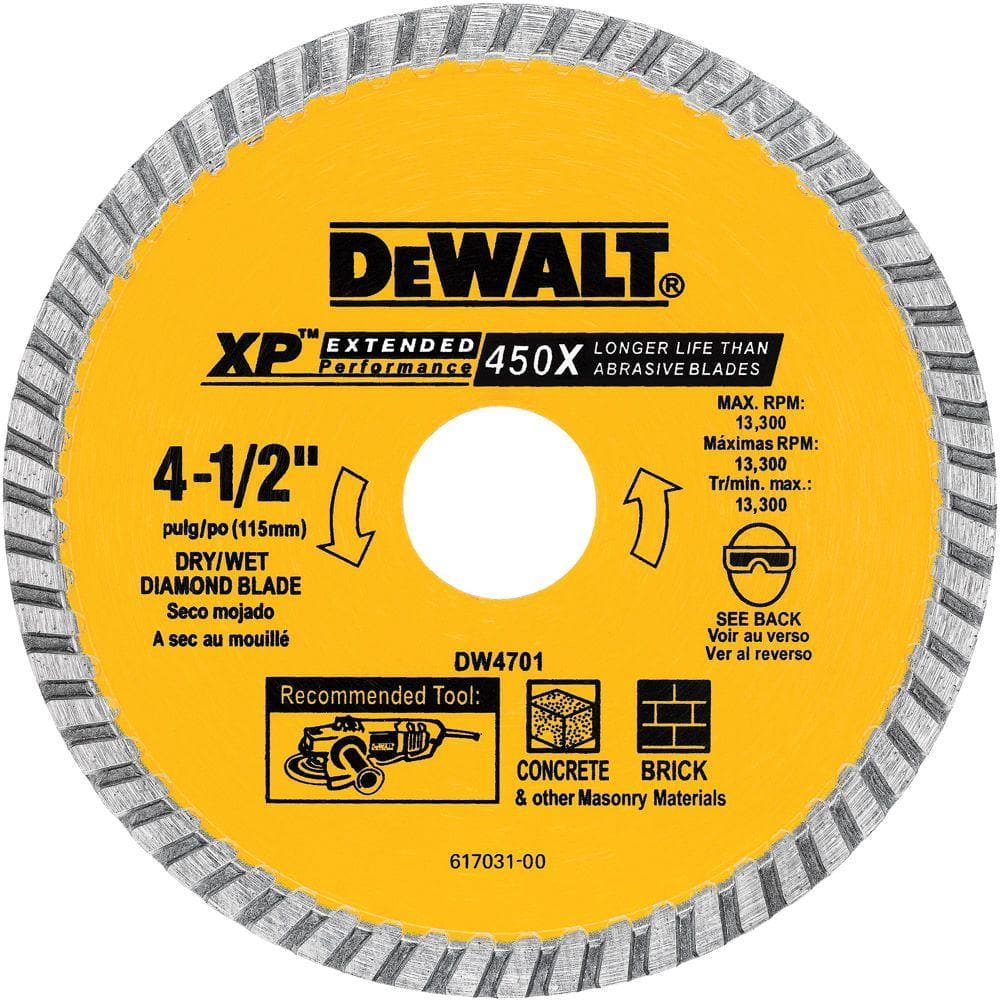
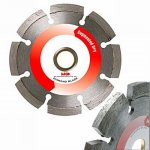
He is using a jamb saw with a diamond blade, however I couldn’t find a place that rents one and nor do I want to buy one for using it only once.

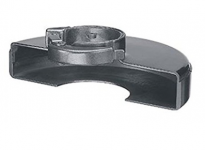
Do you guys have any other idea how to undercut a fireplace bricks? Or do you guys know how I can built a jig for an angle grinder that will basically do the same task as a jamb saw?

Thank you for your help!
 
An angle grinder would do the job, but why? Can't you leave a small gap and fill it? Or find a trim piece?

If you do cut it would you have to cut both top and bottom, then chisel out the middle? I just see this being a messy pain in the backside.

If you find the right thickness of wood, you could lay it down on the floor than just run the angle grinder spark deflector against the wood piece, and either watch your depth carefully or use another piece of wood to create a depth stop. Do make sure to wear a dust mask, and best practice would be to use dust collection.

1784750d-86d4-41b3-8cc7-fe29247bb433_1000.jpg
 
A guard like this might be helpful too. Looking at it you could probably fit a
nozzle for dust extraction too if you know someone with a MIG welder or can
do a little welding yourself.


Attachments

  • blade guard.png
    blade guard.png
    79.4 KB · Views: 643
Peter_C said:
An angle grinder would do the job, but why? Can't you leave a small gap and fill it? Or find a trim piece?

If you do cut it would you have to cut both top and bottom, then chisel out the middle? I just see this being a messy pain in the backside.

If you find the right thickness of wood, you could lay it down on the floor than just run the angle grinder spark deflector against the wood piece, and either watch your depth carefully or use another piece of wood to create a depth stop. Do make sure to wear a dust mask, and best practice would be to use dust collection.

My fireplace brick is rectangular in shape but the corners are rounded.

I was wondering if going to the extreme edge without leaving any expansion gap would look good. Also, what would I fill it with?

Attached is the picture of one of the rounded corner of the fireplace bricks.

[attachimg=1]
 

Attachments

  • Capture.PNG
    Capture.PNG
    1.1 MB · Views: 5,483
My recommendation would be to leave the brick alone and scribe the wood flooring up to it. Make a small consistently gap, then use backer rod and a sealant that matches your flooring color. You won't even notice it when finished.

Sent from my SM-G930R4 using Tapatalk

 
Goz said:
My recommendation would be to leave the brick alone and scribe the wood flooring up to it. Make a small consistently gap, then use backer rod and a sealant that matches your flooring color. You won't even notice it when finished.

Sent from my SM-G930R4 using Tapatalk

I like this idea. Use the wall with the fireplace to start your rows (if you can). If it's hardwood (I think thats what you said) it's easy to spline (or maybe a reason to buy a domino [wink]) somewhere to change the direction of the tongue and grooves if you need to for the rest of the installation.
 
You just need to suck it up and buy the jamb/flush cut saw.  If you'd hired a contractor he'd have one.  Since you've taken his job, you need one now too.  You're still saving money, just less than you'd expected. Don't get all hung up on it though.

You must live in a sparsely populated area because just about every rental place I go in has a flush cut saw for hire.

Even so, this one is cheap and will last your job for sure.  If they are in short supply in your area you should have no trouble selling it on after you use it.
http://t.harborfreight.com/3-38-in-68-amp-heavy-duty-toe-kick-saw-62420.html

Alpha Tools makes a flush cut system for grinders. The proprietary blade and adapter are going to cost a little more than the cheap saw above though , so really doesn't make financial sense.  And trying to sell a used diamond blade probably isn't going get you very many offers.  This set-up may work better for you though since that saw above is really meant to be use in a different orientation.
 
FWIW...I think scribing the flooring would be the easiest, while undercutting the brick will give you the best visual results. If this were my project, I'd undercut the brick.

You appear to be using an engineered flooring product so that the thickness of the flooring is what...1/2"?

I'd consider using a MK or Bosch 4"/5" diamond tuck point blade for a right angle grinder, they're 1/4" thick so they produce a 1/4" thick kerf. I'd then put a rabbet on the bottom of the engineered flooring such that the edge of the floor strip that you want to tuck under the brick is only 1/4" thick or slightly less.

So, undercut the brick by 1/4" thickness and slip the "rabbeted 1/4" tongue" into the recess. The flooring can expand and contract without the need for filler rods or caulk. It will also give you a much sharper/defined sight line between the brick and the flooring.  [big grin]
 

Attachments

  • 19627 MK.jpg
    19627 MK.jpg
    35.6 KB · Views: 621
How about making a 3/4" nosing for the gap, Laminate pieces ( Cove, Shoe, Molding)  since you are going to have base board you could build a jig out of MFD with the curve.  Slice up some Walnut or whatever your baseboard is and make it  I don't think that would be that difficult.  There is an episode from This Old House where Tom Silva makes a molding for a staircase with a rounded last step.  I thought I had it in my favorites but a little searching and I think you'll find it.  I think that would be a nice way to finish it off.  I'm sure you can make this molding  Use you pattern as the backer when routing the profile to keep  the molding stiff 

Check out this link
www.stairsupplies.com/product-category/wood-stair-parts/shoe-molding-stair-nosing-skirtboards/

 
Met with our stone fabricator and asked him - he said there are a few co.'s making blades/wheels like this.

MK diamond has one he said.
 
Goz said:
My recommendation would be to leave the brick alone and scribe the wood flooring up to it. Make a small consistently gap, then use backer rod and a sealant that matches your flooring color. You won't even notice it when finished.

Sent from my SM-G930R4 using Tapatalk

Exactly!  This is what I did on one job 16 years ago.  The homeowners were delighted with the results.  Forget trying to undercut the bricks. 
 
My recommendation comes mostly from my recent experiences renovating a 60-year-old house. I've uncovered many issues where previous homeowner irreparably​ damaged something I would have liked​ to restore.  Once you cut that stone, you're really limiting options for the future. 

Sent from my SM-G930R4 using Tapatalk

 
In theory I agree , but practically speaking - undercutting the brick isn't really limiting you.

That thin parquet is not likely to wow people into restoring it back to original. Pretty much anything that would be added will be much thicker and would fit beneath the undercut.

Besides , the proper way to do it is to undercut it.  You don't see any moldings hiding the current work do you ? 
 
Hey, to put things into perspective...I don't have a dog in this fight...this whole deal as it relates to me, das macht nichts...it is what it is.

I look at most home improvement projects as to whether you're a long term owner or a short term owner.

A long term owner needs to rise every day and look at the abomination they created and feel the angst and the frustration of their supposed "improvement".

The short time owner needs only to move forward no matter what/how they bastardized the "home improvement" process.

So this task is really very simple, you either embrace the "easy to do" philosophy or you embrace the aesthetically preferred undercutting philosophy.

Quarter round and putty or undercutting stone...the choice is yours...and more importantly, you need to be happy with your choice.

 
Cheese said:
So this task is really very simple, you either embrace the "easy to do" philosophy or you embrace the aesthetically preferred undercutting philosophy.
So true.
You could do putty job, but it will look like ... well, putty job. That's why always do what you significant other told you to do.
 
Cheese said:
Hey, to put things into perspective...I don't have a dog in this fight...this whole deal as it relates to me, das macht nichts...it is what it is.

I look at most home improvement projects as to whether you're a long term owner or a short term owner.

A long term owner needs to rise every day and look at the abomination they created and feel the angst and the frustration of their supposed "improvement".

The short time owner needs only to move forward no matter what/how they bastardized the "home improvement" process.
  OMG... way too funny and WAY too true...  I may have to have a poster made with these words... [embarassed] [embarassed] [embarassed]
 
Lots of good comments here. If it were my place that I intend to live in for a long time I would avoid cutting the brick so as to not create a possible problem with a future flooring change. Accurate scribing and a small flexible trim piece would be my approach, YMMV. I wish you well on your project whichever path you choose.
 
A grinder won't cut up to the wall either. A multi-tool with a good quality blade will be slow, but probably get the job done. That is a lot of work to under cut the brick.

What is the subfloor composition? Why are you leaving the old parquet floor? My concern would be it could get wet and bubble raising the new floor. Depending on the glue condition it may not be that hard to remove. I have done so a couple of times and using a roto hammer was able to work quickly, over a slab of concrete.
 
Defiantly an angle grinder with diamond blade. Lay it flat to the floor with blade guard on. It will be the perfect height. Just need the one cut, break off the access with a broad knife or screwdriver. I did mine and had the wife follow with the dust extractor. Took less than 10 minutes. It is a much cleaner look.
 
Back
Top