Bell407
Member
- Joined
- Sep 17, 2013
- Messages
- 15
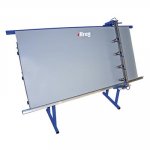
Hey guys. I have contemplated purchasing the Kreg Klamp Table primarily for assembling face frames secured with pocket screws. Before doing that i would like to know what sort of ideas folks have come up with by using the MFT3 for the same purpose.
Thanks
Thanks