Improved dust collection on Hammer N4400

mattbyington

Member
Joined
Mar 11, 2018
Messages
797
Gents,

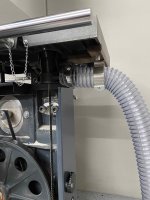
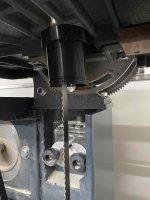
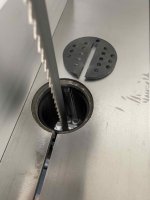
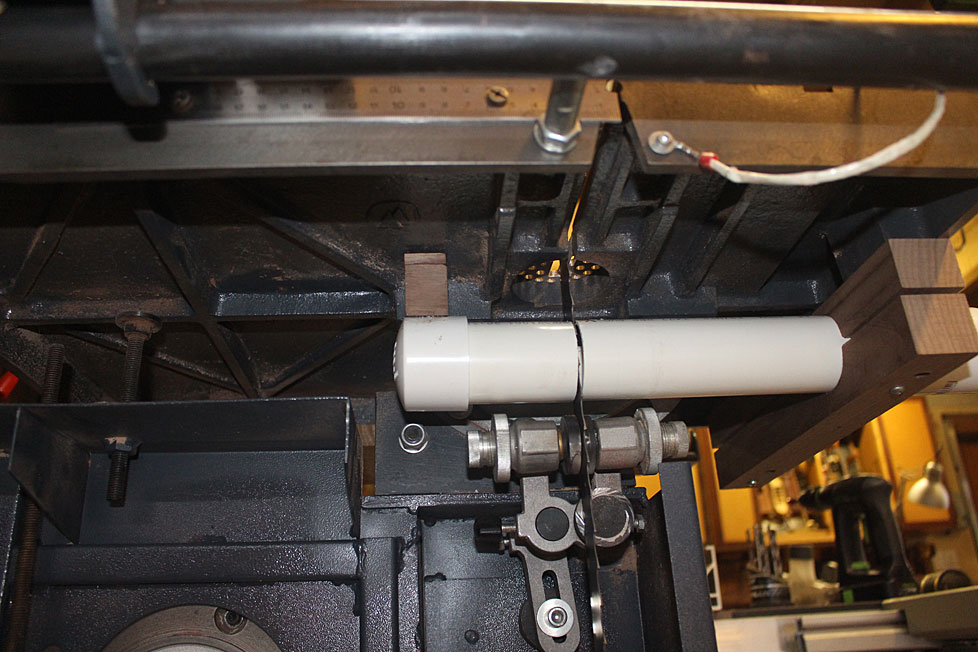
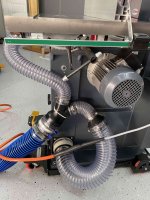
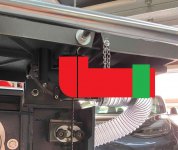
Similar to the other gentleman who commented on the other thread I too am less than impressed with dust collection on the N4400.

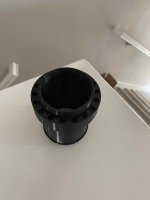
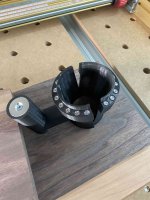
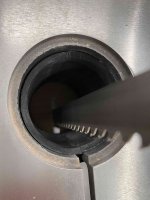
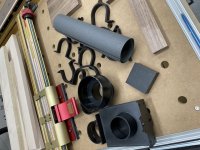
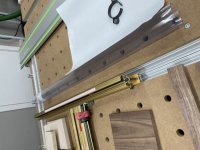
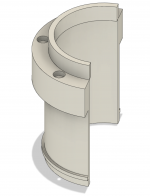
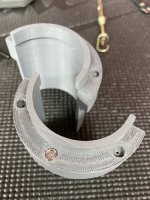
Worked on some prototypes over the weekend designing in fusion 360 and cutting out on my CNC.

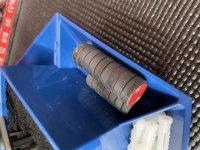
Got some pipe and fittings from Rockler - there will be a fair bit of trial and error over the next week but I’ll update on progress.

[attachimg=1][attachimg=2][attachimg=3][attachimg=4]
 

Attachments

  • 55C28063-C2EB-4CD3-B85D-22F7DEA4D2FF.jpeg
    55C28063-C2EB-4CD3-B85D-22F7DEA4D2FF.jpeg
    48.2 KB · Views: 1,195
  • 2F914F0A-A237-4433-A45B-F1C8608F4547.jpeg
    2F914F0A-A237-4433-A45B-F1C8608F4547.jpeg
    122.9 KB · Views: 1,253
  • 95069EB1-F69A-44B4-82D9-D2B45FBC57BA.jpeg
    95069EB1-F69A-44B4-82D9-D2B45FBC57BA.jpeg
    100.3 KB · Views: 1,248
  • 42F4AC32-225B-49E1-88D2-D98CE51EE78C.jpeg
    42F4AC32-225B-49E1-88D2-D98CE51EE78C.jpeg
    105.1 KB · Views: 1,097
Matt, make the extraction version I posted in another thread. It works.

Regards from Perth

Derek
 
[member=4358]derekcohen[/member] that is roughly the plan. I bookmarked yours.

I'm modifying it slightly to work with my 4" dust collection system, and using some slightly different hardware, and making it a  little easier to attach and detach.

But your design and  work has been invaluable in the  design phase, really appreciate you sharing all of those pictures and your ingenuity.

Matt
 
Ok team. Apologies for the delay. I have been prototyping like crazy over here on this.

Here are my prototypes:

1) PVC from Mcmaster car, rough cuts on the bandsaw and hand saw, and custom bracket out of walnut to bolt it onto the bandsaw (Very similar to Derek's solution)!

That worked OK but I really wanted a tighter seal under the table.

2) A take on (1) but with a flexible hose. Rockler Flex Form:https://www.rockler.com/4-flexform-dust-collection-hose

This was OK. the hose wasn't all that stiff and high quality.

3) Split 4" and 2.5" (using one of those reducing "Y"s). This was the worst - I felt like it was the worst of both worlds. The small hose went to solution (2) (under table) and the larger one to the normal port on the N4400. Collection was terrible.

4) OK, this one is panning out. I had an epiphany. Drillnado sells dust collection for the drill press, right? Right. It has all of the qualities you can ever want - it comes in 2 halves that clamp over the drill press quill - it redirects airflow from "vertical" to "horizontal". (collection hose out of the side), so that you can clamp it around the bandsaw blade and then collect orthogonal to the stream of dust (and the blade itself which is the hardest part). Best of all, it comes with a little "Bellow" that "clips" into it.

Google it or search on Amazon to see pictures of what I mean.

So, I'm going to re-purpose it for my needs. I designed a 3D model in CAD that fits under the table perfectly with a large flange for magnets to attach under the table. It sticks up into the hole .25" for registration.

And it will register into the drill nano part! Should be awesome!

I don't own a 3D printer so a friend is helping me out - Mark - he is a great guy.

Pictures below!

Matt
 
[member=58821]ben_r_[/member] thanks! so here's the first prototype.

The magnets (I just installed one to show you guys) will hold it on the underside of the bandsaw table.

The little lip goes up into the hole a tiny bit (.25" to be specific).

I'm waiting for a second 3D print with slightly different numbers, more to come next week!

Matt

[attachimg=1]
 

Attachments

  • IMG_4165.jpg
    IMG_4165.jpg
    570.5 KB · Views: 801
mattbyington said:
[member=58821]ben_r_[/member] thanks! so here's the first prototype.

The magnets (I just installed one to show you guys) will hold it on the underside of the bandsaw table.

The little lip goes up into the hole a tiny bit (.25" to be specific).

I'm waiting for a second 3D print with slightly different numbers, more to come next week!

Matt

[attachimg=1]
Dude, what printer do you have, those layers look pretty chunky... Are you printing the parts like they are pictured or in a different orientation?
 
Hey [member=58821]ben_r_[/member] I don't have one and I have no experience with them at all :)

I did the design in CAD (Fusion 360) and my friend Mark printed them out for me.

He has a nice industrial printer I think, but we had the quality turned wayyyyy down low for these early prototypes.

For the final version, which we're about to print, it'll be a 20 hour job and he's going to turn the quality settings way up.

The prototypes we didn't care about as much.

I don't know much about the 3D printing world so excuse me if it didn't make sense!

Matt
 
Still prototyping but getting very close!

Matt

[attachimg=1]

[attachimg=2]

[attachimg=3]

[attachimg=4]
 

Attachments

  • IMG_4280.jpeg
    IMG_4280.jpeg
    480.7 KB · Views: 802
  • IMG_4279.jpeg
    IMG_4279.jpeg
    486 KB · Views: 784
  • IMG_4278.jpeg
    IMG_4278.jpeg
    440.6 KB · Views: 744
  • IMG_4273.jpeg
    IMG_4273.jpeg
    329.3 KB · Views: 718
(all of those tiny holes on top hold 1/8" thick by 1/4" diameter small magnets that holds it under the table).

Matt
 
Matt, I hate to rain on your parade - because your work so far is amazing - but there is a potential issue with your design. I do have a suggestion if it is necessary.

The problem is that the extraction area needs air to flow across it. If you block it, as you have done by surrounding the blade with a pipe, then there is no cross air ventilation.

In my system, there is an end cap ...

5a.jpg


I found that it was better to remove it.

Your solution - if needed - could be to drill some holes in the far side.

Regards from Perth

Derek
 
[member=4358]derekcohen[/member] thanks! Good tip. Yeah that makes sense.

So you are thinking there is insufficient airflow coming from the top of the table and also the underside of the piece?

It is open both on top and bottom, I was thinking that was enough airflow but you might be right.

Thanks for the tip I will try drilling some holes!

Matt

I am re-designing it slightly to provide a larger magnet off 2" to the left for better adhesion to the underside of the table.

[attachimg=1]
 

Attachments

  • Untitled.png
    Untitled.png
    215.8 KB · Views: 683
OK, after 7 prototypes and lots of thinking, finally done and it works a charm!

Matt

[attachimg=1]

[attachimg=2]

[attachimg=3]

[attachimg=4]
 

Attachments

  • IMG_4402.jpeg
    IMG_4402.jpeg
    536.6 KB · Views: 606
  • IMG_4404.jpeg
    IMG_4404.jpeg
    530.7 KB · Views: 615
  • IMG_4435.jpeg
    IMG_4435.jpeg
    492.4 KB · Views: 667
  • IMG_4436.jpeg
    IMG_4436.jpeg
    587.9 KB · Views: 704
I think you should have used a 4x4x2.5 wye instead of those transitions from 4" to two 2" and then back to 4". That doesnt make sense and you're definitely going to lose suction there especially if using a dust collector and not a dust extractor.
 
[member=66813]rmhinden[/member] thanks!!

[member=58821]ben_r_[/member] good eye. I actually did that on purpose. I purchased both (the one you are referencing) and the one I have now. When I used the one you are referencing, it favored increased suction to the stock port on the bottom of the saw, as expected. However that's the opposite of what I want. I really wanted the suction to be split 50/50, even favoring my custom designed port on the bottom of the table to collect the vast majority. The stock port on the saw just to clean up the fine dust that got through.

So, my logic was to split the 4" into two equal 2.5" lines, splitting the suction 50/50 (or closer to it at least) and then only increase back to 4" just to fit the port on the bottom of the machine.

Not being very experienced in dust collection, I'm sure my logic is off or there was a better way but I figured I would mention that it was intentional and that I tried the other way, as well.

FWIW I am using the Rockler 1250 CFM collector behind the Oneida Super Dust Deputy cyclone + 35 gallon drum.

Matt
 
I realize 3D printing is fun, but why not just use off-the-shelf PVC elbow with a short stretch of pipe, cut a slot into it (for the blade) and tie to the table where you attached your hose. Elbow does not have to fit into table opening, just sit below it.

View attachment 1


Attachments

  • Capture.JPG
    Capture.JPG
    157.5 KB · Views: 173
[member=15585]Svar[/member] I tested with that, actually! It would have worked OK.

I am not great at cutting PVC pipe :) I was a little nervous on the bandsaw with such small weird shaped pieces, but it would have worked.

I bought a bunch of size 2 pipe from McMaster a month ago and tested with it. It was OK. I went through a couple of iterations.

It really didn't seal well to the underside of the table....

and yes, 3D printing was fun :) it allowed me to install lots of magnets to keep it in place.

And it was a lot of fun prototyping!

Matt
 
Back
Top