Cheese
Member
- Joined
- Jan 16, 2015
- Messages
- 12,503
A sister thread on LED lighting:http://festoolownersgroup.com/festo...led-lights-using-the-mfs/msg577072/#msg577072
I'll try not to get too nerdy on this subject but that will be tough to achieve. [smile]
The first part of this post will be installing the LED strips in the stretchers I made for some cabinets.
The next posts will just be an assemblage of various information I've acquired in the 15+ years of working with LEDs. I'm by no means an expert on the subject, but having worked with them for such a long time I've stumbled upon some interesting items.
As the saying goes, "Even a blind squirrel finds a nut once in a while".
Feel free to chime in.
Here's just a little bit of background information to put the ensuing conversation in proper context.
The bane of all LEDs is heat. The magic temperatures for cooking are 40ºF and 140ºF. For LEDs the magic temperature is under 150ºC. The junction temperature of the LED must be kept to a MAX of 150ºC, preferably a lot less. As an example, If an LED has a rated 60,000 hour life at 125ºC its life is reduced to only 10,000 hours at 150ºC and anything in excess of that just creates a rapid downward spiral.
Here's a cross section of an LED. The junction is the pink area and the thick green area is whatever substrate the LED is mounted on. It may be a circuit board or it may be tape. There can be quite a distance between the LED junctions and the heatsink. So if the heatsink is measuring 150ºC, the junctions will likely be over 180ºC. Keep it cool, the cooler the better.
[attachimg=1]
So with that out of the way let's install the LEDs in the stretchers. I've learned/prefer to mount all the LEDs on some type of heat sink. I know some manufacturers say to just peel off the double stick tape liner and stick the tape to any surface you want. That may be ok on metal surfaces but on wood surfaces you're adhering the LEDs to an insulator. More on this later with some interesting photos to share.
Also, if you have a problem with the LEDs down the road it's simple to remove the LEDs with a few screws rather than unpeeling them and then having to remove the adhesive that's left behind.
For this project I used Lighting Ever LEDs on a roll. They're 2835 LEDs and burn at 4100K so they're very efficient. They produce a lot of light with little current draw. The 2 sided tape used is 3M VHB so they will stick to a lot of different surfaces.
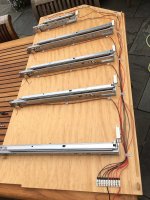
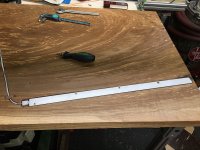
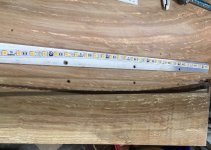
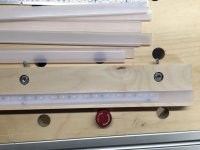
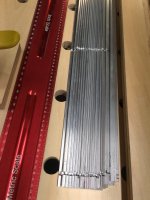
I used 1/2" wide by 1/16" thick aluminum flats for the heatsink. Here's a photo of the aluminum being marked for the hole punching stage.
[attachimg=2]
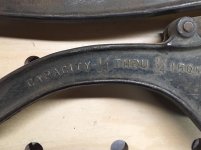
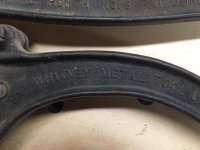
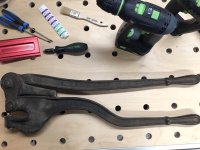
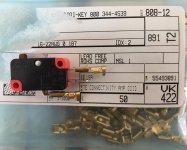
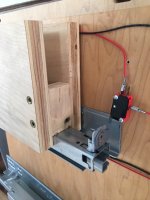
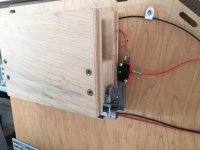
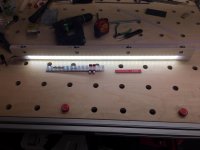
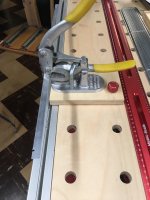
Here's a Roper Whitney hand punch in a bench mount that's used to punch the 4 attachment holes.
[attachimg=3]
[attachimg=4]
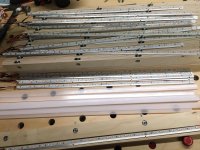
A couple of good wipes with IPA and the aluminum is ready for the LEDs.
[attachimg=5]
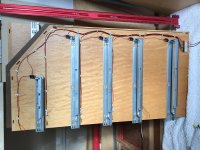
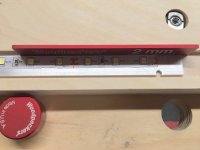
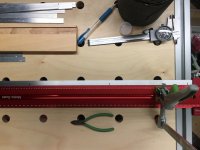
I used a 2mm gauge block to evenly space the heatsink from the channel. I placed the gauge block behind every screw hole and then drove in the screws. The gauge block prevented the heatsink from moving as the screws are driven home.
[attachimg=6]
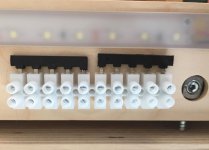
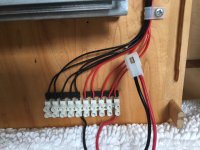
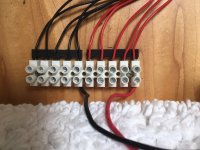
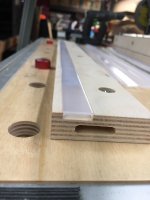
The LED assemblies are held in with 4 each #4 screws.
[attachimg=7]
The Diode LED covers are snapped into place.
[attachimg=8]
[attachimg=9]
Here they are fired up. You can see they provide more than enough light for a drawer. [big grin] I turned one on and let it burn for 48 hours continuously. The room temperature was 67ºF, the heatsink temperature after 48 hours was 74ºF. [cool]
[attachimg=10]
[attachimg=11]
I'll try not to get too nerdy on this subject but that will be tough to achieve. [smile]
The first part of this post will be installing the LED strips in the stretchers I made for some cabinets.
The next posts will just be an assemblage of various information I've acquired in the 15+ years of working with LEDs. I'm by no means an expert on the subject, but having worked with them for such a long time I've stumbled upon some interesting items.
As the saying goes, "Even a blind squirrel finds a nut once in a while".
Feel free to chime in.
Here's just a little bit of background information to put the ensuing conversation in proper context.
The bane of all LEDs is heat. The magic temperatures for cooking are 40ºF and 140ºF. For LEDs the magic temperature is under 150ºC. The junction temperature of the LED must be kept to a MAX of 150ºC, preferably a lot less. As an example, If an LED has a rated 60,000 hour life at 125ºC its life is reduced to only 10,000 hours at 150ºC and anything in excess of that just creates a rapid downward spiral.
Here's a cross section of an LED. The junction is the pink area and the thick green area is whatever substrate the LED is mounted on. It may be a circuit board or it may be tape. There can be quite a distance between the LED junctions and the heatsink. So if the heatsink is measuring 150ºC, the junctions will likely be over 180ºC. Keep it cool, the cooler the better.
[attachimg=1]
So with that out of the way let's install the LEDs in the stretchers. I've learned/prefer to mount all the LEDs on some type of heat sink. I know some manufacturers say to just peel off the double stick tape liner and stick the tape to any surface you want. That may be ok on metal surfaces but on wood surfaces you're adhering the LEDs to an insulator. More on this later with some interesting photos to share.
Also, if you have a problem with the LEDs down the road it's simple to remove the LEDs with a few screws rather than unpeeling them and then having to remove the adhesive that's left behind.
For this project I used Lighting Ever LEDs on a roll. They're 2835 LEDs and burn at 4100K so they're very efficient. They produce a lot of light with little current draw. The 2 sided tape used is 3M VHB so they will stick to a lot of different surfaces.
I used 1/2" wide by 1/16" thick aluminum flats for the heatsink. Here's a photo of the aluminum being marked for the hole punching stage.
[attachimg=2]
Here's a Roper Whitney hand punch in a bench mount that's used to punch the 4 attachment holes.
[attachimg=3]
[attachimg=4]
A couple of good wipes with IPA and the aluminum is ready for the LEDs.
[attachimg=5]
I used a 2mm gauge block to evenly space the heatsink from the channel. I placed the gauge block behind every screw hole and then drove in the screws. The gauge block prevented the heatsink from moving as the screws are driven home.
[attachimg=6]
The LED assemblies are held in with 4 each #4 screws.
[attachimg=7]
The Diode LED covers are snapped into place.
[attachimg=8]
[attachimg=9]
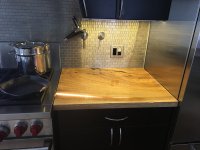
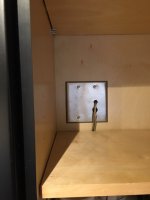
Here they are fired up. You can see they provide more than enough light for a drawer. [big grin] I turned one on and let it burn for 48 hours continuously. The room temperature was 67ºF, the heatsink temperature after 48 hours was 74ºF. [cool]
[attachimg=10]
[attachimg=11]
Attachments
-
 001.png62.8 KB · Views: 2,254
 -
 6854.JPG239.8 KB · Views: 2,077
 -
 6844.JPG257.5 KB · Views: 2,148
 -
 6828.JPG712.1 KB · Views: 2,211
 -
 6827.JPG227.8 KB · Views: 2,125
 -
 6826.JPG231.7 KB · Views: 2,151
 -
 6825a.JPG744.8 KB · Views: 2,166
 -
 6824.JPG436.4 KB · Views: 2,175
 -
 5740.jpg929.9 KB · Views: 2,110
 -
 5741.JPG644.7 KB · Views: 2,160
 -
 5738.jpg749.8 KB · Views: 2,202