ear3
Member
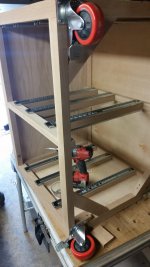
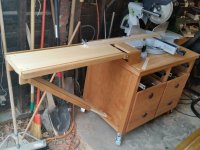
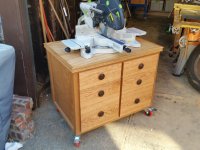
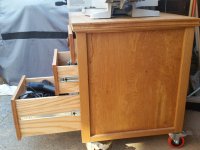
Using the design of [member=11196]Peter Parfitt[/member] as a base (), I just made a shop unit for my Kapex, reserving the UG cart now for mobile use:
[attachthumb=1]
[attachthumb=9]
Having never made a carcasse and drawer structure before, I thought it would be a good chance to practice some techniques and also get the opportunity to work with thicker wood. I decided to just do the carcasse and not add the foldable wings that are found in the original plans -- I want to be able to do up to repeat cuts on 8 foot boards if necessary, which I couldn't see how to do, even if I designed some intricate, folding extension, so I've opted to add on a detachable extension wing in the future.
So I got two 8/4 boards of white oak and ripped all the carcasse members from them -- I initially started with the panther blade on my TS75, but found I got a better cut just using a fresh 30T Forrest blade on the table saw.
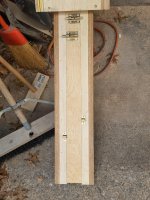
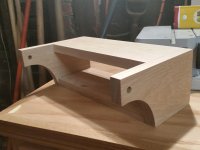
The panels are just 5mm underlay fitted into dadoes routed into the frames. I used a combination of 10mm and 8mm dominoes to join everything together:
[attachthumb=2]
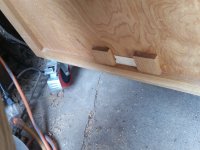
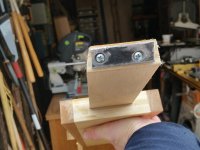
I'm glad the domino is so forgiving, as it allowed me to correct a number of miscues, like this plunge from the wrong side of the board:
[attachthumb=3]
There's also a couple of domino fills in the front from where I forgot to adjust the depth setting when mortising one of the drawer fronts, or when I made the notch on the center stiles on the wrong side, and so had to remortise on the opposite side and fill the now exposed ones in the front with dominoes.
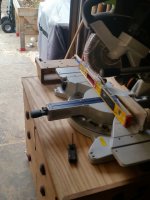
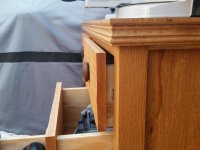
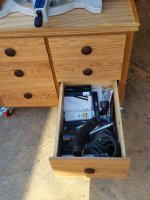
The one thing I'm not happy with are the drawers. I used red as opposed to white oak on the drawer fronts, mainly because I had some extra lying around that I wanted to use up. I also decided to try out the rustic, undulating head on the HL850, and I thought that the contouring would help ameliorate any potential clash between the white oak frame and the red oak drawers. But the contouring was greatly reduced after I sanded it, and the overlay of the drawers makes it look more institutional than I would like. I tried to jazz it up a bit with some walnut drawer pulls I turned on the lathe. But I still have some work to do in exploiting the full potential of the HL850. Used 22" ball bearing slides:
[attachthumb=4]
[attachthumb=5]
[attachthumb=8]
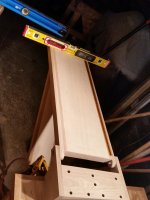
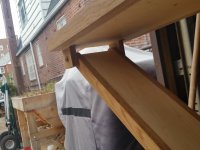
Final detail was to hide the edge of the plywood panel I laid on top, so I routed a profile into strips of the white oak stock I had leftover and attached them to the sides:
[attachthumb=6]
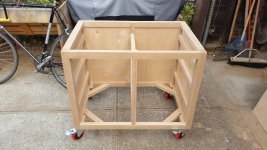
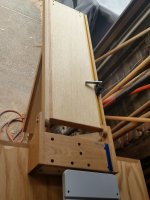
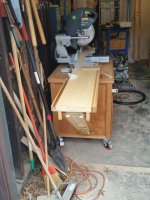
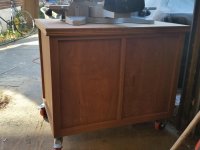
I finished it with Osmo Polyx oil. It's fully mobile with the casters, which I need since I do a lot of my cutting out in the driveway, and when I'm done I can slide the unit back into place:
[attachthumb=7]
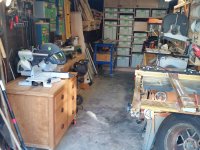
The only thing left to do is to make a left wing extension so I can do repeated/stopped cuts on longer and wider boards. The UG extension wing works fine for material under 6", but does not provide optimal support for wider boards, especially those at the upper limit of the Kapex cutting capacity. I got the Fastcap extension bracket, and so will manufacture something using this at some point soon.
[attachthumb=1]
[attachthumb=9]
Having never made a carcasse and drawer structure before, I thought it would be a good chance to practice some techniques and also get the opportunity to work with thicker wood. I decided to just do the carcasse and not add the foldable wings that are found in the original plans -- I want to be able to do up to repeat cuts on 8 foot boards if necessary, which I couldn't see how to do, even if I designed some intricate, folding extension, so I've opted to add on a detachable extension wing in the future.
So I got two 8/4 boards of white oak and ripped all the carcasse members from them -- I initially started with the panther blade on my TS75, but found I got a better cut just using a fresh 30T Forrest blade on the table saw.
The panels are just 5mm underlay fitted into dadoes routed into the frames. I used a combination of 10mm and 8mm dominoes to join everything together:
[attachthumb=2]
I'm glad the domino is so forgiving, as it allowed me to correct a number of miscues, like this plunge from the wrong side of the board:
[attachthumb=3]
There's also a couple of domino fills in the front from where I forgot to adjust the depth setting when mortising one of the drawer fronts, or when I made the notch on the center stiles on the wrong side, and so had to remortise on the opposite side and fill the now exposed ones in the front with dominoes.
The one thing I'm not happy with are the drawers. I used red as opposed to white oak on the drawer fronts, mainly because I had some extra lying around that I wanted to use up. I also decided to try out the rustic, undulating head on the HL850, and I thought that the contouring would help ameliorate any potential clash between the white oak frame and the red oak drawers. But the contouring was greatly reduced after I sanded it, and the overlay of the drawers makes it look more institutional than I would like. I tried to jazz it up a bit with some walnut drawer pulls I turned on the lathe. But I still have some work to do in exploiting the full potential of the HL850. Used 22" ball bearing slides:
[attachthumb=4]
[attachthumb=5]
[attachthumb=8]
Final detail was to hide the edge of the plywood panel I laid on top, so I routed a profile into strips of the white oak stock I had leftover and attached them to the sides:
[attachthumb=6]
I finished it with Osmo Polyx oil. It's fully mobile with the casters, which I need since I do a lot of my cutting out in the driveway, and when I'm done I can slide the unit back into place:
[attachthumb=7]
The only thing left to do is to make a left wing extension so I can do repeated/stopped cuts on longer and wider boards. The UG extension wing works fine for material under 6", but does not provide optimal support for wider boards, especially those at the upper limit of the Kapex cutting capacity. I got the Fastcap extension bracket, and so will manufacture something using this at some point soon.
Attachments
-
 20151116_101250.jpg2.9 MB · Views: 883
 -
 20151116_101423.jpg748.6 KB · Views: 470
 -
 20151116_101653.jpg2.5 MB · Views: 386
 -
 20151116_101614.jpg3.3 MB · Views: 515
 -
 20151116_101447.jpg774.9 KB · Views: 412
 -
 20151116_101413.jpg2.9 MB · Views: 463
 -
 20151116_101339.jpg1.8 MB · Views: 463
 -
 20151026_182531.jpg2 MB · Views: 388
 -
 20151026_201435.jpg1.8 MB · Views: 496