Laminating/Gluing Two Woods Together on Tabletop?

onocoffee

Member
Joined
Sep 23, 2024
Messages
308
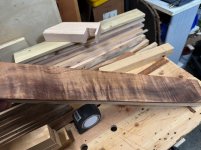
I've been thinking about putting together an 18" (or so) round side table made mostly of hard maple. What I would like to do is inlay/laminate a strip of Hawaiian koa in the center. The top will need to be assembled from 6" 3/4 hard maple boards.

However, the strip of koa that I have is currently 10mm thick and needs to be planed just a little. I'm guessing it will be 8mm when ready. I've been thinking that I will take a matching width board of hard maple, glue the two boards together and then cut them to be the same width and then plane down to a thickness that matches the rest of the top and glue it all together.

Yesterday, this video came across my feed and he's talking about using Gorilla glue for reasons and that laminating only one side of a board can give you problems.

I don't know how much I can rely upon his word, so I'm asking you. What kind of issues can laminating these two boards together pose over the long term? Should I be using a different glue than Titebond II? And are there any other considerations I should be considering?

Thanks!

This is the video:
 
I know for a fact that various species of wood expand/contract at different rates as the humidity changes. 

I understand that if you select species that have very similar expansion/shrinkage rates, then gluing them together will not be a problem.

Similarly, if you apply a finish on one side of a board, you are advised to coat the other side so that the board does not warp.

I usually hear the expansion/shrinkage as being “seasonal expansion/shrinkage” because in the winters the humidity tends to less than in summers.

Additionally, wood expands at different rates depending upon the direction of the grain. 

There are lots written on the subject.  Here is one article: https://www.popularwoodworking.com/wp-content/uploads/2010/10/WoodMovement.pdf

And here is the search I used to find it:
https://www.google.com/search?q=expansion+rates+for+species+of+wood&client=firefox-b-1-m&sca_esv=248c1a1232d6ce85&sxsrf=AHTn8zozz69KkeH7OHP6XCPXpwfR9L7joA%3A1741532705220&ei=Ia7NZ6WYDaeoptQP1rCTkAo&ved=0ahUKEwjlrInyov2LAxUnlIkEHVbYBKIQ4dUDCBA&uact=5&oq=expansion+rates+for+species+of+wood&gs_lp=Egxnd3Mtd2l6LXNlcnAiI2V4cGFuc2lvbiByYXRlcyBmb3Igc3BlY2llcyBvZiB3b29kMgUQIRigATIFECEYoAEyBRAhGKABMgUQIRigATIFECEYoAFI0IIBUPsLWKp-cAN4AJABAZgBiQGgAf4cqgEFMzIuMTC4AQPIAQD4AQGYAimgAqAfqAIKwgIKECMYgAQYJxiKBcICCBAAGIAEGLEDwgIFEAAYgATCAg8QIxiABBgnGIoFGEYY-QHCAggQLhiABBixA8ICBBAAGAPCAg4QLhiABBixAxiDARiKBcICCxAuGIAEGLEDGIMBwgINEC4YgAQYQxjUAhiKBcICChAAGIAEGEMYigXCAg4QLhiABBixAxjRAxjHAcICCxAAGIAEGLEDGIMBwgIHECMYJxjqAsICBBAjGCfCAgsQABiABBiRAhiKBcICDhAuGIAEGJECGNQCGIoFwgIREC4YgAQYsQMY0QMYgwEYxwHCAhAQABiABBiRAhiKBRhGGPkBwgINEAAYgAQYsQMYgwEYCsICChAAGIAEGLEDGArCAhMQABiABBiRAhixAxiKBRhGGPkBwgIOEAAYgAQYkQIYsQMYigXCAggQABgWGAoYHsICBhAAGBYYHsICCxAAGIAEGIYDGIoFwgIFECEYqwLCAggQABiABBiiBMICCBAAGKIEGIkFwgIFECEYnwWYAxzxBSrxOJgN_2n0iAYBkgcFMjMuMTigB_S_Aw&sclient=gws-wiz-serp
 
Thanks Packard for the links.

According to my search based on the Woodworking Magazine link, Hawaiian Koa has a dimensional change coefficient of 0.00338 while Hard Maple has a coefficient of 0.00165 (radial) and 0.00353 (tangential).

Interesting stuff but the article expects you/me to have reference figures of the highest moisture content (MC) from the hot and wet season and the driest from the winter season. I have none of that.

But if I use the article's change of 3 percentage points (presuming 12MC to 9MC) to create the equations (with the board width of 3 inches:

Hawaiian Koa: 3 x 3 x .00338 = 0.03042 = 0.7727 mm
Hard Maple: 3 x 3 x .00353 = 0.03177 = .80696 mm

Not to get bogged down in minutiae but this is a difference of .03426mm in dimensional shift between the two woods. I'm thinking that this is nothing to be overtly concerned about - correct?

This laminated board will be sandwiched in-between other planks of hard maple to complete the tabletop. I'm presuming based on these numbers that it won't be too much of a problem.

Any thoughts on the type of glue and if I need to use something other than Titebond 2?

 
Adhering material to one side can be an issue because it introduces a fair amount of moisture to one face of the board. This can lead to some issues as it dries and it _can_ introduce stress in the form of cupping or even some bowing. 

If you're just laminating boards together anyways, you can always rejoint/plane after everything dries to ensure it is square.  Sometimes things flatten out as the material dries.

This is less of a problem with thicker material, although it does occur sometimes.

You could consider gluing up your top and then routing out a recess for your inlay afterwards. If you route the groove first, you can mill your Koa slightly overwide and then plane it to fit. You could consider re-sawing the Koa into a thinner piece, which may open up some more option (and let you use the Koa for more projects). This assumes you have a bandsaw.

 
[member=59039]mrFinpgh[/member] My current thought was to cut a piece of the hard maple just slightly larger than the koa, laminate the two together and then plane and dimension after drying. Then, assemble the top.

Does assembling the top and then routing out the area to inlay the koa offer an advantage?
 
How wide is the strip of Koa?
Regarding the video you linked. I've veneered one side of plywood many times using titebond (let it dry, then iron on) with no adverse affects even years later. Warping due to veneering issue, while real, is grossly exaggerated.
 
Svar said:
How wide is the strip of Koa?
Regarding the video you linked. I've veneered one side of plywood many times using titebond (let it dry, then iron on) with no adverse affects even years later. Warping due to veneering issue, while real, is grossly exaggerated.

[member=15585]Svar[/member] - the koa strip is 75mm wide, 540mm long (the grain runs with the length) and 10mm thick. One face of the koa has been surfaced and the other side needs to be planed. I expect it will end up around 8mm thick after surfacing. And then laminate the koa to hard maple which will then be surfaced to a total of 18mm in thickness. Other hard maple boards will be joined on the two flanking sides of the laminate at 18mm thickness. At least that is what I have in mind.

When you say that you glue with titebond, let it dry and then iron on, I'm not sure I follow. Do you coat both pieces with titebond and allow the glue to dry without putting them together? Then put them together and heat with an iron?

Thanks!
 
I make “iron-on” veneers by brushing Titebond onto the veneer and allowing it to dry.

I always use it immediately after it felt dry—I don’t know if it works the same if you allow it to fully cure. 

Titebond can add significant amounts of moisture to a joint.  It will cause a glued dowel to swell enough that the dry fit came together easily and the glued joint required some heavy persuading with a mallet or lots of clamps.

I thought most of the moisture escaped through the thin veneer (and I still think so) but with thicker materials it will soak into the wood. 
 
Packard - if Titebond adds a significant amount of moisture, would it then be better to go with something like the Gorilla glue?
 
The short answer:  I’m not sure.

The longer one below, but I would wait for some other members to reply.

Also, if the piece of wood you are laminating is too thick, the heat from an iron might not penetrate enough to work as a iron-on piece.  Test first.

I’ve used Gorilla glue in the past.  It seems to expand during the cure process and some of the glue escaped the joint.  Cleaning it up, left a glue line.

Also note, it has been written that Gorilla glue works best if you dampen the surfaces prior to glue up.  So, if you follow those directions, there will be water regardless of the type of glue you use.

In any case, I am comfortable using Titebond III (waterproof and mostly for the longer open time).

How big is the piece you are planning on laminating?  If it is small and in the center of the table, it might not be an issue at all.

I use hide glue for installing cane woven sheets.  Mainly because the glue is reversible in case I have to replace the cane.  I don’t believe that there is any water in the hide glue.  Again, I’m not sure.  Hot water will remove the hide glue so, reversible.

Hide glue has a limited shelf life, so don’t buy large bottles of the stuff unless you are doing a lot of cane door/drawer panels. 
 
onocoffee said:
When you say that you glue with titebond, let it dry and then iron on, I'm not sure I follow. Do you coat both pieces with titebond and allow the glue to dry without putting them together? Then put them together and heat with an iron?
Thanks!
Yes. Keep in mind it only works for thin veneer, because it has to be heated through.
 
Given the gazillions of cutting boards made and used every day, subject to extreme moisture changes, I, too, can't imagine this being a problem.

And the issue being discussed in the video is quite clearly centered on veneering an engineered substrate, and he makes "an exception" for veneering on top of solid wood, which is really just laminating and laminations properly done hold up for generations.
 
Regardless of any other factors, the size of the inlay matters most, as long as it is not going across the grain. At a width of 75mm (3") it won't matter much at all. Though I do agree that inlaying the strip into an already glued top would be best. The thinner the piece, the less it can react. The moisture is somewhat of an issue too. It can swell the inlay enough to make it difficult/impossible to insert. Waterless glues actually lubricate the pieces, making a polyurethane or even hide glue ideal.

Balancing the bottom is unnecessary here. That's more for veneering, where the whole face is covered. That can turn a large sheet into a Pringle.
 
Well, I've started. Cut down a piece of hard maple to nearly the same dimension as the koa. I thought the koa was S2S but it really wasn't. Ran it through the jointer then planer and ended up with it being 7mm in thickness. Some TitebondII and a bunch of clamps for a couple of hours and now to let it cure overnight.

Next step will be to square up the piece on the jointer, plane it down to match the thickness of the rest of the top, plunge in some Dominos, and start making a table. Thanks for the tips and thoughts.

View attachment 1View attachment 2View attachment 3
 

Attachments

  • Screenshot 2025-03-16 at 21.33.41.jpg
    Screenshot 2025-03-16 at 21.33.41.jpg
    242.3 KB · Views: 24
  • Screenshot 2025-03-16 at 21.33.50.jpg
    Screenshot 2025-03-16 at 21.33.50.jpg
    544.1 KB · Views: 30
  • Screenshot 2025-03-16 at 21.33.55.jpg
    Screenshot 2025-03-16 at 21.33.55.jpg
    264.6 KB · Views: 28
Just a tip:

When you do the final sanding prior to applying the finish, do so with an oversized flat block.

The reason being that the two different species of wood may sand down at different rates and you could end up with a high spot.  The flat block will mitigate that possibility. 

If you are finishing directly after running it through the planer, this will not be an issue.
 
Back
Top