GoingMyWay
Member
- Joined
- Oct 11, 2017
- Messages
- 3,782
I'm in the process of making a "Last Man Standing" peg game. The most basic version is made with just a triangular piece of pine with holes drilled in it to accept golf tees. My grandparents had a slightly "fancier" version that I believe we got from a Cracker Barrel. It used cut nails and it had a little plastic cup drilled into the board to store the nails so they wouldn't be lost when not in use. I wanted to make something like this, but I thought it might be a little hard to find a small lidded cup to store the nails. Then I stumbled on plans from Woodworker's Journal that had a hidden compartment in the bottom to store the nails.
I thought that was a pretty slick design so I decided to make it for my friend who is getting married at the end of the month. This is good because I have definitive deadline, otherwise projects seems to just drag on and on. The little bit of bad news is there isn't much time to get it finished.
I will warn everyone that there have been a lot of "firsts" with this project.
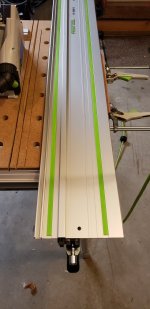
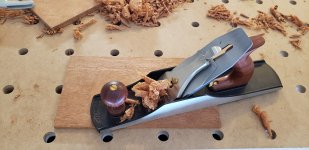
The project requires 7/8" and 1/4" stock. I have no jointer, thickness planer, tablesaw, bandsaw, or drill press. Once again I've decided to make the project extra hard on myself by not having the typical tools one would use to create such a project. I picked up a piece of Honduran Mahogany from Woodcraft.
[attachimg=1]
It's just about 7/8" thick and about 6" wide, which are perfect for my application. This is really my first time ever working with hardwood, with the exception off the end grain cutting boards that I've made but I don't really count that since to me it seems to be a separate category of woodworking unto itself.
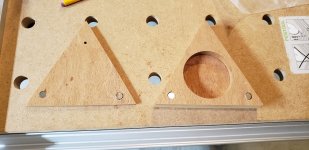
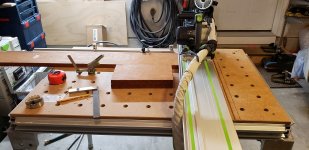
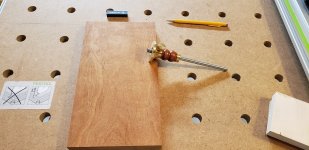
The storage hole in the bottom needs to be 2 3/4" in diameter. The plans said you could either use a forstner bit or a router. I was kinda left scratching my head trying to figure out how I could cut such a small circle with just a router so I picked up a cheapish 2 3/4" forstner bit from Amazon. My initial plan was to use my UJK Drill Guide to drill a perfectly plumb hole to the exact depth of 1/2". Unfortunately, the shank of the forstner bit is 1/2" and the chuck on the UJK Drill Guide is only 3/8" so that wasn't going to work. Instead, I used a square and my Makita cordless drill to carefully drill a plumb hole in a scrap piece of 3/4" baltic birch. It turned out pretty good. Now I could use this as a template along with a 5/8" top bearing Flush Trim router bit that I have. This was the first real use of my OF1400 router. Once I zero'd the router on top of the template I got a little confused about how I adjust the depth stop for 1/2". Luckily I found an excellent YouTube video where Greg Paolini showed how correctly zero and set the depth of cut. It sounded like my initial mistake to just move the depth setting instead of the whole plunger up was pretty common. I also must say how impressed I was with the dust extraction! I could see all of the dust being sucked up as I was routing my hole.
[attachimg=2]
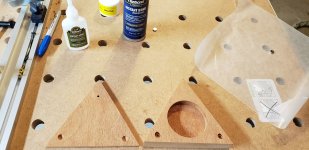
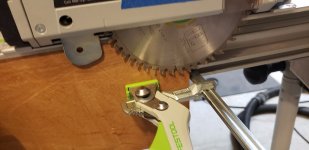
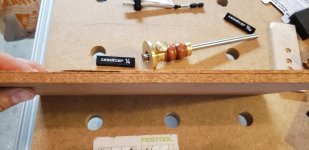
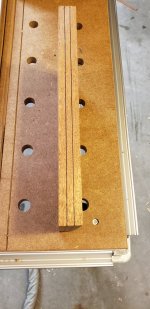
I used the UJK Drill Guide to drill the 3/8" holes 5/32" deep that will be used to hold the rare earth magnets. I ran into a slight problem using a brad point drill bit because in a test piece the point of the drill bit ended up drilling all the way through in order to get the overall hole deep enough to have the magnet below the surface. I ended up finding a really good deal on a 14 piece set of DeWalt split point bits for only $9.97. Just the 3/8" split point bit alone was like $5.
[attachimg=3]
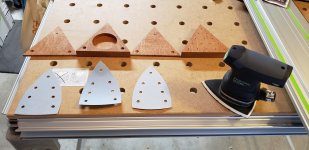
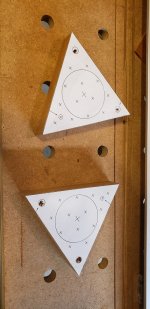
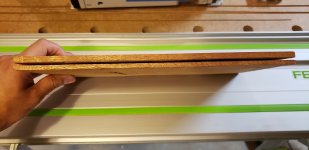
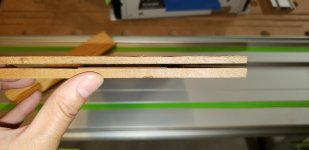
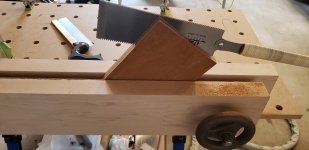
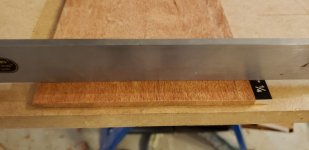
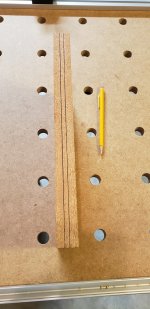
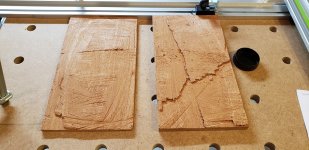
I wasn't able to find any pre-milled 1/4" thick stock that was wide enough at Woodcraft. I picked up a Lynx Rip Handsaw that I figured I'd use to resaw the 7/8" stock into 5/8" thick and I could get to the final 1/4" thickness using a hand plane. Sounded good on paper anyway. I used my marking gauge to mark out the 5/8" thickness and went to work starting to saw all the way around the board. My first problem is that I'm stupid - I was thinking 5/8" is 1/8" more than 1/4", but that would be 3/8"!. I am such an idiot!! And as usual, I'd like to blame the saw for the problem, but it's really a problem with me - or more specifically my technique or lack thereof. As you can see this made a big mess.
[attachimg=4]
[attachimg=5]
[attachimg=6]
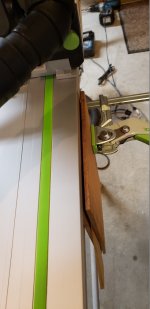
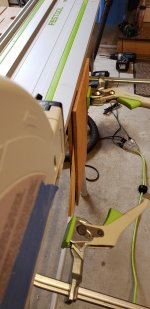
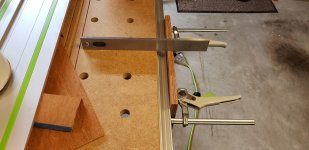
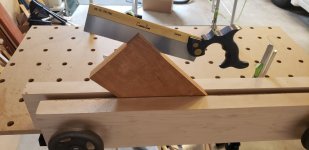
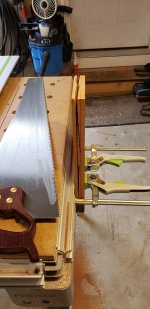
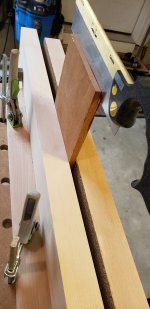
It didn't help that I don't have a heavy traditional bench. Trying to saw on the side of the super wobbly MFT/3 definitely didn't help things. I think most of my sawing energy was going into shaking that table rather than cutting the wood. I switched to using my Moxon vice sitting perpendicularly on my Kreg Mobile Project Center, which is much more stable.
[attachimg=7]
I tried starting the cutting on the remaining piece using my dovetail rip backsaw.
[attachimg=8]
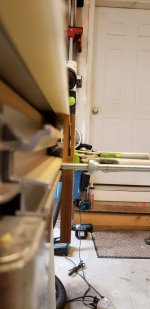
This did a much better job of cutting a straight line, but I still had some problems getting all the cuts to line up exactly. I cut another piece of wood and this time marked out the correct thickness of 3/8" and I also repositioned the Moxon vise so it was hanging over the edge so I could get my board down a little lower to help reduce the amount of chatter. I still struggled a little to get the Japanese pull saw to track straight, but it was better than before.
[attachimg=9]
[attachimg=10]
[attachimg=11]
[attachimg=12]
[attachimg=13]
[attachimg=14]
This was also my first chance to use my Veritas Scrub Plane with the PM-V11 blade.
[attachimg=15]
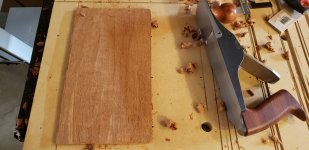
I reset my marking gauge to 1/4" so I knew exactly how much material I needed to remove to get the final thickness. The Scrub Plane made quick work of hogging out the majority of the excess material. I used my Woodriver 5 1/2 to smooth out the rest. Miraculously I was able to get an even board that was 1/4" thick!
[attachimg=16]
[attachimg=17]
[attachimg=18]
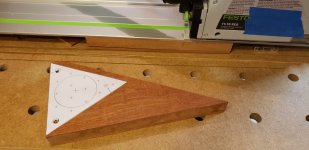
The instructions said to double stick tape the 2 pieces of wood together and cut them out on the bandsaw. The TS55 did a beautiful job cutting the pieces.
[attachimg=19]
[attachimg=20]
I thought that was a pretty slick design so I decided to make it for my friend who is getting married at the end of the month. This is good because I have definitive deadline, otherwise projects seems to just drag on and on. The little bit of bad news is there isn't much time to get it finished.
I will warn everyone that there have been a lot of "firsts" with this project.
The project requires 7/8" and 1/4" stock. I have no jointer, thickness planer, tablesaw, bandsaw, or drill press. Once again I've decided to make the project extra hard on myself by not having the typical tools one would use to create such a project. I picked up a piece of Honduran Mahogany from Woodcraft.
[attachimg=1]
It's just about 7/8" thick and about 6" wide, which are perfect for my application. This is really my first time ever working with hardwood, with the exception off the end grain cutting boards that I've made but I don't really count that since to me it seems to be a separate category of woodworking unto itself.
The storage hole in the bottom needs to be 2 3/4" in diameter. The plans said you could either use a forstner bit or a router. I was kinda left scratching my head trying to figure out how I could cut such a small circle with just a router so I picked up a cheapish 2 3/4" forstner bit from Amazon. My initial plan was to use my UJK Drill Guide to drill a perfectly plumb hole to the exact depth of 1/2". Unfortunately, the shank of the forstner bit is 1/2" and the chuck on the UJK Drill Guide is only 3/8" so that wasn't going to work. Instead, I used a square and my Makita cordless drill to carefully drill a plumb hole in a scrap piece of 3/4" baltic birch. It turned out pretty good. Now I could use this as a template along with a 5/8" top bearing Flush Trim router bit that I have. This was the first real use of my OF1400 router. Once I zero'd the router on top of the template I got a little confused about how I adjust the depth stop for 1/2". Luckily I found an excellent YouTube video where Greg Paolini showed how correctly zero and set the depth of cut. It sounded like my initial mistake to just move the depth setting instead of the whole plunger up was pretty common. I also must say how impressed I was with the dust extraction! I could see all of the dust being sucked up as I was routing my hole.
[attachimg=2]
I used the UJK Drill Guide to drill the 3/8" holes 5/32" deep that will be used to hold the rare earth magnets. I ran into a slight problem using a brad point drill bit because in a test piece the point of the drill bit ended up drilling all the way through in order to get the overall hole deep enough to have the magnet below the surface. I ended up finding a really good deal on a 14 piece set of DeWalt split point bits for only $9.97. Just the 3/8" split point bit alone was like $5.
[attachimg=3]
I wasn't able to find any pre-milled 1/4" thick stock that was wide enough at Woodcraft. I picked up a Lynx Rip Handsaw that I figured I'd use to resaw the 7/8" stock into 5/8" thick and I could get to the final 1/4" thickness using a hand plane. Sounded good on paper anyway. I used my marking gauge to mark out the 5/8" thickness and went to work starting to saw all the way around the board. My first problem is that I'm stupid - I was thinking 5/8" is 1/8" more than 1/4", but that would be 3/8"!. I am such an idiot!! And as usual, I'd like to blame the saw for the problem, but it's really a problem with me - or more specifically my technique or lack thereof. As you can see this made a big mess.
[attachimg=4]
[attachimg=5]
[attachimg=6]
It didn't help that I don't have a heavy traditional bench. Trying to saw on the side of the super wobbly MFT/3 definitely didn't help things. I think most of my sawing energy was going into shaking that table rather than cutting the wood. I switched to using my Moxon vice sitting perpendicularly on my Kreg Mobile Project Center, which is much more stable.
[attachimg=7]
I tried starting the cutting on the remaining piece using my dovetail rip backsaw.
[attachimg=8]
This did a much better job of cutting a straight line, but I still had some problems getting all the cuts to line up exactly. I cut another piece of wood and this time marked out the correct thickness of 3/8" and I also repositioned the Moxon vise so it was hanging over the edge so I could get my board down a little lower to help reduce the amount of chatter. I still struggled a little to get the Japanese pull saw to track straight, but it was better than before.
[attachimg=9]
[attachimg=10]
[attachimg=11]
[attachimg=12]
[attachimg=13]
[attachimg=14]
This was also my first chance to use my Veritas Scrub Plane with the PM-V11 blade.
[attachimg=15]
I reset my marking gauge to 1/4" so I knew exactly how much material I needed to remove to get the final thickness. The Scrub Plane made quick work of hogging out the majority of the excess material. I used my Woodriver 5 1/2 to smooth out the rest. Miraculously I was able to get an even board that was 1/4" thick!
[attachimg=16]
[attachimg=17]
[attachimg=18]
The instructions said to double stick tape the 2 pieces of wood together and cut them out on the bandsaw. The TS55 did a beautiful job cutting the pieces.
[attachimg=19]
[attachimg=20]
Attachments
-
 20190707_142632.jpg215.3 KB · Views: 1,057
 -
 20190713_161522.jpg140.9 KB · Views: 967
 -
 20190713_162439.jpg190.2 KB · Views: 942
 -
 scrub_plane.jpg194 KB · Views: 985
 -
 20190713_162831.jpg154.2 KB · Views: 935
 -
 20190713_171348.jpg215.6 KB · Views: 958
 -
 20190714_115846.jpg121.7 KB · Views: 919
 -
 20190714_121222.jpg169.8 KB · Views: 992
 -
 20190714_121404.jpg180.9 KB · Views: 923
 -
 20190713_160758.jpg130.5 KB · Views: 978
 -
 20190713_153827.jpg216.8 KB · Views: 953
 -
 20190713_153249.jpg241.2 KB · Views: 974
 -
 20190707_145218.jpg202.1 KB · Views: 1,021
 -
 20190707_154715.jpg209 KB · Views: 1,122
 -
 20190707_200317.jpg220.9 KB · Views: 973
 -
 20190707_204129.jpg211.8 KB · Views: 1,022
 -
 20190707_204156.jpg267.3 KB · Views: 1,048
 -
 20190709_154805.jpg171.5 KB · Views: 959
 -
 20190709_152032.jpg172.5 KB · Views: 956
 -
 20190709_154805.jpg171.5 KB · Views: 941