Last Man Standing Peg Game

GoingMyWay

Member
Joined
Oct 11, 2017
Messages
3,782
I'm in the process of making a "Last Man Standing" peg game.  The most basic version is made with just a triangular piece of pine with holes drilled in it to accept golf tees.  My grandparents had a slightly "fancier" version that I believe we got from a Cracker Barrel.  It used cut nails and it had a little plastic cup drilled into the board to store the nails so they wouldn't be lost when not in use.  I wanted to make something like this, but I thought it might be a little hard to find a small lidded cup to store the nails.  Then I stumbled on plans from Woodworker's Journal that had a hidden compartment in the bottom to store the nails.

I thought that was a pretty slick design so I decided to make it for my friend who is getting married at the end of the month.  This is good because I have definitive deadline, otherwise projects seems to just drag on and on.  The little bit of bad news is there isn't much time to get it finished.

I will warn everyone that there have been a lot of "firsts" with this project.

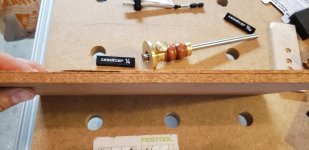
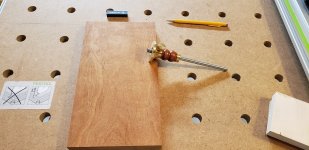
The project requires 7/8" and 1/4" stock.  I have no jointer, thickness planer, tablesaw, bandsaw, or drill press.  Once again I've decided to make the project extra hard on myself by not having the typical tools one would use to create such a project.  I picked up a piece of Honduran Mahogany from Woodcraft.

[attachimg=1]

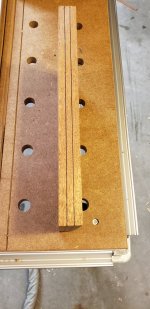
It's just about 7/8" thick and about 6" wide, which are perfect for my application.  This is really my first time ever working with hardwood, with the exception off the end grain cutting boards that I've made but I don't really count that since to me it seems to be a separate category of woodworking unto itself.

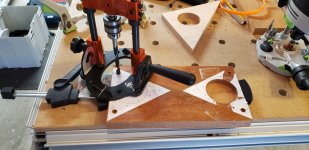
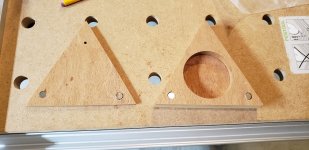
The storage hole in the bottom needs to be 2 3/4" in diameter.  The plans said you could either use a forstner bit or a router.  I was kinda left scratching my head trying to figure out how I could cut such a small circle with just a router so I picked up a cheapish 2 3/4" forstner bit from Amazon.  My initial plan was to use my UJK Drill Guide to drill a perfectly plumb hole to the exact depth of 1/2".  Unfortunately, the shank of the forstner bit is 1/2" and the chuck on the UJK Drill Guide is only 3/8" so that wasn't going to work. Instead, I used a square and my Makita cordless drill to carefully drill a plumb hole in a scrap piece of 3/4" baltic birch.  It turned out pretty good.  Now I could use this as a template along with a 5/8" top bearing Flush Trim router bit that I have.  This was the first real use of my OF1400 router.  Once I zero'd the router on top of the template I got a little confused about how I adjust the depth stop for 1/2".  Luckily I found an excellent YouTube video where Greg Paolini showed how correctly zero and set the depth of cut.  It sounded like my initial mistake to just move the depth setting instead of the whole plunger up was pretty common.  I also must say how impressed I was with the dust extraction!  I could see all of the dust being sucked up as I was routing my hole.

[attachimg=2]

I used the UJK Drill Guide to drill the 3/8" holes 5/32" deep that will be used to hold the rare earth magnets.  I ran into a slight problem using a brad point drill bit because in a test piece the point of the drill bit ended up drilling all the way through in order to get the overall hole deep enough to have the magnet below the surface.  I ended up finding a really good deal on a 14 piece set of DeWalt split point bits for only $9.97.  Just the 3/8" split point bit alone was like $5.

[attachimg=3]

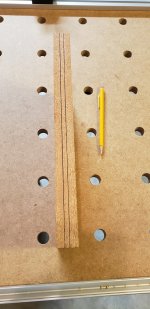
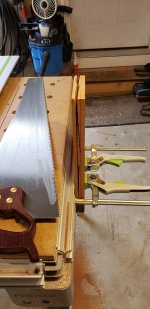
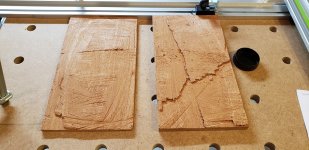
I wasn't able to find any pre-milled 1/4" thick stock that was wide enough at Woodcraft.  I picked up a Lynx Rip Handsaw that I figured I'd use to resaw the 7/8" stock into 5/8" thick and I could get to the final 1/4" thickness using a hand plane.  Sounded good on paper anyway.  I used my marking gauge to mark out the 5/8" thickness and went to work starting to saw all the way around the board.  My first problem is that I'm stupid - I was thinking 5/8" is 1/8" more than 1/4", but that would be 3/8"!.  I am such an idiot!!  And as usual, I'd like to blame the saw for the problem, but it's really a problem with me - or more specifically my technique or lack thereof.  As you can see this made a big mess.

[attachimg=4]

[attachimg=5]

[attachimg=6]

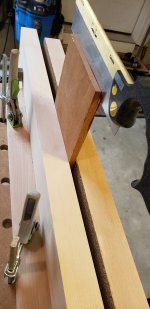
It didn't help that I don't have a heavy traditional bench.  Trying to saw on the side of the super wobbly MFT/3 definitely didn't help things.  I think most of my sawing energy was going into shaking that table rather than cutting the wood.  I switched to using my Moxon vice sitting perpendicularly on my Kreg Mobile Project Center, which is much more stable.

[attachimg=7]

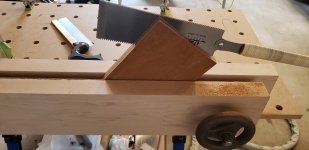
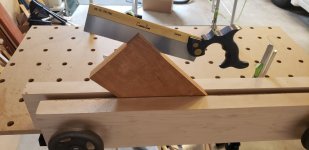
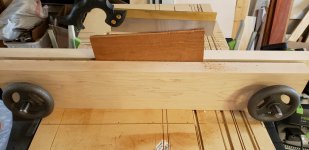
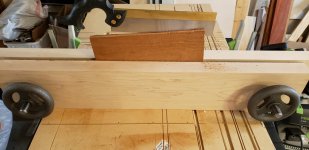
I tried starting the cutting on the remaining piece using my dovetail rip backsaw. 

[attachimg=8]

This did a much better job of cutting a straight line, but I still had some problems getting all the cuts to line up exactly.  I cut another piece of wood and this time marked out the correct thickness of 3/8" and I also repositioned the Moxon vise so it was hanging over the edge so I could get my board down a little lower to help reduce the amount of chatter.  I still struggled a little to get the Japanese pull saw to track straight, but it was better than before.

[attachimg=9]

[attachimg=10]

[attachimg=11]

[attachimg=12]

[attachimg=13]

[attachimg=14]

This was also my first chance to use my Veritas Scrub Plane with the PM-V11 blade. 

[attachimg=15]

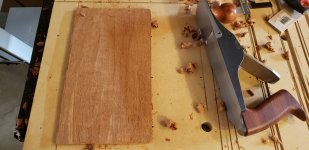
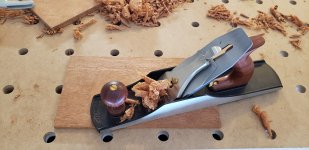
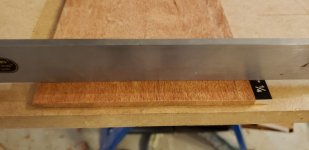
I reset my marking gauge to 1/4" so I knew exactly how much material I needed to remove to get the final thickness.  The Scrub Plane made quick work of hogging out the majority of the excess material.  I used my Woodriver 5 1/2 to smooth out the rest.  Miraculously I was able to get an even board that was 1/4" thick!

[attachimg=16]

[attachimg=17]

[attachimg=18]

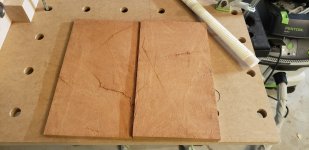
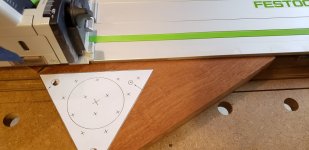
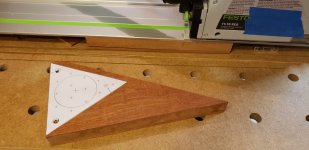
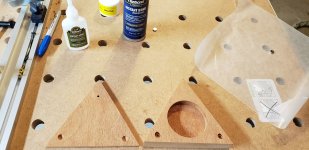
The instructions said to double stick tape the 2 pieces of wood together and cut them out on the bandsaw.  The TS55 did a beautiful job cutting the pieces.

[attachimg=19]

[attachimg=20]


Attachments

  • 20190707_142632.jpg
    20190707_142632.jpg
    215.3 KB · Views: 1,057
  • 20190713_161522.jpg
    20190713_161522.jpg
    140.9 KB · Views: 967
  • 20190713_162439.jpg
    20190713_162439.jpg
    190.2 KB · Views: 942
  • scrub_plane.jpg
    scrub_plane.jpg
    194 KB · Views: 985
  • 20190713_162831.jpg
    20190713_162831.jpg
    154.2 KB · Views: 935
  • 20190713_171348.jpg
    20190713_171348.jpg
    215.6 KB · Views: 958
  • 20190714_115846.jpg
    20190714_115846.jpg
    121.7 KB · Views: 919
  • 20190714_121222.jpg
    20190714_121222.jpg
    169.8 KB · Views: 992
  • 20190714_121404.jpg
    20190714_121404.jpg
    180.9 KB · Views: 923
  • 20190713_160758.jpg
    20190713_160758.jpg
    130.5 KB · Views: 978
  • 20190713_153827.jpg
    20190713_153827.jpg
    216.8 KB · Views: 953
  • 20190713_153249.jpg
    20190713_153249.jpg
    241.2 KB · Views: 974
  • 20190707_145218.jpg
    20190707_145218.jpg
    202.1 KB · Views: 1,021
  • 20190707_154715.jpg
    20190707_154715.jpg
    209 KB · Views: 1,122
  • 20190707_200317.jpg
    20190707_200317.jpg
    220.9 KB · Views: 973
  • 20190707_204129.jpg
    20190707_204129.jpg
    211.8 KB · Views: 1,022
  • 20190707_204156.jpg
    20190707_204156.jpg
    267.3 KB · Views: 1,048
  • 20190709_154805.jpg
    20190709_154805.jpg
    171.5 KB · Views: 959
  • 20190709_152032.jpg
    20190709_152032.jpg
    172.5 KB · Views: 956
  • 20190709_154805.jpg
    20190709_154805.jpg
    171.5 KB · Views: 941
[attachimg=1]

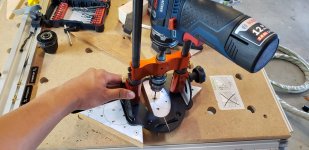
I used the UJK Drill Guide to drill the 7/64" holes 1/4" deep into the top of the game board.

[attachimg=2]

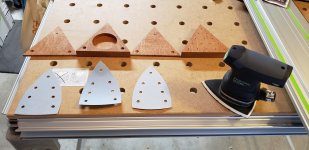
Used my DTS400 to sand everything using 120, 150, 180.  I just read the instructions for the finish and it said to only sand to 150 grit with an oil based finish.  DOH!  I guess I'll have to resand with 150 grit then.

[attachimg=3]

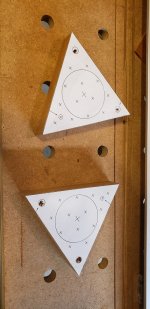
Even though I was careful and even marked the opposing ends, I somehow still mixed up the polarity of one of the magnets.  This was one of my biggest fears!  I was going to use some acetone to unglue the offending magnet, but my wife gave away our bottle to her mom.  I do have denatured alcohol, which sounds like it should also breakdown CA glue.

[attachimg=4]

[attachimg=5]

I think I should be ready for finishing once I get that one errant magnet reversed and then resand everything with only 150 grit.
 

Attachments

  • 20190714_214342.jpg
    20190714_214342.jpg
    230.9 KB · Views: 935
  • 20190714_214039.jpg
    20190714_214039.jpg
    225.9 KB · Views: 1,014
  • 20190714_182003.jpg
    20190714_182003.jpg
    208.9 KB · Views: 931
  • 20190714_161529.jpg
    20190714_161529.jpg
    211.5 KB · Views: 925
  • 20190714_121902.jpg
    20190714_121902.jpg
    223.6 KB · Views: 913
Sometimes you just have to figure out a way to do it.

I have resawn boards with the track saw. Attach board to the side of workbench with clamps or screws at the ends.  Position it so that the edge of the board is even with the bench surface. Place the track so that the saw will cut into the edge of the board. Cut to full depth avoiding the screwed or clamped ends. You can flip the board to get twice the cutting depth of the saw. It might need to be done in several passes of increasing depth depending on the wood. Cut the ends off. Wahlah two boards. Run through planer.

Of course a band saw would be easier ..... but if you don't have one.

Seth
 
I didn't think using a track saw to resaw would work, but I hadn't thought about the technique you described.  Though, the setup of getting the edge even with the bench surface while at the same time clamping in a position that won't be in the path of the saw blade seems tedious.
 
GoingMyWay said:
I didn't think using a track saw to resaw would work, but I hadn't thought about the technique you described.  Though, the setup of getting the edge even with the bench surface while at the same time clamping in a position that won't be in the path of the saw blade seems tedious.

If you have a bench that you don't mind driving a screw into the screws are easier. Start the screw. Use your body to hold and one hand to hold the board against the bench. Drive the screw with the other. Once you get one end attached it is easy to make alignment adjustments.  It doesn't matter if the screws or clamps are in the path because you do not cut all the way to / through the end of the board. You leave the ends (so this starts as a rough length cut board) and cut them off later. That allows clamping space and holds the board in one piece until you are all done using the track saw.

It is surprisingly easy to do in actual practice.

Limited to double the depth of the track saw. Plus a little more if you don't mind finishing the center with a hand saw or jig saw. The track saw cut makes a guide for these. Can't do really wide boards though. But 6" - 8" is no problem.

The cut is pretty good and pretty even. Then just go to the planer.

Sorry I can't find any pics from when I did this.

Don't mean to be hijacking your build topic.

Seth
 
I agree with Seth on the technique. Quick and effective.
If you use MFT and TS55 there is no danger of cutting into the clamps. The center of t-sot channel on MFT is about 62 mm below the table top.
 
[member=66216]GoingMyWay[/member]  Resawing by hand is indeed a challenge, but you did an admirable job with the tools you had at hand, especially on the finishing given you don't have a thickness planer.  Seth's advice on utilizing the tracksaw is sound.

One note on resawing for the future -- what can often happen after you resaw a board, even one that is fully dried, is that the thinner boards cup as the newly exposed center adjusts to the ambient humidity.  The solution for this is to clamp the original outer faces of the two boards together along the length of the entire board for a couple of days while they stabilize.  I know for me it sucks having to wait for this process to play out, so I try to do it early on whenever I have a project calling for resawing, that way I'm working on other things and not just waiting for the boards.

I don't have a bandsaw or jointer either, but I do do a fair amount of resawing thanks to a Roubo frame saw, handplanes (including the formidable scrub plane!) and a thickness planer:http://www.badaxetoolworks.com/kpfs.php

The frame saw does require, however, serious workholding capabilities such as a leg vise.  Something to keep in mind if you ever consider upgrading to a more robust bench.  Since you are integrating more handtools into your kit, at some point you might be faced with having to do so.

One other note about the magnets -- CA glue will hold the magnets for a while, but eventually they will pop out with the continuous pull of the magnetic forces.  Don't ask me how I know!  A better choice in these situations is a two part epoxy.   
 
SRSemenza said:
If you have a bench that you don't mind driving a screw into the screws are easier. Start the screw. Use your body to hold and one hand to hold the board against the bench. Drive the screw with the other. Once you get one end attached it is easy to make alignment adjustments.  It doesn't matter if the screws or clamps are in the path because you do not cut all the way to / through the end of the board. You leave the ends (so this starts as a rough length cut board) and cut them off later. That allows clamping space and holds the board in one piece until you are all done using the track saw.

Unfortunately I don't really have a wooden bench where I could screw into.  I'm also have trouble visualizing the exact placement of the screws so they won't be in the path of the saw blade.  Originally I thought you were suggesting making a plunge cut in between the screws on either end since this part would get cut off, but I don't think this is actually the case.  You know, this sounds like a perfect application for the Stanton Bench with the bench skirt!


I wanted to make one right after I saw Dave make his Stanton Bench, but then I kinda lost interest and eventually got an MFT/3.  I'm now recalling that I actually bought the UJK Drill Guide solely to drill the holes to make a Stanton Bench.

SRSemenza said:
It is surprisingly easy to do in actual practice.

Limited to double the depth of the track saw. Plus a little more if you don't mind finishing the center with a hand saw or jig saw. The track saw cut makes a guide for these. Can't do really wide boards though. But 6" - 8" is no problem.

I thought about using a reciprocating saw to finish the center of the cut since  I have some fairly long blades.  I only have short jigsaw blades.  Though I wonder if the reciprocating saw blade might have too much flex in it, even with the initial cut all the way around all but finished.

SRSemenza said:
The cut is pretty good and pretty even. Then just go to the planer.

Sorry I can't find any pics from when I did this.

Don't mean to be hijacking your build topic.

Seth

You're not hijacking it at all!  I appreciate the suggestions and guidance from experienced woodworkers.

Svar said:
I agree with Seth on the technique. Quick and effective.
If you use MFT and TS55 there is no danger of cutting into the clamps. The center of t-sot channel on MFT is about 62 mm below the table top.

That's more or less the only way I could do it now with what I currently have right now.  My initial concern was that was the saw would hit the clamp (I never bothered to measure though), but since it's 62mm vs 55mm there obviously wouldn't be a problem.  My board is about 6 inches wide so I'd think using the TS75 at full depth would be better, but then the clamps would be right in the path of the blade.  Then again, since the cut is going to have to be finished by hand anyway it probably doesn't really make a difference if there is 1/2" or 2" left to cut in the middle.
 
ear3 said:
[member=66216]GoingMyWay[/member]  Resawing by hand is indeed a challenge, but you did an admirable job with the tools you had at hand, especially on the finishing given you don't have a thickness planer.  Seth's advice on utilizing the tracksaw is sound.

Thanks!  It was kind cool to only use hand tools to resaw the board.  I kinda felt like Rob Cosman, Paul Sellers, or Roy Underhill.  At least for the brief moment when I was able to get the saw started with relatively little fight and the saw was tracking straight.  Then I quickly realized that not all of my cuts were lining up and it was all downhill from there!

ear3 said:
One note on resawing for the future -- what can often happen after you resaw a board, even one that is fully dried, is that the thinner boards cup as the newly exposed center adjusts to the ambient humidity.  The solution for this is to clamp the original outer faces of the two boards together along the length of the entire board for a couple of days while they stabilize.  I know for me it sucks having to wait for this process to play out, so I try to do it early on whenever I have a project calling for resawing, that way I'm working on other things and not just waiting for the boards.
UH OH.  I hadn't really thought about the potential for cupping!  Any chance it might be less of an issue because I measured the moisture content of the board between 5-6% with my Wagner Moisture Meter?  Granted, I was too lazy to change the wood species on the meter.  I think it was last for either Walnut or Maple.  The boards have also now been sitting almost exclusively in the non-air conditioned garage.  Would immediately applying the top coat varnish right after resawing help prevent cupping?

ear3 said:
I don't have a bandsaw or jointer either, but I do do a fair amount of resawing thanks to a Roubo frame saw, handplanes (including the formidable scrub plane!) and a thickness planer:http://www.badaxetoolworks.com/kpfs.php

The frame saw does require, however, serious workholding capabilities such as a leg vise.  Something to keep in mind if you ever consider upgrading to a more robust bench.  Since you are integrating more handtools into your kit, at some point you might be faced with having to do so.

I really wish I could have a nice bench with a shoulder vise like Rob Cosman, but I just don't have the room since I normally park the car in the garage when I'm not working on a project.  Those benches are also very heavy by design and that kinda scares me.  I'd hate to have something so heavy that I couldn't move it without practically getting a whole moving crew.

ear3 said:
One other note about the magnets -- CA glue will hold the magnets for a while, but eventually they will pop out with the continuous pull of the magnetic forces.  Don't ask me how I know!  A better choice in these situations is a two part epoxy. 

Shoot!  I already had one magnet come out on its own.  I had to go in an kinda ream the hole out with the drill so I could reglue it.  I think spraying the accelerator on the magnet ended up doing more harm than good and really wasn't necessary to begin with.  The instructions did say I could also use epoxy.  I've only used epoxy one other time.  I seem to recall that it was fairly thick and viscous.  Is that generally speaking correct?  Since the bottom is only 1/4" thick there isn't a lot of extra depth in there for the adhesive.  Ideally I'd like the magnet flush with the surface so that it doesn't fall into the hole on the mating surface.  Then again, I guess it's not really the end of the world if it sticks up a bit either.

So you're saying it's really a question of when not if the magnet is going to pull out?  I'd hate to give it as a gift only to later hear that the magnet fell out.  My friend lives in Texas so I wouldn't be able to reattach the magnet for him.
 
ear3 said:
One other note about the magnets -- CA glue will hold the magnets for a while, but eventually they will pop out with the continuous pull of the magnetic forces.  Don't ask me how I know!  A better choice in these situations is a two part epoxy. 

I agree with Edward...I've had issues with magnets and cyanoacrylate glue failing. I now use a small dap of construction adhesive say PL400 or I drill the hole undersize and then press the magnet in using a bench vise. I think it's a two-fold issue, first the wood fibers absorb most of the glue and secondly the bond line with all cyanoacrylate glues while strong, is very brittle. They don't stand up to any shock loading.

I do admire your tenacity  [big grin]  taking on a resawing challenge while not really owning a "resaw".

The saying "Where there's a will, there's a way" comes to mind.  [not worthy]
 
I did use the thick CA glue for what it's worth.  I guess that glue line is very brittle.  Speaking of brittle, 2 of the set of 10 magnets broke from slamming into each other when they pulled together.  I got these from Woodcraft for only about $6.  I also ordered a set from Rockler that were twice as much money.  I wonder if the Rockler ones are going to be better or all of these thin rare earth magnets are very brittle.  I think the Rockler listed the pull strength at 2lbs.  I couldn't find any strength specifications for the Woodcraft version.  I found a set of 40 3/8" x 1/16" rare earth magnets from Home Depot for only $12.99.

Is the undersized hole sufficient for holding the magnet in?

Maybe the correct word is stupidity and/or insanity  [laughing].
 
    If I get a chance later I will set up a piece just for pictures.

    The screws / clamps can be in the path because if need be. Yes, plunge in at the start of the cut and out at the end. The cut starts and stops a few inches from the ends of the board. Can also be screwed clamped lower than the blade depth. But you still don't want to cut all the way to the end because the the board will "collapse"  on the kerf.  The attachment really just depends on what bench set up is available.

Seth
 
GoingMyWay said:
1. Speaking of brittle, 2 of the set of 10 magnets broke from slamming into each other when they pulled together. 

2. Is the undersized hole sufficient for holding the magnet in?

1. I've also had that issue, that's the reason I seat one of the magnets slightly below the surface.

2. I've used the undersized hole method in fir and pine. Never tried it in maple or oak. For hard woods I use the PL adhesive.

For proper magnet orientation, I take all of the magnets out of the package and join them together CAREFULLY so that they form a stick. I place a piece of blue painters tape on one end of the stick. I then put a dab of PL in the hole for one of the mating pieces and place the magnet stick in the hole and then slide the magnet stick to the side to release it from the rest of the magnets.

For the other mating pieces, I remove the painters tape from one end of the magnet stick and place it on the other end of the stick and then repeat the PL and sliding routine. That's cured any polarity issues.
 
SRSemenza said:
    If I get a chance later I will set up a piece just for pictures.

    The screws / clamps can be in the path because if need be. Yes, plunge in at the start of the cut and out at the end. The cut starts and stops a few inches from the ends of the board. Can also be screwed clamped lower than the blade depth. But you still don't want to cut all the way to the end because the the board will "collapse"  on the kerf.  The attachment really just depends on what bench set up is available.

Seth

Oh ok - I think I get it if it's a plunge cut.  That's a good point about leaving some "meat" in the middle so the wood doesn't collapse on the kerf.  That would be bad.

Cheese said:
GoingMyWay said:
1. Speaking of brittle, 2 of the set of 10 magnets broke from slamming into each other when they pulled together. 

2. Is the undersized hole sufficient for holding the magnet in?

1. I've also had that issue, that's the reason I seat one of the magnets slightly below the surface.

2. I've used the undersized hole method in fir and pine. Never tried it in maple or oak. For hard woods I use the PL adhesive.

For proper magnet orientation, I take all of the magnets out of the package and join them together CAREFULLY so that they form a stick. I place a piece of blue painters tape on one end of the stick. I then put a dab of PL in the hole for one of the mating pieces and place the magnet stick in the hole and then slide the magnet stick to the side to release it from the rest of the magnets.

For the other mating pieces, I remove the painters tape from one end of the magnet stick and place it on the other end of the stick and then repeat the PL and sliding routine. That's cured any polarity issues.

Maybe I should try using PL400.

Thanks for sharing your technique for the magnets.  That seems like a good method.
 
SRSemenza said:
    If I get a chance later I will set up a piece just for pictures.

    The screws / clamps can be in the path because if need be. Yes, plunge in at the start of the cut and out at the end. The cut starts and stops a few inches from the ends of the board. Can also be screwed clamped lower than the blade depth. But you still don't want to cut all the way to the end because the the board will "collapse"  on the kerf.  The attachment really just depends on what bench set up is available.

Seth

Please do, can’t wrap my head around “if you don’t mind driving a screw in the screws”.

[member=66216]GoingMyWay[/member] can be made to resist lateral forces. You just need to attach the MFT to a wall or strong post. If you can’t put the MFT close to a wall just attach a cleat to the wall and clamp a stiff stick to both cleat and MFT. Two sticks attached to two walls (90 degrees to one another) is best but for sawing which only racks the MFT in one direction one support will do.

That Stanton bench you linked is a very nice design but you can get most of the benefit from a couple of strips of plywood and reinforcing brackets or just a pair of flattened and straightened 2x6’s (or bigger). Stand it in a corner when not needed.
 
About the board collapsing as the second cut is completed, since you’re using a plunge saw you can stop anytime and add a shim to keep the pieces parallel. You can also add shims in the opposite side kerf and clamp to put a little spring in the workpiece to keep it from closing on the blade.

If the plunge saw can’t cut to the center of the board, and you have a choice of saws choose one whose kerf matches the kerf of the hand saw you’ll use to finish the cut. (HKC has a narrow kerf blade). The old school panel hand saw in your photo is good for completing a cut in this case because the tall blade helps keep the saw in axis with the existing kerf.
 
Thanks for these suggestions Michael.

I have a foldup table that's attached to the wall that I should be able to clamp my MFT to or at least use a stretcher board to attach them together.  I wonder if that will be sufficient to stabilize things.

I really don't need another piece of resawn wood at this time, but I'm kinda interested to use a scrap piece of plywood just to try this technique.
 
Michael Kellough said:
SRSemenza said:
    If I get a chance later I will set up a piece just for pictures.

    The screws / clamps can be in the path because if need be. Yes, plunge in at the start of the cut and out at the end. The cut starts and stops a few inches from the ends of the board. Can also be screwed clamped lower than the blade depth. But you still don't want to cut all the way to the end because the the board will "collapse"  on the kerf.  The attachment really just depends on what bench set up is available.

Seth

Please do, can’t wrap my head around “if you don’t mind driving a screw in the screws”.

[member=66216]GoingMyWay[/member] can be made to resist lateral forces. You just need to attach the MFT to a wall or strong post. If you can’t put the MFT close to a wall just attach a cleat to the wall and clamp a stiff stick to both cleat and MFT. Two sticks attached to two walls (90 degrees to one another) is best but for sawing which only racks the MFT in one direction one support will do.

That Stanton bench you linked is a very nice design but you can get most of the benefit from a couple of strips of plywood and reinforcing brackets or just a pair of flattened and straightened 2x6’s (or bigger). Stand it in a corner when not needed.

Aah, typos..... that should read "if you don't mind driving a screw into the bench"

Seth
 
Thanks for taking those pics Seth!

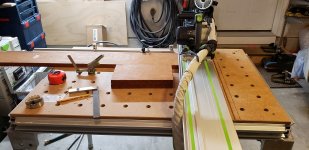
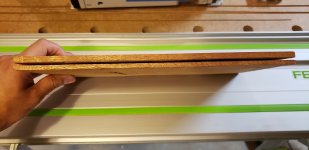
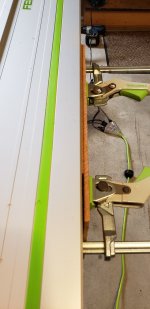
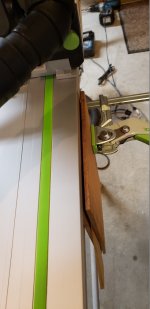
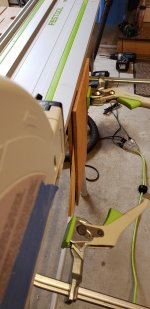
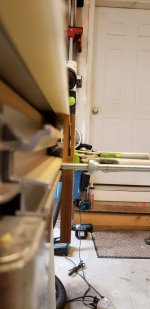
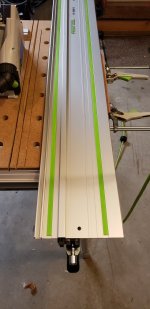
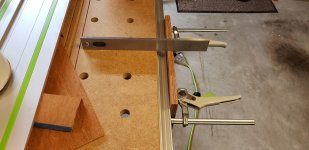
I got excited to test it out for myself with my MFT/3 and TS55.  I forgotten I had another piece of mahogany that I had already marked out for 3/8" and 1/4".

[attachimg=1]

[attachimg=2]

[attachimg=3]

[attachimg=4]

[attachimg=5]

[attachimg=6]

[attachimg=7]

[attachimg=8]

[attachimg=9]

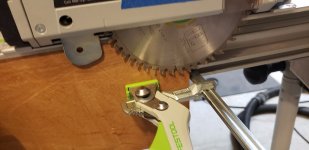
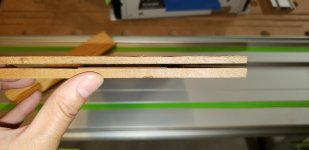
I tried shimming the kerf open, but then found it wasn't really necessary.  I used a 3/32" spacer from the 3/8" line on the waste side to leave me a little wiggle room to hand plane down to 1/4".  I haven't finished the cut off with a handsaw yet.
 

Attachments

  • 20190716_145655.jpg
    20190716_145655.jpg
    129.8 KB · Views: 678
  • 20190716_145604.jpg
    20190716_145604.jpg
    165.8 KB · Views: 651
  • 20190716_145509.jpg
    20190716_145509.jpg
    129.9 KB · Views: 637
  • 20190716_145402.jpg
    20190716_145402.jpg
    204.6 KB · Views: 648
  • 20190716_144916.jpg
    20190716_144916.jpg
    145.5 KB · Views: 700
  • 20190716_144725.jpg
    20190716_144725.jpg
    176 KB · Views: 692
  • 20190716_144321.jpg
    20190716_144321.jpg
    130.9 KB · Views: 691
  • 20190716_143911.jpg
    20190716_143911.jpg
    191.9 KB · Views: 639
  • 20190716_145919.jpg
    20190716_145919.jpg
    144.6 KB · Views: 648
Back
Top