For those who don't want to read the backstory:
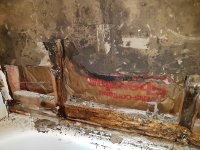
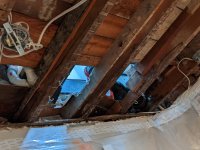
My kitchen ceiling has some water damage from a leak in the bathroom above. It's drywall laminated to plaster with asbestos in the mix. I'm going to need to get a portion of it removed just to get the plumber access to the lines buried below the 4" concrete slab in the bathroom. I would assume it's a smart idea to remove any of it that's wet. How much should come out? And what should I do in terms of drying/preventing mold once it has been removed?
A couple weeks ago, I saw a puddle on my kitchen floor after I had used the shower (located directly above the kitchen). The puddle came out from beneath my range, which was odd.
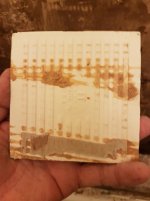
Despite my best efforts, I could not identify any clear source of water or leaks from above. The location seemed improbable, as the water didn't appear to be coming from anywhere at all. When my wife got home, i had her run the bathtub for about 10 minutes and we couldn't replicate the issue. So we agreed to keep an eye on it and see if it happened again.. a week of daily use went by and nothing. But my curiosity/confusion got the best of me last week, so I rented a thermal camera and had her run both the tub and sink with hot water (so it would show up clearly on the image). Sure enough with both things running, after about 3 minutes the camera started to show some serious contrast.
[attachimg=1]
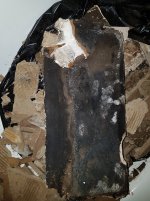
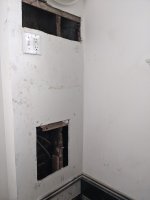
Soon thereafter, I saw a pinhole leak in the ceiling above the range hood, and noticed water accumulating in one of our surface mounted light fixtures. [eek]. The puddle under the stove appeared again. When I pulled the fixture, it was full of water but still worked. I think I'll be replacing it.
[attachimg=2]
So. Obviously, there's a leak somewhere in the plumbing in our bathroom. It doesn't seem to be a consistent leak (good?) or at least it doesn't show up as a visible issue unless a lot of water is going through the pipes.
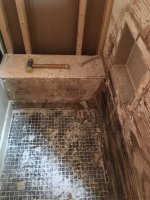
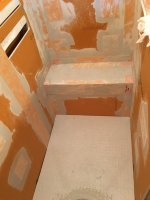
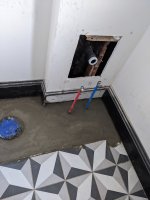
It seems to me like the ceiling is going to have to come out in the kitchen to both 1. replace the water damaged drywall and 2. to provide the plumber with access to the plumbing, as the bathroom floor is a 4" slab of concrete with tile over it.
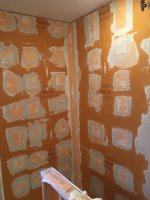
To remove the ceiling is a bit of an ordeal. Aside from being our kitchen, the ceiling is drywall laminated to old plaster with asbestos in the base coat. So I'm going to have to get someone to come in and take it out. Expensive stuff.

What I'm trying to determine now is what else I need to do, besides the obvious (remove ceiling, have the plumber come and fix the leak).
I know mold is a consideration with drywall - so far there's no visible signs of mold (on the front of the drywall at least) and that the joists themselves must have gotten wet at some point. What I'm not clear on is where the cutoff is for removing drywall that gets water on it. Is there a moisture reading that indicates 'remove' as opposed to 'let dry out'?
Should I take the opportunity to dry things out for a certain period of time? Should I treat the joists with some kind of anti-fungal or encapsulant? Would it make sense to consult a
water damage restoration Charlotte NC service for guidance? Anything else I should be accounting for? For what it's worth, this is an old and very leaky house (I doubt you could even measure ACH50 in here), so there is probably more opportunities for drying than a new home.
Thanks,
Adam


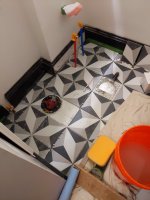
") I was able to get a new drill for mixing - I went with a HF Low RPM/High Torque spade drill/mixer. As of now, I can't see myself needing to mix more than 50 gallons of stuff within the next decade, and I'm going to likely buy a new dust extractor to bridge things while I work on examining/repairing my Fein Turbo, so I figure I'll put the money where I need it.
I was able to get a new drill for mixing - I went with a HF Low RPM/High Torque spade drill/mixer. As of now, I can't see myself needing to mix more than 50 gallons of stuff within the next decade, and I'm going to likely buy a new dust extractor to bridge things while I work on examining/repairing my Fein Turbo, so I figure I'll put the money where I need it.