thebicyclecafe
Member
- Joined
- Dec 7, 2011
- Messages
- 73
The Faster, Easier, and Smarter way to do breadboard ends
Hello fellow FOGers, I’m excited to post my demo here. I am currently finishing up the build on a large walnut kitchen island for my wife, and the island top is the last major step here. I am building my top with breadboard ends, and thought this would be a great opportunity to show you guys how I use my Festools to improve upon a traditional technique, making it more simple and more accurate.
My hope is that through this tutorial I can introduce a faster, easier, smarter way to do breadboard ends on any solid wood panel.
The rationale for loose tenons
There are a few ways to do breadboard ends traditionally, most are attached via some form of mortise and tenon joinery. Commonly, a long tongue will be milled on the panel, with an accompanying groove on the breadboard end. Only the center of the joint will be glued, the remainder of the joint is pegged or doweled, with elongated holes for the panel to move along the dowels. Fitting individual M&Ts, and a tongue and groove on a wide panel is usually an iterative, measurement intensive, trial and error router exercise. With little room for error, usually the tenon fitting is done by removing stock from the panel ends, lowering the straight or rabbeting bit until the proper fit is achieved.
If the groove or mortise wasn’t perfectly centered on the breadboard end, this is a two part process- fit the top, then fit the bottom side of the joint.
A loose or floating tenon is a form of mortise and tenon that involves mortises cut in both sides of the joint, and held together by an auxiliary piece of wood (the loose tenon). They're not necessarily loose, in most cases they are glued in on both ends, although you will see here that only the center one is.
In the pictorial tutorial below, you will see just how easy to make your breadboard ends fit snugly, without any painstaking measurements or trial and error. Without doing additional measurement or fitting, I was able to confidently fit my ends in one go. I also had less wood waste, and made almost no mess in my shop. After cutting the joinery for my bread board end, I didn’t even bother to sweep or vacuum my bench or shop floor, there simply was nothing left behind due to the superb dust collection from the Festool system.
OK, let’s get started!
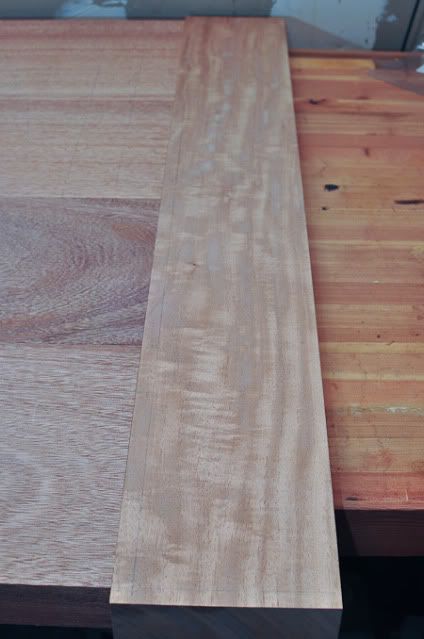
Stock Preparation
Before attaching my ends, I constructed and glued up my top, and milled the breadboard ends four-square and to the same thickness as the top. The top was flat and even across the joints, this is important. I used 8/4 African Mahogany for the whole top here, and had a particularly nice ribbon-striped rift sawn board for the ends. I planed the ends at the same time I planed the boards for the panel, so I was sure they were the same thickness. I mark the tops of your breadboard ends, and also the tops of my panel.
For the length of the breadboard ends, I make a rough cut in terms of length for the time being- I left the length about ½” longer than the width of the panel, so that I had some room to work with if I made a mistake, or just some room for correction if the tenon spacing wasn’t quite right. I’ll flush cut these later after the joint is made and confirmed.
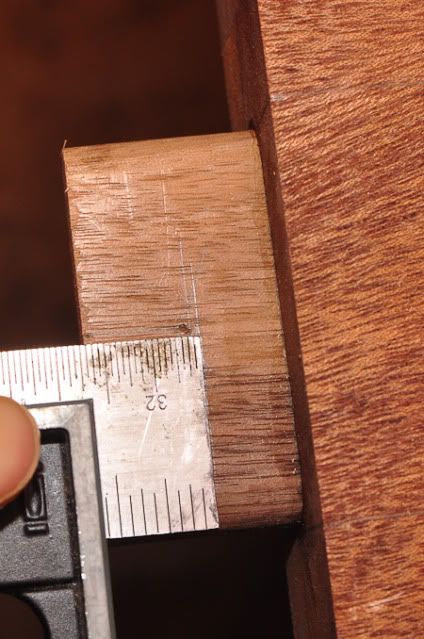
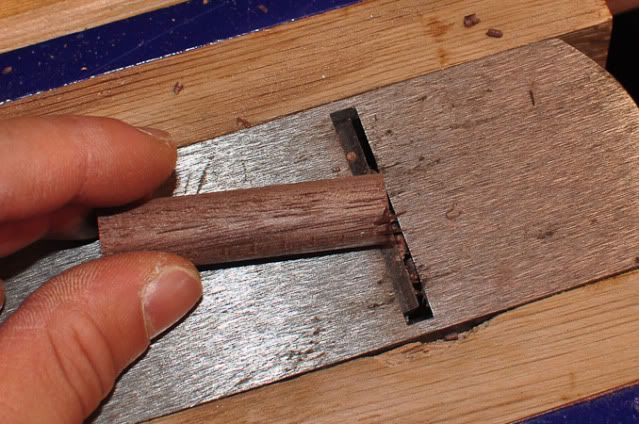
Loose Tenon Stock
Next, I make my own loose tenon stock. The rule of thumb is ¼ to 1/3 of the top's thickness. My top is around 1-5/8”, so I opted for ½” tenons. I took a scrap piece of walnut I had lying around, and ran it through the planer to finish thickness. The bit I am using is a Whiteside ½” straight bit, which I’ve used before for loose tenons. Since I had loose tenon stock leftover from a joint that also used this bit, I plane down my walnut scrap to match that thickness. I could have also cut a test mortise, or used my actual mortises later on to fit the stock. The goal is stock that is a few thousandths of an inch thinner than my mortise, this will result in a tenon that can be inserted into the mortise by hand, but has no play within the mortise.
I could have made loose tenon stock out of any hardwood scrap you have lying around, but I generally use the same wood for the tenons as I do for my pegs. Since I want to use walnut pegs, I used some walnut scrap for the tenons. I’ll explain why later on when I show the drawboring. At any rate, I stay away from extremes such as using poplar for the tenons and rosewood pegs.
I then rip my stock to width on the table saw, ending up with two pieces of 55mm (~2 inch) wide stock. I’d say 1.5-2 inches is a good size tenon width to shoot for, you don’t want to make them too wide since then you’ll have to factor in the movement of the tenons themselves as well. I rout the loose tenon boards with a roundover bit that has a radius that is half of my loose tenon stock thickness. For example, since I had ½” stock, I used a ¼” radius roundover bit. For ¼” stock, use a 1/8” radius bit, etc.
I want only the full portion of the round cutting edge of your bit to be cutting the stock. This will ensure that I get perfectly circular ends. After doing this I cut the loose tenons to my desired 2” length.
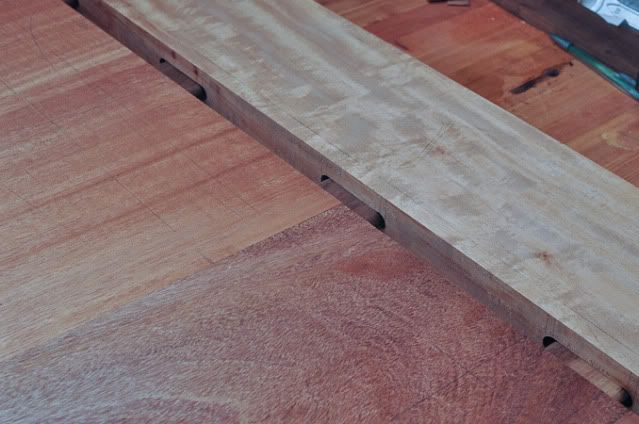
Trimming the panel with tracksaw
I start by trimming the ends of my panel so that the panel is square and straight. This is a finish cut.
For reference, the final length of my panel is about 52”. My breadboard ends are 5.5” wide. Total length with breadboard ends is 63".
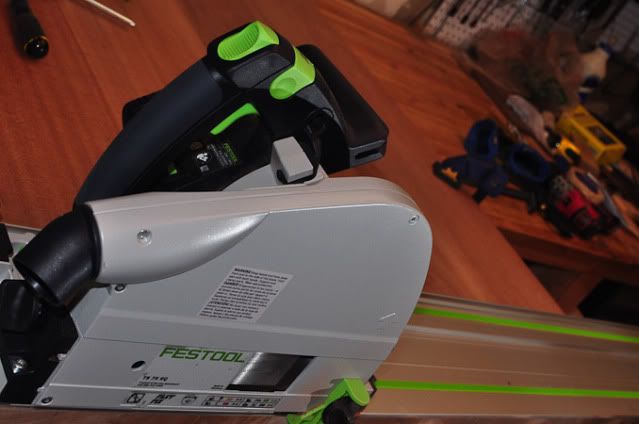
Here I use a festool FS guide rail and TS-75 saw to make sure the cut is straight. I square up the guide rail on my pencil marks, clamp down the rail, set my depth of cut, and make the cut.
With a TS-55 or TS-75 this is remarkably clean and efficient.
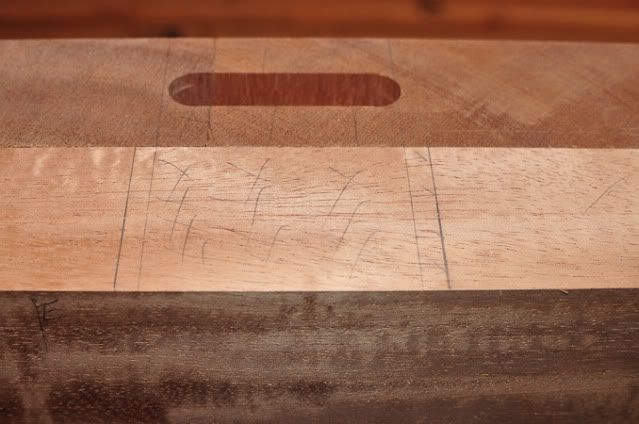
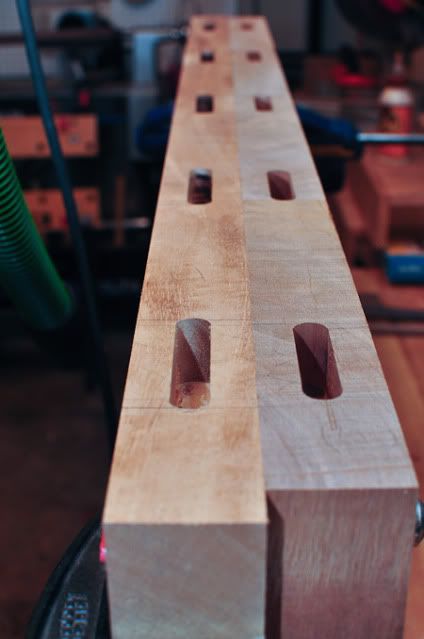
Mortise Layout
Here I mark out the location of my mortises- the mortises on the panel side should be exactly the width that you made your tenon stock. I have 5 tenons over the 38” length.
I then transfer these marks across to the breadboard end. On the breadboard end I elongate the mortises 5mm on each end. Based on my calculations, the panel has the potential to move up to 5mm. Yes, that means 2.5mm in each direction, but there’s no guarantee that the top will move evenly in both directions. I'll layout only the lateral position of the mortise- the vertical position isn't an exact science as long as I keep it the same across both breadboard end and panel.
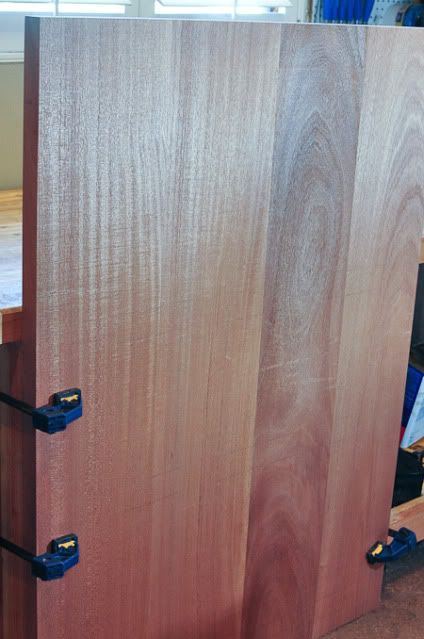
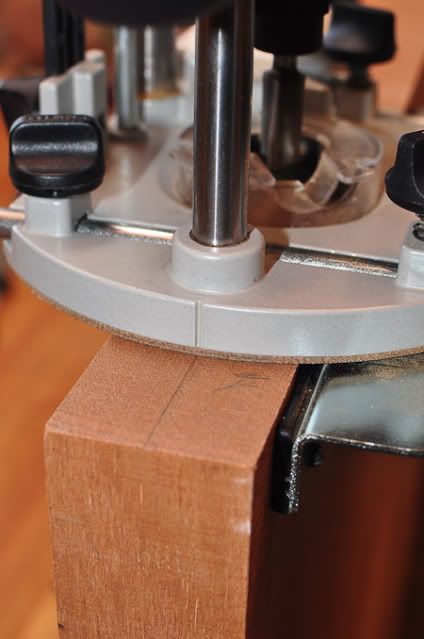
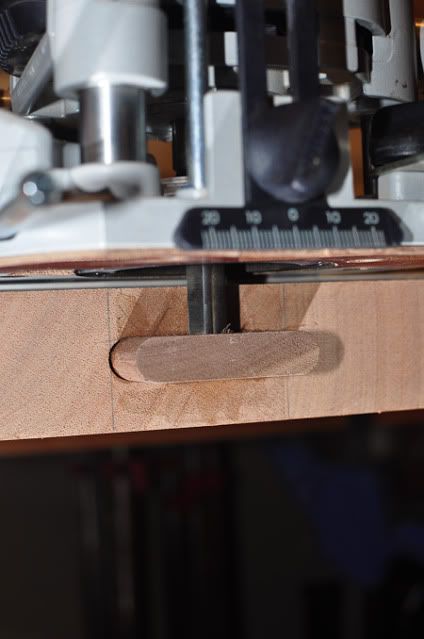
Routing the mortises with OF1010
Next, I orient my panel in a vertical fashion, and securely clamp to my workbench. When I made my workbench, I made sure to design it such that it was optimal for clamping large panels, so the top and legs are flush to the front. Since it’s 52” long, it’s still a comfortable height for working this way.
I mark the center line for the thickness of my top- exact center is not terribly critical here, I just want the tenon to have enough wood supporting it on each side. I am only going to be referencing one side when you do your tenons (preferably the top side since you want it perfectly flush).
I chuck up the ½” straight bit in my OF1010, set the plunge depth at the lowest turret stop for half of the tenon length, and set up the parallel edge guide with micro-adjuster to line up with the center line.
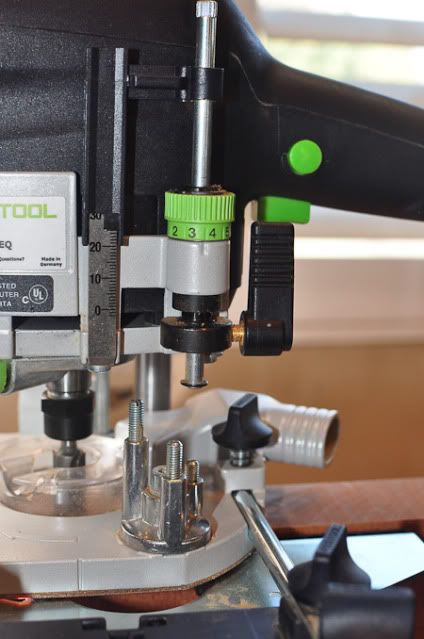
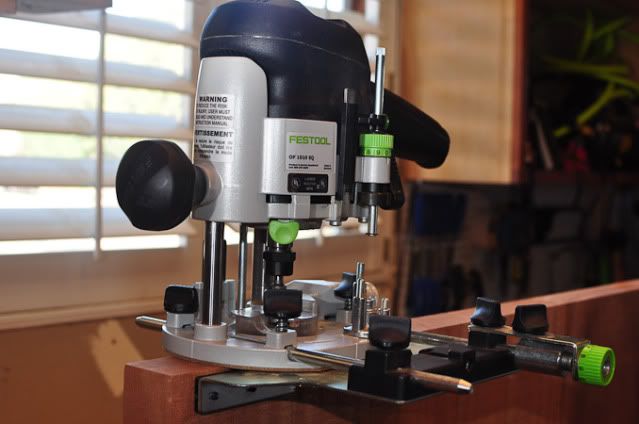
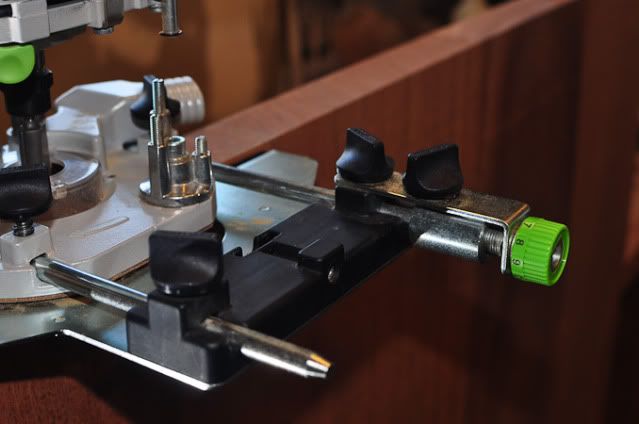
I lock down the parallel guide knobs and all the knobs. I make sure this is secure, as this is the final setting, and if my edge guide moves I will have problems getting the breadboard ends to fit flush.
Before I rout, using the bit itself as a gauge against my layout lines, I mark out the left side starting points for all of my mortises, using the end of the edge guide as my reference point. I then mark out the stopping points.
As an extra precaution, I clamp down a stop block so that I can go no further than the stopping point.
I connect up the plug it adapter cord and D27 antistatic hose and start the routing by plunging slowly to full depth at the starting point. I like to lower the bit a little at a time, and raise it back out to eject any chips or dust. After plunging to full depth, I then use highest turret depth stops, and go across the length of the mortise until I reach the stop block. I turn off the router, raise the bit, then go back to the next turret stop, and router again. Finally I use the full depth setting and finish the mortise. At this point, I test the fit of one of the loose tenons, and find that it fits nicely, so I am good to finish the remainder.
Next, I do the same on the breadboard end, and except I will be using the extended mortise reference lines that I marked out earlier. As long as I register the edge guide to the top of the breadboard end, my ends are guaranteed to fit flush to the top of the panel.
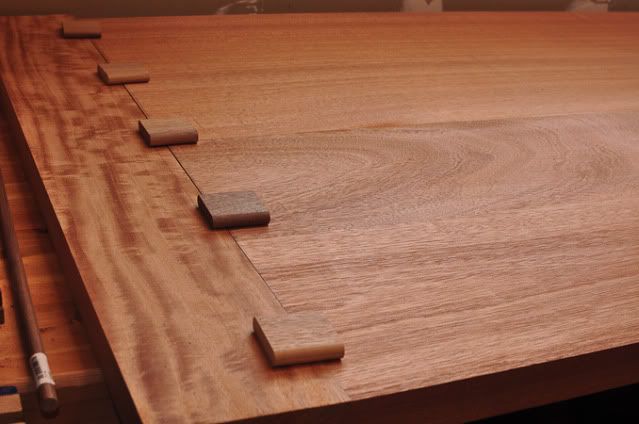
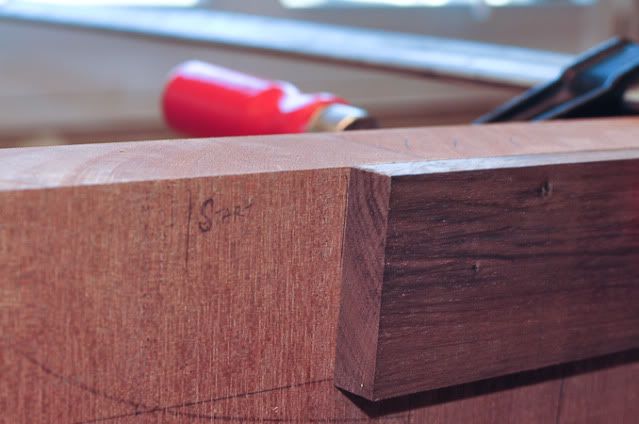
Dry fit
With all my mortises cut, now it’s time to do a dry fit of the assembly. I insert the tenons, and then put the breadboard end on. Since my mortises are elongated on the breadboard ends, with some force I am able to slide the end back and forth along the panel- it moves about 5mm in each direction. This is what I expect, since I elongated all the mortises by that amount. At this point, I trim the ends flush to my panel using my miter saw.
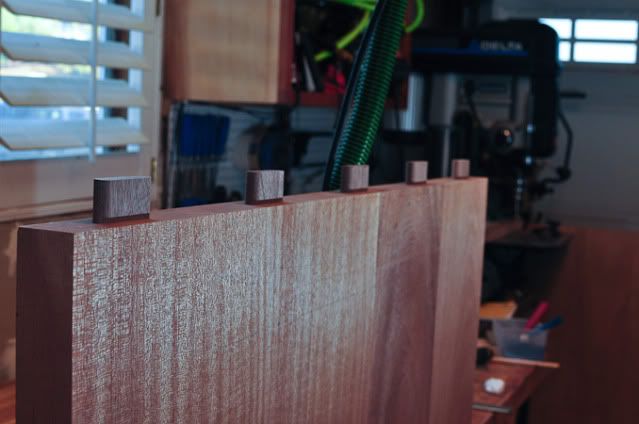
Glue the tenons
I then glue the loose tenons into the panel, making sure to get good glue coverage on both the tenon and in the mortise. I marked off half of the tenon during my dry fit so I know where to stop spreading glue. Clamping isn’t necessary as the snug fit should be sufficient to hold it in place. Then, I clean off all squeeze out before the glue hardens.
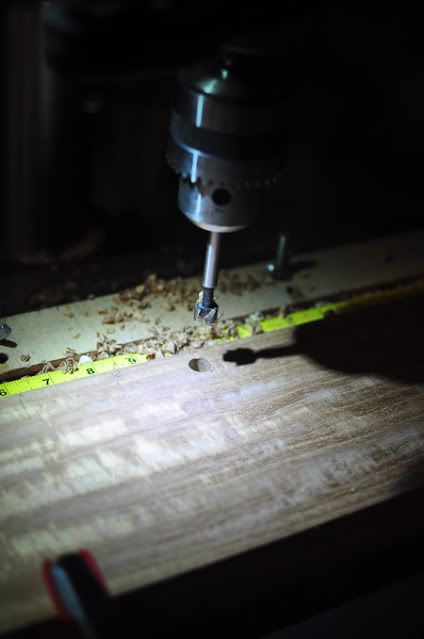
Drilling the BB ends
I moved on to drilling the holes on the breadboard end right after I glued the tenons. Taking the breadboard ends to the drill press, I use a ½” forstner bit, line up the center to my line, and set my fence in place. I then carefully drill my holes all the way through.
Marking the offset
After the glue is set on the tenons, I take the breadboard end and dry fit it, ensuring that the end is on tight, and that the two ends of the breadboard end are flush during the dry fit. I insert a ½” bradpoint bit into each hole, and with the point, I make a mark that transfers the center of the holes over to the tenons.

I remove the end, now, I could just drill straight down through my tenon, leaving me an aligned hole in which to insert my peg. However, I’m not going to do that. Other than the center tenon, these joints will be glueless. I’ll need some tension to keep the joint drawn tight towards the panel, especially if I am already allowing it to move in two directions. I am going to use my pegs to drawbore here. Basically this works when I offset the hole on the tenon end, such that the peg has to bend through the tenon hole in order to exit through the bottom side of the breadboard end. I am using a 1/32” offset here. If you recall earlier I mentioned that I use the same wood for the tenon and the peg. If I used a much harder wood for the peg, it would just widen the hole on the softer tenon, loosening up the fit. Likewise, a harder tenon would just peel or crush the fibers on the straight grained peg, loosening up the fit as well. When you have two similar woods, the force is evenly distributed across all members. Note here that the drawboring pin should not make the joint fit tight, it holds the joint tight- in the absence of tension, the end should already fit with minimal gaps and no slop.
So, using the point I established earlier, I draw a line to establish the location of the center, and then draw a second line offset 1/32” towards the panel. I take the same brad point bit, chuck it into my handheld drill, and on the center point of the offset line, drill a hole about 1/8” deep for all 10 tenons.
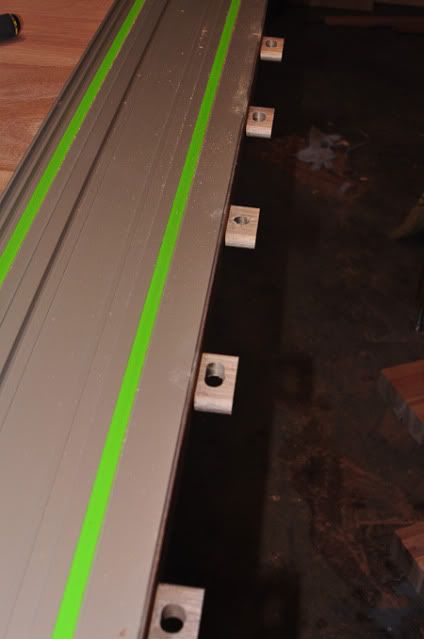
Using the guide rail to elongate the holes
Usually, the holes are elongated by drilling all the way through, taking a drill and rocking it left and right to make the hole longer. That doesn’t do it for me in terms of accuracy, so now, the FS guide rail comes back. Since I’ve drilled my holes all on the same line, and marked carefully, I know that the offset holes will all be in line. I affix the guide rail such that the splinter guard sits flush to the edge of my panel. I then mount the guide rail attachment for my OF1010, and also attach the microadjuster. Lowering the bit, I set the position of router based on the left most and right most tenons.
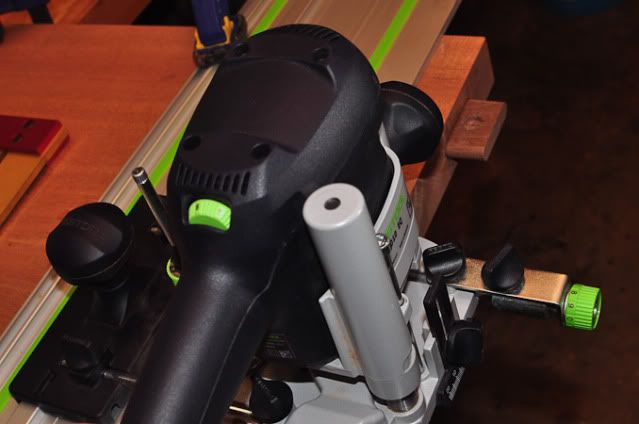
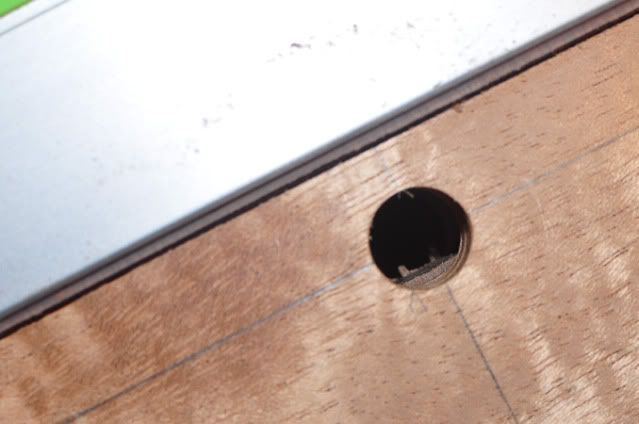
When the bit fits nicely in the guide holes drilled earlier, I know that the position is set correctly. I lock down the guide rods with the knobs. Lining up the bit to the guide hole, I plunge out a hole and elongate slots about 5mm in each direction (I just do this by feel, push it gently in one direction and the other ). Since the center tenon is fixed, I do not elongate the hole on that tenon.
One last dry fit confirms that the offset slots/holes were done correctly. That little bit of tenon showing through the top of the hole, indicates to me that the peg is going to bend forward to overcome that part of the tenon, and maintain the tightness of the joint, even as the panel moves.
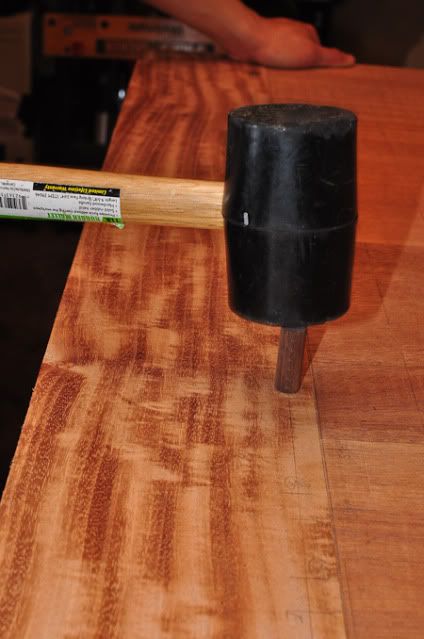
Assembly
I taper the ends of my pins with an inverted block plane held in a vise. I just take a couple shavings off the end, and repeat for 10 pins.
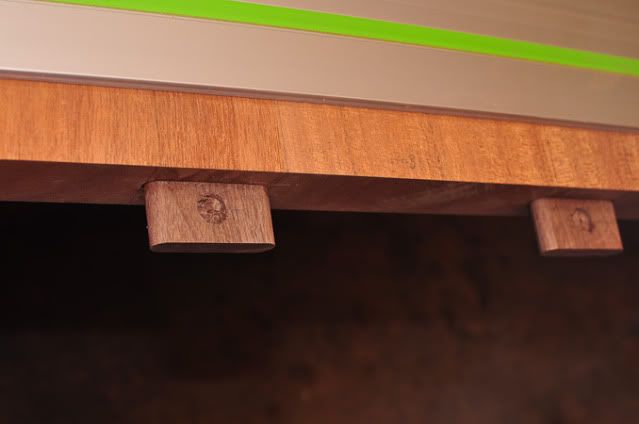
Now, I attach the end by gluing the center tenon, and tap the pin in with a rubber mallet. I don't glue the others. I know I've done the joint correctly when I don't need excessive brute force to drive the pins in. There is some resistance, but nothing that would break or crack wood- nothing but the straight grained pegs bending here slightly folks! I set the pins flush to the top using left over dowel stock like a nail set, gently tap the pins in place, and flush cut them from the bottom with a dovetail saw.
That's it!
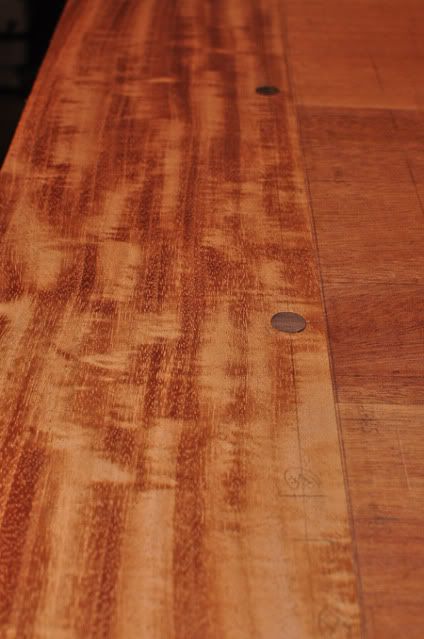
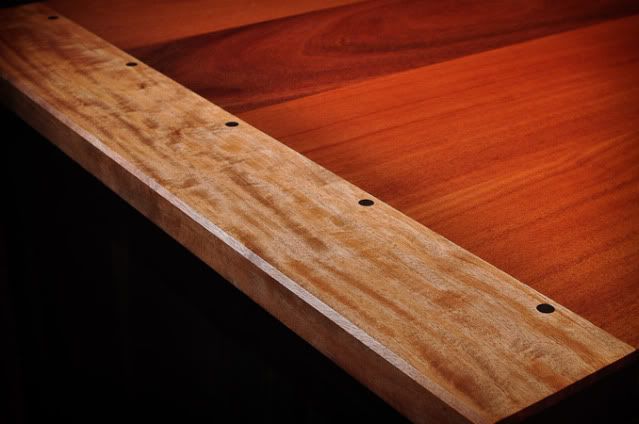
My breadboard ends line up perfectly and are perfectly flush to the panel. I finish sand my top with my ETS 150, and use my OF1010 again to rout a chamfer. The top is finished with pure tung oil. Yes, the drawer fronts need to be attached, but I couldn't wait to show you how it looks! I will be sure to upload a picture when I have those attached in the next few days.
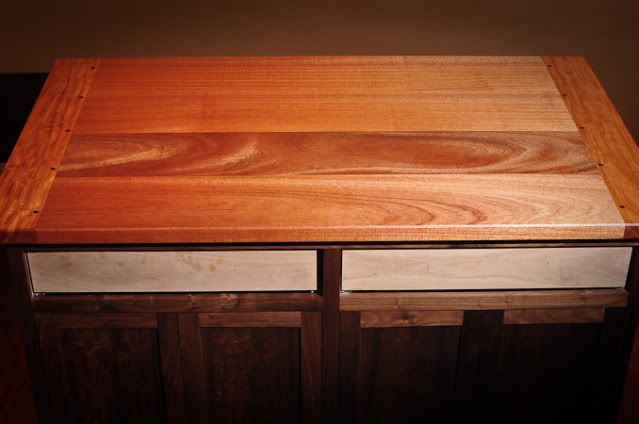
This will be a great top for years to come, and I am sure I will see the panel "float" within the ends and move over the seasons- then I know it's working as designed. Thanks for reading and I hope you've enjoyed it as much as I did doing this tutorial. Thanks Festool for making this job really easy and enjoyable!
Cheers,
Sheen
Hello fellow FOGers, I’m excited to post my demo here. I am currently finishing up the build on a large walnut kitchen island for my wife, and the island top is the last major step here. I am building my top with breadboard ends, and thought this would be a great opportunity to show you guys how I use my Festools to improve upon a traditional technique, making it more simple and more accurate.
My hope is that through this tutorial I can introduce a faster, easier, smarter way to do breadboard ends on any solid wood panel.
The rationale for loose tenons
There are a few ways to do breadboard ends traditionally, most are attached via some form of mortise and tenon joinery. Commonly, a long tongue will be milled on the panel, with an accompanying groove on the breadboard end. Only the center of the joint will be glued, the remainder of the joint is pegged or doweled, with elongated holes for the panel to move along the dowels. Fitting individual M&Ts, and a tongue and groove on a wide panel is usually an iterative, measurement intensive, trial and error router exercise. With little room for error, usually the tenon fitting is done by removing stock from the panel ends, lowering the straight or rabbeting bit until the proper fit is achieved.
If the groove or mortise wasn’t perfectly centered on the breadboard end, this is a two part process- fit the top, then fit the bottom side of the joint.
A loose or floating tenon is a form of mortise and tenon that involves mortises cut in both sides of the joint, and held together by an auxiliary piece of wood (the loose tenon). They're not necessarily loose, in most cases they are glued in on both ends, although you will see here that only the center one is.
In the pictorial tutorial below, you will see just how easy to make your breadboard ends fit snugly, without any painstaking measurements or trial and error. Without doing additional measurement or fitting, I was able to confidently fit my ends in one go. I also had less wood waste, and made almost no mess in my shop. After cutting the joinery for my bread board end, I didn’t even bother to sweep or vacuum my bench or shop floor, there simply was nothing left behind due to the superb dust collection from the Festool system.
OK, let’s get started!
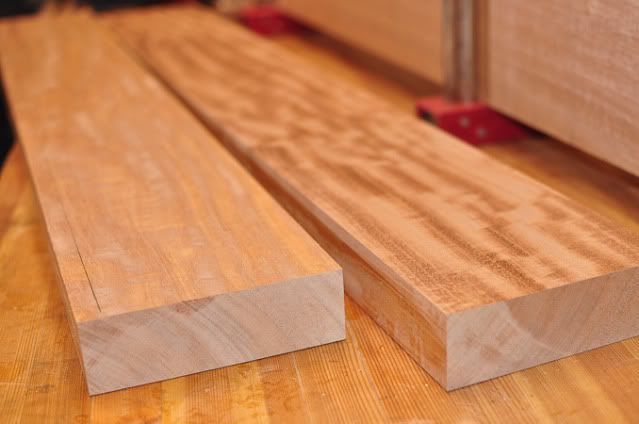
Stock Preparation
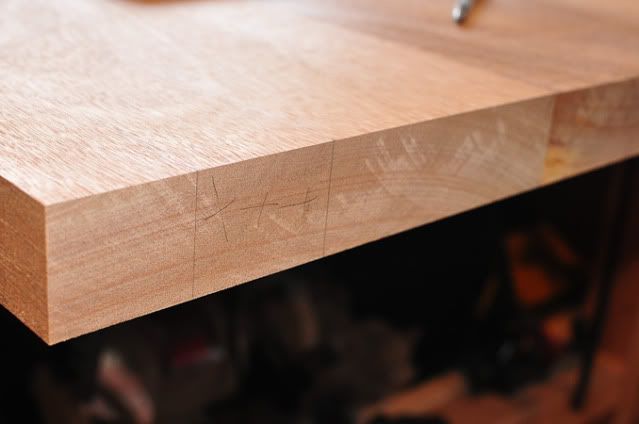
Before attaching my ends, I constructed and glued up my top, and milled the breadboard ends four-square and to the same thickness as the top. The top was flat and even across the joints, this is important. I used 8/4 African Mahogany for the whole top here, and had a particularly nice ribbon-striped rift sawn board for the ends. I planed the ends at the same time I planed the boards for the panel, so I was sure they were the same thickness. I mark the tops of your breadboard ends, and also the tops of my panel.
For the length of the breadboard ends, I make a rough cut in terms of length for the time being- I left the length about ½” longer than the width of the panel, so that I had some room to work with if I made a mistake, or just some room for correction if the tenon spacing wasn’t quite right. I’ll flush cut these later after the joint is made and confirmed.
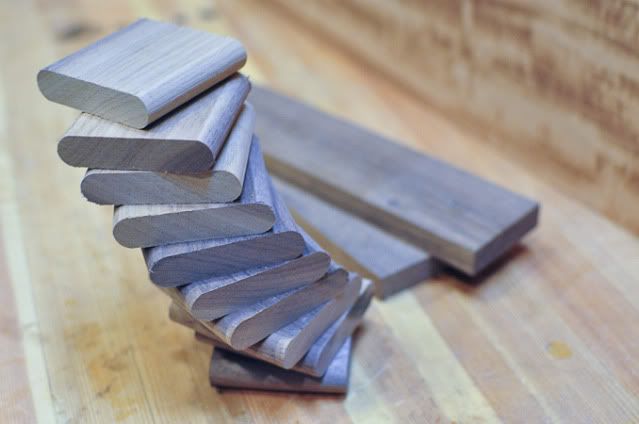
Loose Tenon Stock
Next, I make my own loose tenon stock. The rule of thumb is ¼ to 1/3 of the top's thickness. My top is around 1-5/8”, so I opted for ½” tenons. I took a scrap piece of walnut I had lying around, and ran it through the planer to finish thickness. The bit I am using is a Whiteside ½” straight bit, which I’ve used before for loose tenons. Since I had loose tenon stock leftover from a joint that also used this bit, I plane down my walnut scrap to match that thickness. I could have also cut a test mortise, or used my actual mortises later on to fit the stock. The goal is stock that is a few thousandths of an inch thinner than my mortise, this will result in a tenon that can be inserted into the mortise by hand, but has no play within the mortise.
I could have made loose tenon stock out of any hardwood scrap you have lying around, but I generally use the same wood for the tenons as I do for my pegs. Since I want to use walnut pegs, I used some walnut scrap for the tenons. I’ll explain why later on when I show the drawboring. At any rate, I stay away from extremes such as using poplar for the tenons and rosewood pegs.
I then rip my stock to width on the table saw, ending up with two pieces of 55mm (~2 inch) wide stock. I’d say 1.5-2 inches is a good size tenon width to shoot for, you don’t want to make them too wide since then you’ll have to factor in the movement of the tenons themselves as well. I rout the loose tenon boards with a roundover bit that has a radius that is half of my loose tenon stock thickness. For example, since I had ½” stock, I used a ¼” radius roundover bit. For ¼” stock, use a 1/8” radius bit, etc.
I want only the full portion of the round cutting edge of your bit to be cutting the stock. This will ensure that I get perfectly circular ends. After doing this I cut the loose tenons to my desired 2” length.
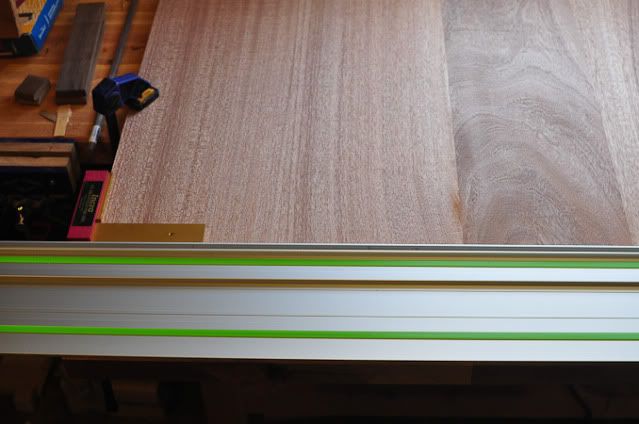
Trimming the panel with tracksaw
I start by trimming the ends of my panel so that the panel is square and straight. This is a finish cut.
For reference, the final length of my panel is about 52”. My breadboard ends are 5.5” wide. Total length with breadboard ends is 63".
Here I use a festool FS guide rail and TS-75 saw to make sure the cut is straight. I square up the guide rail on my pencil marks, clamp down the rail, set my depth of cut, and make the cut.
With a TS-55 or TS-75 this is remarkably clean and efficient.
Mortise Layout
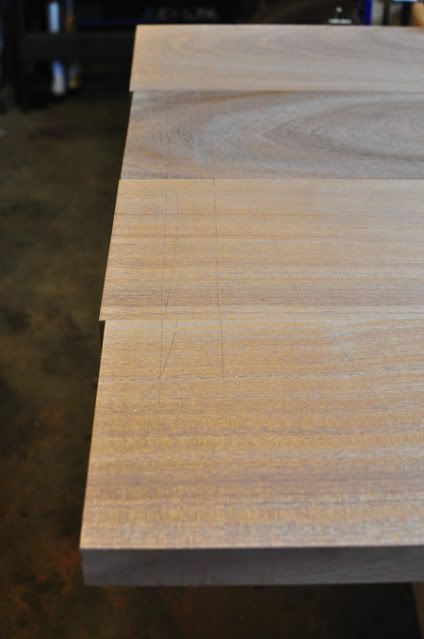
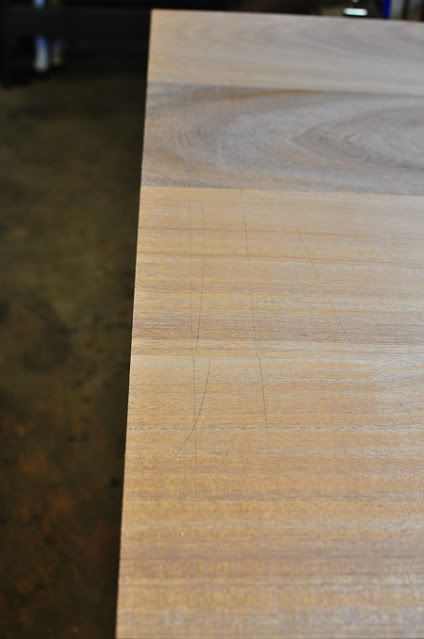
Here I mark out the location of my mortises- the mortises on the panel side should be exactly the width that you made your tenon stock. I have 5 tenons over the 38” length.
I then transfer these marks across to the breadboard end. On the breadboard end I elongate the mortises 5mm on each end. Based on my calculations, the panel has the potential to move up to 5mm. Yes, that means 2.5mm in each direction, but there’s no guarantee that the top will move evenly in both directions. I'll layout only the lateral position of the mortise- the vertical position isn't an exact science as long as I keep it the same across both breadboard end and panel.
Routing the mortises with OF1010
Next, I orient my panel in a vertical fashion, and securely clamp to my workbench. When I made my workbench, I made sure to design it such that it was optimal for clamping large panels, so the top and legs are flush to the front. Since it’s 52” long, it’s still a comfortable height for working this way.
I mark the center line for the thickness of my top- exact center is not terribly critical here, I just want the tenon to have enough wood supporting it on each side. I am only going to be referencing one side when you do your tenons (preferably the top side since you want it perfectly flush).
I chuck up the ½” straight bit in my OF1010, set the plunge depth at the lowest turret stop for half of the tenon length, and set up the parallel edge guide with micro-adjuster to line up with the center line.
I lock down the parallel guide knobs and all the knobs. I make sure this is secure, as this is the final setting, and if my edge guide moves I will have problems getting the breadboard ends to fit flush.
Before I rout, using the bit itself as a gauge against my layout lines, I mark out the left side starting points for all of my mortises, using the end of the edge guide as my reference point. I then mark out the stopping points.
As an extra precaution, I clamp down a stop block so that I can go no further than the stopping point.
I connect up the plug it adapter cord and D27 antistatic hose and start the routing by plunging slowly to full depth at the starting point. I like to lower the bit a little at a time, and raise it back out to eject any chips or dust. After plunging to full depth, I then use highest turret depth stops, and go across the length of the mortise until I reach the stop block. I turn off the router, raise the bit, then go back to the next turret stop, and router again. Finally I use the full depth setting and finish the mortise. At this point, I test the fit of one of the loose tenons, and find that it fits nicely, so I am good to finish the remainder.
Next, I do the same on the breadboard end, and except I will be using the extended mortise reference lines that I marked out earlier. As long as I register the edge guide to the top of the breadboard end, my ends are guaranteed to fit flush to the top of the panel.
Dry fit
With all my mortises cut, now it’s time to do a dry fit of the assembly. I insert the tenons, and then put the breadboard end on. Since my mortises are elongated on the breadboard ends, with some force I am able to slide the end back and forth along the panel- it moves about 5mm in each direction. This is what I expect, since I elongated all the mortises by that amount. At this point, I trim the ends flush to my panel using my miter saw.
Glue the tenons
I then glue the loose tenons into the panel, making sure to get good glue coverage on both the tenon and in the mortise. I marked off half of the tenon during my dry fit so I know where to stop spreading glue. Clamping isn’t necessary as the snug fit should be sufficient to hold it in place. Then, I clean off all squeeze out before the glue hardens.
Drilling the BB ends
I moved on to drilling the holes on the breadboard end right after I glued the tenons. Taking the breadboard ends to the drill press, I use a ½” forstner bit, line up the center to my line, and set my fence in place. I then carefully drill my holes all the way through.
Marking the offset
After the glue is set on the tenons, I take the breadboard end and dry fit it, ensuring that the end is on tight, and that the two ends of the breadboard end are flush during the dry fit. I insert a ½” bradpoint bit into each hole, and with the point, I make a mark that transfers the center of the holes over to the tenons.
I remove the end, now, I could just drill straight down through my tenon, leaving me an aligned hole in which to insert my peg. However, I’m not going to do that. Other than the center tenon, these joints will be glueless. I’ll need some tension to keep the joint drawn tight towards the panel, especially if I am already allowing it to move in two directions. I am going to use my pegs to drawbore here. Basically this works when I offset the hole on the tenon end, such that the peg has to bend through the tenon hole in order to exit through the bottom side of the breadboard end. I am using a 1/32” offset here. If you recall earlier I mentioned that I use the same wood for the tenon and the peg. If I used a much harder wood for the peg, it would just widen the hole on the softer tenon, loosening up the fit. Likewise, a harder tenon would just peel or crush the fibers on the straight grained peg, loosening up the fit as well. When you have two similar woods, the force is evenly distributed across all members. Note here that the drawboring pin should not make the joint fit tight, it holds the joint tight- in the absence of tension, the end should already fit with minimal gaps and no slop.
So, using the point I established earlier, I draw a line to establish the location of the center, and then draw a second line offset 1/32” towards the panel. I take the same brad point bit, chuck it into my handheld drill, and on the center point of the offset line, drill a hole about 1/8” deep for all 10 tenons.
Using the guide rail to elongate the holes
Usually, the holes are elongated by drilling all the way through, taking a drill and rocking it left and right to make the hole longer. That doesn’t do it for me in terms of accuracy, so now, the FS guide rail comes back. Since I’ve drilled my holes all on the same line, and marked carefully, I know that the offset holes will all be in line. I affix the guide rail such that the splinter guard sits flush to the edge of my panel. I then mount the guide rail attachment for my OF1010, and also attach the microadjuster. Lowering the bit, I set the position of router based on the left most and right most tenons.
When the bit fits nicely in the guide holes drilled earlier, I know that the position is set correctly. I lock down the guide rods with the knobs. Lining up the bit to the guide hole, I plunge out a hole and elongate slots about 5mm in each direction (I just do this by feel, push it gently in one direction and the other ). Since the center tenon is fixed, I do not elongate the hole on that tenon.
One last dry fit confirms that the offset slots/holes were done correctly. That little bit of tenon showing through the top of the hole, indicates to me that the peg is going to bend forward to overcome that part of the tenon, and maintain the tightness of the joint, even as the panel moves.
Assembly
I taper the ends of my pins with an inverted block plane held in a vise. I just take a couple shavings off the end, and repeat for 10 pins.
Now, I attach the end by gluing the center tenon, and tap the pin in with a rubber mallet. I don't glue the others. I know I've done the joint correctly when I don't need excessive brute force to drive the pins in. There is some resistance, but nothing that would break or crack wood- nothing but the straight grained pegs bending here slightly folks! I set the pins flush to the top using left over dowel stock like a nail set, gently tap the pins in place, and flush cut them from the bottom with a dovetail saw.
That's it!
My breadboard ends line up perfectly and are perfectly flush to the panel. I finish sand my top with my ETS 150, and use my OF1010 again to rout a chamfer. The top is finished with pure tung oil. Yes, the drawer fronts need to be attached, but I couldn't wait to show you how it looks! I will be sure to upload a picture when I have those attached in the next few days.
This will be a great top for years to come, and I am sure I will see the panel "float" within the ends and move over the seasons- then I know it's working as designed. Thanks for reading and I hope you've enjoyed it as much as I did doing this tutorial. Thanks Festool for making this job really easy and enjoyable!
Cheers,
Sheen
