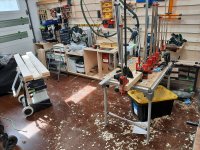
I've been doing more and more work with hand tools recently and have really hated using them with the mft3 I have. It is great for sheet goods but so wobbly that I end up spending more effort trying to keep the table from skidding across the room than actually doing work. I decided to finally spend a few days and do something about it. I bought Ingenious Mechanicks by Chris Schwarz and decided to give a low roman workbench a go.
Three big reasons: I need a hand tool solution. I need something small I can stuff in a corner of my shop. I would like something small for my boys to work on in the shop with me.
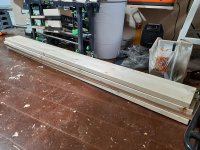
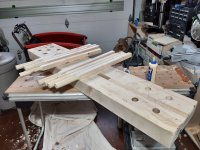
With Covid restrictions I placed an order online at my local HD and hoped for the best. I fit 4 pine 2X10 8' into my little hatchback and brought them home.
View attachment 1
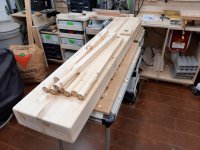
I spent one afternoon cutting 64' lengths out of the least twisted parts of each board and ripped them in half.
View attachment 2
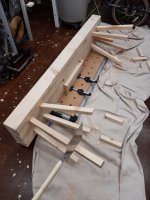
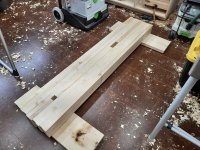
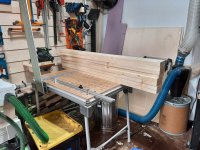
I don't have a ton of clamps so I decided to glue up the bench two boards at a time. Once the glue started to set I screwed 2 1/2" woodscrews through the assembly, took the clamps off and started on the next 2.
View attachment 3
The next day I glued the whole top and let that sit overnight.
View attachment 4
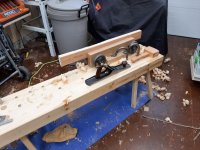
The resulting top was not very even as I was lazy and did not rip my boards exactly in half. Didn't matter. I got out my LV scrub plane and in about 20 minutes had it level. I then used a foreplane and a smoothing plane to get my benchtop done.
View attachment 5View attachment 6
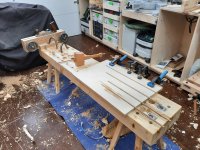
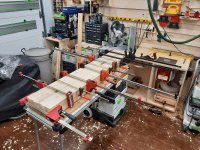
The next day I cut the offcuts from the 2X10's into 1.5" square legs. I used a spokeshave to round the taper and then used the biggest auger bit I could find to drill 1 1/2" holes through the benchtop.
View attachment 7View attachment 8
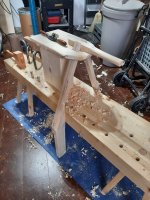
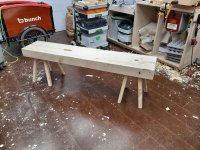
Here is what my dry fit looked like. I should have made a better jig to drill the holes at the same angle. Oh well.
View attachment 9
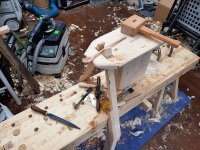
This afternoon I got my 4 and 6 year old boys to hammer in the legs with some glue and wedges on the top side. They had a blast doing this and luckily no one crushed a finger!
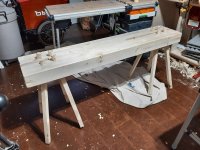
I was super impatient and didn't let the glue fully dry before flush cutting the top and cutting the legs to size.
View attachment 10
And here we have my low roman workbench ready to go!
View attachment 11
No fancy wood was used here, just the 2X10 pine boards I bought at home depot. I'm debating on how to drill dog holes. Chris has some suggestions in his book but I'm also thinking of using my parf guide to drill and mft style top in this thing. I've got plenty of 20mm dogs and have a couple of hold fasts in the mail. I also bought some planing stops from Lee Valley that sit flush with the surface when not in use. I can't wait to get going using this bench! I might end up doing a vice on it but will try it with just plane stops and dogs for now. Anyone else make one of these? How do you like it? What dog hole configuration did you use?
Thanks
Three big reasons: I need a hand tool solution. I need something small I can stuff in a corner of my shop. I would like something small for my boys to work on in the shop with me.
With Covid restrictions I placed an order online at my local HD and hoped for the best. I fit 4 pine 2X10 8' into my little hatchback and brought them home.
View attachment 1
I spent one afternoon cutting 64' lengths out of the least twisted parts of each board and ripped them in half.
View attachment 2
I don't have a ton of clamps so I decided to glue up the bench two boards at a time. Once the glue started to set I screwed 2 1/2" woodscrews through the assembly, took the clamps off and started on the next 2.
View attachment 3
The next day I glued the whole top and let that sit overnight.
View attachment 4
The resulting top was not very even as I was lazy and did not rip my boards exactly in half. Didn't matter. I got out my LV scrub plane and in about 20 minutes had it level. I then used a foreplane and a smoothing plane to get my benchtop done.
View attachment 5View attachment 6
The next day I cut the offcuts from the 2X10's into 1.5" square legs. I used a spokeshave to round the taper and then used the biggest auger bit I could find to drill 1 1/2" holes through the benchtop.
View attachment 7View attachment 8
Here is what my dry fit looked like. I should have made a better jig to drill the holes at the same angle. Oh well.
View attachment 9
This afternoon I got my 4 and 6 year old boys to hammer in the legs with some glue and wedges on the top side. They had a blast doing this and luckily no one crushed a finger!
I was super impatient and didn't let the glue fully dry before flush cutting the top and cutting the legs to size.
View attachment 10
And here we have my low roman workbench ready to go!
View attachment 11
No fancy wood was used here, just the 2X10 pine boards I bought at home depot. I'm debating on how to drill dog holes. Chris has some suggestions in his book but I'm also thinking of using my parf guide to drill and mft style top in this thing. I've got plenty of 20mm dogs and have a couple of hold fasts in the mail. I also bought some planing stops from Lee Valley that sit flush with the surface when not in use. I can't wait to get going using this bench! I might end up doing a vice on it but will try it with just plane stops and dogs for now. Anyone else make one of these? How do you like it? What dog hole configuration did you use?
Thanks
Attachments
-
 20210425_134504.jpg456.2 KB · Views: 737
 -
 20210503_184744.jpg740.2 KB · Views: 1,046
 -
 20210503_183842.jpg418.9 KB · Views: 711
 -
 20210502_200745.jpg478.9 KB · Views: 1,071
 -
 20210502_192435.jpg429.7 KB · Views: 876
 -
 20210501_120451.jpg437.4 KB · Views: 666
 -
 20210429_181734.jpg587 KB · Views: 739
 -
 20210429_115104.jpg681.5 KB · Views: 543
 -
 20210428_182725.jpg710.3 KB · Views: 595
 -
 20210427_162050.jpg828.6 KB · Views: 593
 -
 20210427_144340.jpg543.3 KB · Views: 630