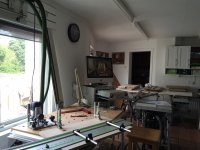
LR 32 success!

JNComplete

Member
Joined
Aug 10, 2012
Messages
13
Having purchased the OF 1400 series router last fall, I knew the main purpose was for the day when I could afford the LR32 system. Well after a couple projects under my belt getting used to the system, I am happy to say that it paid off.  It's a little daunting at first when you open up the system, try to understand what all the parts do and try to envision yourself flipping the track from one side to the other, and not have it screw up.  Is it just me or do most people have this nervousness that you are going to ruin either a part of the tool, like the rail(think 10,000 rpms) or the nice piece of plywood that you so meticulously cut?

I had a pretty good experience with an extra long cabinet side, where I joined up two tracks, while only one had holes.  It took some fiddling but it all worked out with indexing, all holes lining up. 
That being said, I would like to point out that the instruction booklet that it comes with is greatly lacking, and on the very first page, the one with the illustration, the first picture shows the router as backwards to the guide plate. This makes life very confusing when you're getting familiarized, or re-familiarized. I put my system away for a month and had to re-aquaint myself, and again, it confused me. 
In the end, I'm happy I purchased this system. The learning curve is a little steep, but the Youtube videos were so helpful. Thanks to all the great craftsman who put their knowledge out there.

This system though is so precise, its shocking. I do a lot of bookcases and entertainment centers where shelf pins are the norm.  The clean holes alone make it worth the cash, but when you couple in dead on accuracy, it's a major improvement to the products I sell.

Thanks Festool!

Jon Nelson 
 
The LR32 is well worth it's cost. I fuddled with several hole drilling rigs for years until I saw the LR32.

A supplemental guide exists https://www.festoolusa.com/media/pdf/32mm_System_and_the_Festool_Hole_Guide.PDF  on the Festool site. That is what I used as the manual once I found it.

I know that your using it is a lot easier if you dimension your cabinet sides so that it does not matter which is the top or bottom. Doing so eliminates the need to flip the rail and reposition it, which is prone for errors even though it sounds simple. I've burned myself after being interrupted while using it more than once. It got to the point that I would repeat each step on a scrap piece to make sure I did the flip and turn correctly.

I believe there is a way to avoid having to flip the template by dimensioning the height of the material to be a multiple of 32mm(I think), but I can't find a reference to it.

I agree that the manual sucks. After you figure out how to use the system the manual becomes understandable. The VS600 manual is a piece of work too, as is the device. There are different setups for each type of joint with a lot of board flipping involved. It is another tool that requires 100% concentration with no interuptions.
 
Crucial to use 32mm dimensions!
Need to memorize my 32x table....
Great tool btw. Love it.
 
I recently purchased just the sled portion that mounts on my 1010 router.  I don't build frameless cabinets and it means nothing to me to be 32MM from the face and I wasn't planning to use it for hinge boring so for $125 it was a great value.  Already had the router and the track.  I have the parallel guides from Rip Dogs and once they are set this system is amazing.  I lay the rail out just proud of the end of my workpiece and then use a small square to pull it flush with the end.  I use this method every time I lay the rail down and it works precisely.  I tried flushing it with my hand/fingers and that didn't work so well.  The square method is the same every time.  The holes are perfectly square and clean.  Finish guy even noticed and complemented me today on the closet system I had just installed.  Awesome tool for a really fair price. 
 
Jeff2413 said:
I recently purchased just the sled portion that mounts on my 1010 router.  I don't build frameless cabinets and it means nothing to me to be 32MM from the face and I wasn't planning to use it for hinge boring so for $125 it was a great value.  Already had the router and the track.  I have the parallel guides from Rip Dogs and once they are set this system is amazing.  I lay the rail out just proud of the end of my workpiece and then use a small square to pull it flush with the end.  I use this method every time I lay the rail down and it works precisely.  I tried flushing it with my hand/fingers and that didn't work so well.  The square method is the same every time.  The holes are perfectly square and clean.  Finish guy even noticed and complemented me today on the closet system I had just installed.  Awesome tool for a really fair price.

Pictures?
 
Was thinking about investing in the system to do some large wall cabinets.  What do you mean exactly by dimensioning in increments of 32mm?  Do you mean the depth or the height?

JimH2 said:
The LR32 is well worth it's cost. I fuddled with several hole drilling rigs for years until I saw the LR32.

A supplemental guide exists https://www.festoolusa.com/media/pdf/32mm_System_and_the_Festool_Hole_Guide.PDF  on the Festool site. That is what I used as the manual once I found it.

I know that your using it is a lot easier if you dimension your cabinet sides so that it does not matter which is the top or bottom. Doing so eliminates the need to flip the rail and reposition it, which is prone for errors even though it sounds simple. I've burned myself after being interrupted while using it more than once. It got to the point that I would repeat each step on a scrap piece to make sure I did the flip and turn correctly.

I believe there is a way to avoid having to flip the template by dimensioning the height of the material to be a multiple of 32mm(I think), but I can't find a reference to it.

I agree that the manual sucks. After you figure out how to use the system the manual becomes understandable. The VS600 manual is a piece of work too, as is the device. There are different setups for each type of joint with a lot of board flipping involved. It is another tool that requires 100% concentration with no interuptions.
 
Edward A Reno III said:
Was thinking about investing in the system to do some large wall cabinets.  What do you mean exactly by dimensioning in increments of 32mm?  Do you mean the depth or the height?

JimH2 said:
The LR32 is well wo
rth it's cost. I fuddled with several hole drilling rigs for years until I saw the LR32.

A supplemental guide exists https://www.festoolusa.com/media/pdf/32mm_System_and_the_Festool_Hole_Guide.PDF  on the Festool site. That is what I used as the manual once I found it.

I know that your using it is a lot easier if you dimension your cabinet sides so that it does not matter which is the top or bottom. Doing so eliminates the need to flip the rail and reposition it, which is prone for errors even though it sounds simple. I've burned myself after being interrupted while using it more than once. It got to the point that I would repeat each step on a scrap piece to make sure I did the flip and turn correctly.

I believe there is a way to avoid having to flip the template by dimensioning the height of the material to be a multiple of 32mm(I think), but I can't find a reference to it.

I agree that the manual sucks. After you figure out how to use the system the manual becomes understandable. The VS600 manual is a piece of work too, as is the device. There are different setups for each type of joint with a lot of board flipping involved. It is another tool that requires 100% concentration with no interuptions.
Yes it is the length/ height of the side panel. The stops are base on 32mm spacing between the holes. Fast cap sells a tape with the 32mm marks noted on the tape. So for a kitchen lower base can the height should be roughly 30" + 4" for toe kick and 2" for counter top gives ya the 36" finish dimension
 
Sparktrician said:
Nigel M said:
Crucial to use 32mm dimensions!
Need to memorize my 32x table....
Great tool btw. Love it.

Maybe this table will help you. 

[smile]
Thank you very much for posting this table!  This will really help!  Jeff
 
I used my LR32 set for the first time recently (it's so old it came with an 800 rail) and found that [member=8352]erock[/member] videos were very helpful.
Of course I made my units 700 tall so not 32 compatible alas Eric's videos explained it all !! Be sure to watch his videos there great 
Good luck with your project

[attachimg=1]


Attachments

  • IMG_1432.JPG
    IMG_1432.JPG
    2.1 MB · Views: 4,771
I used the LR32 first time yesterday. I initially thought it would take me a while to set up and the manual was missing from the box... ...but I got the hang of it in ten minutes flat and churned out the first row of holes after fifteen minutes. I had a look at Eric's LR32 video some time ago, and it helped!

Some shelves I made were bespoke so I did not need to adhere strictly to the LR32 standard placement (from edge and bottom placement) and ad libbing the LR32 was a breeze.

I actually kick myself for not making the investment before but I think the LR32 set will pay for itself on the first job for me so well, now I have it and it is being used. I had some trouble initially with the spring loaded hole spacer thingy (it stuck) but it worked out fine with a little cursing and has been smooth ever since.

 
Festool Fishy said:
I used my LR32 set for the first time recently (it's so old it came with an 800 rail) and found that [member=8352]erock[/member] videos were very helpful.
Of course I made my units 700 tall so not 32 compatible alas Eric's videos explained it all !! Be sure to watch his videos there great 
Good luck with your project

[attachimg=1]

[member=6370]Festool Fishy[/member]

[big grin]  [not worthy]
 
I really don't get why it's so important to dimension based on 32mm increments...

I too recently built my first cabinet with the LR32. I've had some carcases in my garage built to fit a particular container store bin, and wanted to make some matching cabinets for SYS-AZ.

The existing cabinets were 38" tall, so my sys-az cabinets were made to match... 38" tall.

I laid out and drilled both sides from the bottom of the cabinet, and that was that. It was a bit of a pain setting for the rear holes, as they were further away from the back of the cabinet than the LR32 rails allowed, but that's not a huge deal. ** That reminds me, does anyone know where to buy longer rails, or adhesive measuring tape that's the appropriate width for that hex bar stock?
 
capww8 said:
I really don't get why it's so important to dimension based on 32mm increments...

I too recently built my first cabinet with the LR32. I've had some carcases in my garage built to fit a particular container store bin, and wanted to make some matching cabinets for SYS-AZ.

The existing cabinets were 38" tall, so my sys-az cabinets were made to match... 38" tall.

I laid out and drilled both sides from the bottom of the cabinet, and that was that. It was a bit of a pain setting for the rear holes, as they were further away from the back of the cabinet than the LR32 rails allowed, but that's not a huge deal. ** That reminds me, does anyone know where to buy longer rails, or adhesive measuring tape that's the appropriate width for that hex bar stock?

Check out this video by Festool USA's Brian Sedgeley, How to use the Festool LR 32 System in Center of Panel. How to use the Festool LR 32 System in Center of Panel
 
Is the 32-mm system easy enough, or should I just get the DD40 ?
 
capww8,

The euro system is based on a 32 mm OC for the self holes w/a 37mm set back. The euro system is based on those measurements.  For example the holes on a base plate for a euro hinge are 32mm the proper set back for the base plate for the euro hinge is properly set with the screw holes at 37mm . If you use the euro blum style drawer slides the hole on the drawer slide has a 37mm set back on the slide. The 5mm holes will line up.

Say you want to build a closet organiser and want to add some euro hafel euro hard ware such as a tie rack the mount is designed to us a 37mm set back and the mount screw holes are 32mm.

Its a pretty coll system once ya get used to it.

Now with that being said, If you don't use that the of hard ware then you really don't need the 32mm system.
 
Holmz said:
Is the 32-mm system easy enough, or should I just get the DD40 ?

I don't know what the DD40 is. But the LR32 is pretty easy to use once you understand it.
 
Holmz said:
Is the 32-mm system easy enough, or should I just get the DD40 ?

Odd that you ask this.  At least twice in the last week you have suggested that others get the DD40 system versus the LR-32 system.  Does this mean that you haven't used either?

Peter
 
Back
Top