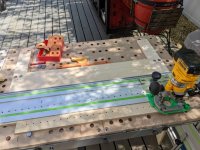
yes I am only using one stop, we typically make our panels balanced when ever possible so that makes it easier, a stop of the reciever side of the flip rail lifts off at just the right angle. For unbalanced panels we have to do one set of sides and then put the stop on the other side by the hinge and adjust the rail but the fence and stops stay the same.DynaGlide said:[member=32538]MaineShop[/member]
Are you using only one LR-32 end stop on the rail when doing this?
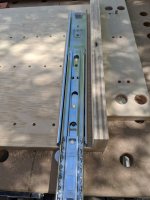
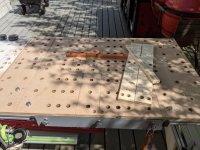
afish said:yes he is. The other end is butting to the fence from what I gather. It sounds like a sound method. Not sure if its simpler than the other. Biggest issue I see is having to make sure the rail is perfectly square to the fence or you could run into issues with the 5mm holes not being parallel to the front edge so one would need to be careful with that especially when doing upper cabinets where they are only 12"ish wide. It could be easy to get out of square. Also what happens when doing the rear set of holes? In my mind the panel is mostly past the end of the fence so you would only have an inch or two to square off the fence unless you have the fence extended to the right of the rail.
Once you make the adjustable stops which also comes in handy for stops when cutting. Since they pop in and out of the MFT without any tools they can act similar to flip stops so they come in handy for many things. If they are in the way just lift them out and you can easily come back to that measurement later by placing it back. Either way once those are made there is virtually no set up time and no fence to square or worry about being or staying square. Many people have issues getting square cuts with a MFT and hinge unless its the dashboard so. Using the set back arms to set the rear adjustable stops guarantees parellel hole placement as long as your set back arms are adjusted correctly. It also works for taller panels. Not sure if maine shop system would work for 42" uppers.
Absolutely right about needing to make sure your fence is square before you start a run. And you are right about the height limitations. Typically we use this set up for any gables under 36in high. We did use it once for some taller stuff and actually used two mfts connected and the long rail spanning them. It worked in that scenario because they were wide panels and we needed dozens so it was worth setting up. Typically with taller panels I use a similar setup to yours with dogs or use parallel guides on the rail. The issue as you get into taller panels is that you tend to be working with skinnier panels which are harder to keep square against the fence. Under 36" and at least 12" wide we use the MFT set up. When I get back to the shop tonight I will try and set it up real quick and snap some photos. It is not a perfect set up but it is quick and could help some.