stvrowe
Member
- Joined
- Jan 27, 2007
- Messages
- 811
These are some pics of the Master Bedroom remodel but first, a shout out to the good advice given on this forum. Thanks to the excellent advice from Walk On Wood, I have a Powernail Flex Roll 50P flooring nailer which is an outstanding tool. Thanks to several other reviews on this forum, I picked up a Rolair JC10 compressor and a Kapex.
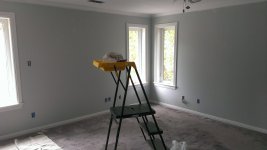
This is a picture before painting and pulling the carpet out. I had previously milled my own crown molding on a ShopFox molder. Just in the 3 rooms I have put crown in so far, this has paid for 80% of the machine and knives. I still have 3 more rooms to go so this machine will have more than paid for itself just in trim savings. Installation was done using a Dewalt miter saw (prior to Kapex acquisition) and running up and down stairs to the garage for cuts was something that I vowed to not repeat.
[attachimg=1]
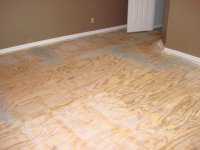
This is after painting and leveling of the floor. I used the RAS 115 with P24 Saphir paper to grind the seams into submission. See the RAS 115 and Saphire is Tougher than Nails thread for more details on this.
[attachimg=2]
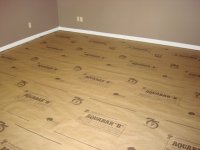
Prior to installing AquaBar underlayment, I used a Crain jamb saw to undercut the baseboard to allow room for flooring expansion. For the inside corners, I used a Fein Multimaster to complete the cuts. Using this method saved considerable time and effort in removing/re-installing base. In addition, since this trim is not available any longer (I didn't want to purchase additional knives for the molder), this reduced the risk of molding damage.
[attachimg=3]
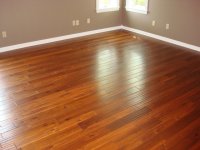
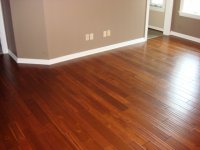
This shows the flooring and base shoe is installed and touch-up painting completed. The flooring I used had two plank widths which made installation a bit more inefficient since the cutoff from one end could not be used directly on the start of the next row and often fell in all the wrong places resulting in a lot more cuts. I used the Kapex with a CT36 extractor. While the cuts were not completely dust free, the cleanup was minimal.
[attachimg=4]
[attachimg=5]
The only thing left now other than hanging pictures is fabrication of the transition pieces from the wood floor to tile in the bath area and to the carpet in the hall which will eventually be hardwood flooring. The only casualty was the locking foot on the CT36 snapped off (bummer).
This is a picture before painting and pulling the carpet out. I had previously milled my own crown molding on a ShopFox molder. Just in the 3 rooms I have put crown in so far, this has paid for 80% of the machine and knives. I still have 3 more rooms to go so this machine will have more than paid for itself just in trim savings. Installation was done using a Dewalt miter saw (prior to Kapex acquisition) and running up and down stairs to the garage for cuts was something that I vowed to not repeat.
[attachimg=1]
This is after painting and leveling of the floor. I used the RAS 115 with P24 Saphir paper to grind the seams into submission. See the RAS 115 and Saphire is Tougher than Nails thread for more details on this.
[attachimg=2]
Prior to installing AquaBar underlayment, I used a Crain jamb saw to undercut the baseboard to allow room for flooring expansion. For the inside corners, I used a Fein Multimaster to complete the cuts. Using this method saved considerable time and effort in removing/re-installing base. In addition, since this trim is not available any longer (I didn't want to purchase additional knives for the molder), this reduced the risk of molding damage.
[attachimg=3]
This shows the flooring and base shoe is installed and touch-up painting completed. The flooring I used had two plank widths which made installation a bit more inefficient since the cutoff from one end could not be used directly on the start of the next row and often fell in all the wrong places resulting in a lot more cuts. I used the Kapex with a CT36 extractor. While the cuts were not completely dust free, the cleanup was minimal.
[attachimg=4]
[attachimg=5]
The only thing left now other than hanging pictures is fabrication of the transition pieces from the wood floor to tile in the bath area and to the carpet in the hall which will eventually be hardwood flooring. The only casualty was the locking foot on the CT36 snapped off (bummer).