Crazyraceguy
Member
- Joined
- Oct 16, 2015
- Messages
- 4,887
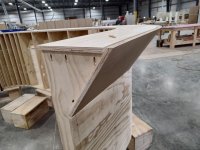
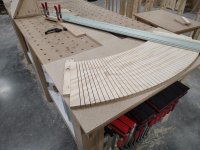
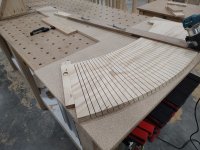
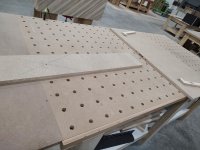
In a few recent posts I have shown pics of an odd challenge for a laminate trimmer.
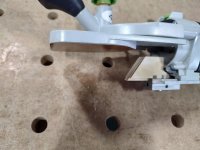
Flush-cutting when the adjacent face is not square to the edge you need to trim is a bit of a challenge. With the horizontal base installed, the "copy wheel" (Festool's word) keeps the machine registered against the edge, but it can't do that if the edge is not square. It can overcome a slight angle, but not much before it starts to feel sketchy.
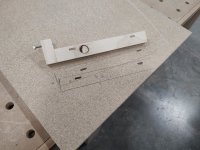
I developed an alternative to the wheel. A simple block of wood, ply in this case, will work as a registration point that matches up to whatever angle you need. I machined it to have a tenon that fits into the same groove as the original wheel, on the factory bracket. That gives it some depth adjustment too. I only took one pic after putting it on and testing. Since it worked out, I removed it and cleaned it up (rounded the exposed edges). It doesn't have to be fancy, it will probably never be used again.
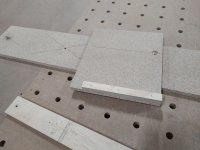
While I had the router table set-up to cut the tenon, I made a few extra blanks, so I can be ready for the next time something like this comes up.
I have had cases where the copy wheel was too far away from the bit, where the edge was too thin to register against. Something like this, with a 90 degree face, would have worked. Wish I had thought of it then.
Flush-cutting when the adjacent face is not square to the edge you need to trim is a bit of a challenge. With the horizontal base installed, the "copy wheel" (Festool's word) keeps the machine registered against the edge, but it can't do that if the edge is not square. It can overcome a slight angle, but not much before it starts to feel sketchy.
I developed an alternative to the wheel. A simple block of wood, ply in this case, will work as a registration point that matches up to whatever angle you need. I machined it to have a tenon that fits into the same groove as the original wheel, on the factory bracket. That gives it some depth adjustment too. I only took one pic after putting it on and testing. Since it worked out, I removed it and cleaned it up (rounded the exposed edges). It doesn't have to be fancy, it will probably never be used again.
While I had the router table set-up to cut the tenon, I made a few extra blanks, so I can be ready for the next time something like this comes up.
I have had cases where the copy wheel was too far away from the bit, where the edge was too thin to register against. Something like this, with a 90 degree face, would have worked. Wish I had thought of it then.