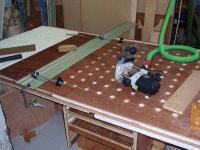
MFT 20mm

Greg M

Member
Joined
Jul 13, 2014
Messages
284
I've done a lot of searching and i'm finding conflicting information.  I'd like to find a router bit for making the perfect size 20mm holes for the top of the MFTC that I'm building.  Seems that the Festool 20mm router bit is actually 20.2mm which is too loose to use with dogs.

What is the right router bit?
 
Greg M said:
I've done a lot of searching and i'm finding conflicting information.  I'd like to find a router bit for making the perfect size 20mm holes for the top of the MFTC that I'm building.  Seems that the Festool 20mm router bit is actually 20.2mm which is too loose to use with dogs.

What is the right router bit?
I use the Festool 20mm hinge bit and it's the perfect size.
 
^^ ... Agreed.  I have used it on a number of projects and jigs and the holes are perfect for my slew of dogs (Festool, Precision, Rail, Parf, Qwas, etc.)

Note:  The holes are great in all sorts of MDF, but once you move to other wood, you might have varying degrees of fit.

Cheers.  Bryan.
 
You may like to try the 20 mm Zobo if you can drill rather than route - that is what I will be recommending for 20mm hole drilling in the next "Parf" production.

Peter
 
Peter Parfitt said:
You may like to try the 20 mm Zobo if you can drill rather than route - that is what I will be recommending for 20mm hole drilling in the next "Parf" production.

Peter

My router will make straight holes, my drill, not so much since it adds too much of me into the equation.
 
Greg M said:
Peter Parfitt said:
You may like to try the 20 mm Zobo if you can drill rather than route - that is what I will be recommending for 20mm hole drilling in the next "Parf" production.

Peter

My router will make straight holes, my drill, not so much since it adds too much of me into the equation.

This was exactly my thoughts when Peter recommended a drill over the router. Can't follow this particular logic in using the drill over a router, especially given Peter's normal approach to accuracy and tight tolerances.
 
orm8426 said:
[....

This was exactly my thoughts when Peter recommended a drill over the router. Can't follow this particular logic in using the drill over a router, especially given Peter's normal approach to accuracy and tight tolerances.

It may take another 6-8 weeks but I hope to be able to set your mind at rest that I still strive to be as accurate as my arthritic hands, failing eyesight and blunt pencil allow.  [wink]

Peter
 
Peter Parfitt said:
orm8426 said:
[....

This was exactly my thoughts when Peter recommended a drill over the router. Can't follow this particular logic in using the drill over a router, especially given Peter's normal approach to accuracy and tight tolerances.

It may take another 6-8 weeks but I hope to be able to set your mind at rest that I still strive to be as accurate as my arthritic hands, failing eyesight and blunt pencil allow.  [wink]

Peter

Look forward to it.  I watch almost all of your videos.
 
Peter Parfitt said:
orm8426 said:
[....

This was exactly my thoughts when Peter recommended a drill over the router. Can't follow this particular logic in using the drill over a router, especially given Peter's normal approach to accuracy and tight tolerances.

It may take another 6-8 weeks but I hope to be able to set your mind at rest that I still strive to be as accurate as my arthritic hands, failing eyesight and blunt pencil allow.  [wink]

Peter

I look forward to seeing your results! :)
 
I use the Festool 20mm spiral groove cutter, after plunging with a standard 12.7mm kitchen fitters bit to take away some of the material first (overkill I expect).

Part no. 490947 I believe.
 
My approach is not to use layout lines or try to judge where to drill (or rout) holes

I use a 6mm bit. 30mm hinge bit, holy rail distance stops and LR32 base to make a template
[attachimg=1]
Then the template, 30mm guide bush and 20mm hinge bit to drill the grid.

The only layout I did (AFAIR) was to position the 2 rows of 6mm registration holes.

As you can see I fogot to drill 1 hole in the template in the picture but it was trivial to reposition the guide rail to drill the missing one.

PS
Infact having just thought about the process no template is needed and only a couple of sanity check marks. The process would be:

Use the LR32 end stop and distance stops to make 2 rows of 6mm positioning holes 96mm spacing (the LR32makes this trivial) at some random distance from the long edge (make sure they are clear of a 96mm hole position)

Then using the rail and end stop, or stops, with the distance stops set to 96mm use the 20mm hinge bit to drill every 3rd position.

The distance stops together with the 6mm positioning holes give longitudinal accuracy. The rail with 1 or 2 end stops give latitudinal accuracy.

The only slight problem is that because of the end stop screw you can't rout a 20mm hole very close to the end stop. But of course you can trim the work surface after routing the grid.

This of course is assuming you have the LR32 setup.


Attachments

  • image.jpg
    image.jpg
    126.4 KB · Views: 1,244
Back
Top