So I finally pulled the trigger on the MFT/3 and TS-55 REQ combo. The MFT/3 came Thursday but I didn't get to open it up until today so here we go…
Packing:
It's a big box and pretty heavy so if you need to bring it up or down stairs be prepared for that. It's a bit awkward one person but workable if you need to do it. The table itself is completely assembled, you just need to pull it from the box and open the legs and tighten down the hand screws. One of the legs has a leveling foot that you can use to stop any rocking if the table is on an uneven surface.
Stability:
Pretty good, it's not rock stable but decent. Might get the stabilizer bars to see if they firm it up any more but it's not bad as it is. I think I can stand by my assertion from checking them out in dealer demos and such that it's not stable enough to hand plane on but I probably would hand saw dovetails on it without any issue.
Assembly:
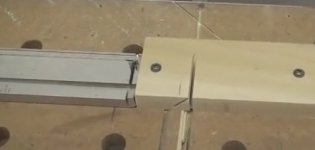
The rest of the kit goes together pretty easily. Festool documentation as usual is pretty sparse. Youtube has lots of videos on setup though so no problem. Got everything together and squared up the gauge pretty simply following this video:
I may still do a little adjusting but it seems like the protractor, after a slight bit of adjustment, is quite well squared and testing cuts and flipping them around shows that the cut is even top to bottom so I think we are pretty good to go.
Accessories:
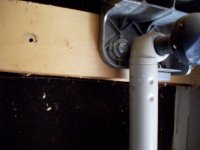
Stop flag is nice, but for pieces narrower then the track width there's not really any way to measure for repeat cuts other then marking the piece and lining it up to the track. Track risers work well but when the piece you are cutting is small, you have to make sure to not put any weight on the track so it doesn't bow before you lock the risers. Hose deflector doesn't work too well but I think that is because of the angle of the plug it cord on the TS-55 REQ. It sort of sticks out sideways so the power cord wants to hang to the left of the rail where the hose wants to be on the right of the rail. Might need to velcro them together at a few points so they stay over the deflector. The fence clamp works well and really tightens up the fence. My only beef is that the locking bar is a pain because it is too far forward when it is open so I can't slide the fence with it attached, I need to move the fence clamp into place and lock it down then move the fence to the fence clamp. I may need to see if I can unscrew the locking bar and move it a little so it's not in the way.
Usage:
Spent the afternoon playing around cutting up 1/4" ply to make up inserts for a systainer to hold my abrasive collection which is growing extensively") I ordered a Systainer IV that will probably get here next week sometime but I am using the TS-55 systainer to get the measurements right for the inserts. My table saw is in a small one car garage with out a lot of room around it so when I need to use it, it requires me clear some room and to pull it away from the wall. I suspect that I will be using the table saw a lot less now. Additionally using the MFT with the OF1010 is probably going to cut down on my router table use too which has similar issues with space in the garage. I do need to get the clamping elements for sanding though, I can tell that already. For sander use I don't find it to be much different then using my regular bench but it does have a nice setup for clamping so I think as an assembly table it is going to work nicely as well.
I ordered a Systainer IV that will probably get here next week sometime but I am using the TS-55 systainer to get the measurements right for the inserts. My table saw is in a small one car garage with out a lot of room around it so when I need to use it, it requires me clear some room and to pull it away from the wall. I suspect that I will be using the table saw a lot less now. Additionally using the MFT with the OF1010 is probably going to cut down on my router table use too which has similar issues with space in the garage. I do need to get the clamping elements for sanding though, I can tell that already. For sander use I don't find it to be much different then using my regular bench but it does have a nice setup for clamping so I think as an assembly table it is going to work nicely as well.
Bottom line:
I like the table a lot. Overall I am very happy with the purchase. The only downside is that it opens up a whole new set of expensive Festool accessories that I need to get
I was on the fence for a year on it, it is a lot of money for what seems like something that could be duplicated, maybe improved on for less money on my own but the fact is, out of the box it is very useful and the accessories will all work without any hassle. As has been mentioned on other threads, the MFT/3, or something like it, is really a core piece of the Festool system. You really get a better idea of how much can be done with the tracks and how much thought goes into the other tools when you start plugging them together in the table. While I understand completely that the table is expensive, and as a hobbiest/DIY guy it was tough to justify that outlay of cash. It really does make so many operations so much easier and smoother though that I think in a very short time I am going to wonder why I waited so long on it.
And that is my Day One thoughts and impressions of the MFT/3.
-Jim
Packing:
It's a big box and pretty heavy so if you need to bring it up or down stairs be prepared for that. It's a bit awkward one person but workable if you need to do it. The table itself is completely assembled, you just need to pull it from the box and open the legs and tighten down the hand screws. One of the legs has a leveling foot that you can use to stop any rocking if the table is on an uneven surface.
Stability:
Pretty good, it's not rock stable but decent. Might get the stabilizer bars to see if they firm it up any more but it's not bad as it is. I think I can stand by my assertion from checking them out in dealer demos and such that it's not stable enough to hand plane on but I probably would hand saw dovetails on it without any issue.
Assembly:
The rest of the kit goes together pretty easily. Festool documentation as usual is pretty sparse. Youtube has lots of videos on setup though so no problem. Got everything together and squared up the gauge pretty simply following this video:
I may still do a little adjusting but it seems like the protractor, after a slight bit of adjustment, is quite well squared and testing cuts and flipping them around shows that the cut is even top to bottom so I think we are pretty good to go.
Accessories:
Stop flag is nice, but for pieces narrower then the track width there's not really any way to measure for repeat cuts other then marking the piece and lining it up to the track. Track risers work well but when the piece you are cutting is small, you have to make sure to not put any weight on the track so it doesn't bow before you lock the risers. Hose deflector doesn't work too well but I think that is because of the angle of the plug it cord on the TS-55 REQ. It sort of sticks out sideways so the power cord wants to hang to the left of the rail where the hose wants to be on the right of the rail. Might need to velcro them together at a few points so they stay over the deflector. The fence clamp works well and really tightens up the fence. My only beef is that the locking bar is a pain because it is too far forward when it is open so I can't slide the fence with it attached, I need to move the fence clamp into place and lock it down then move the fence to the fence clamp. I may need to see if I can unscrew the locking bar and move it a little so it's not in the way.
Usage:
Spent the afternoon playing around cutting up 1/4" ply to make up inserts for a systainer to hold my abrasive collection which is growing extensively
I ordered a Systainer IV that will probably get here next week sometime but I am using the TS-55 systainer to get the measurements right for the inserts. My table saw is in a small one car garage with out a lot of room around it so when I need to use it, it requires me clear some room and to pull it away from the wall. I suspect that I will be using the table saw a lot less now. Additionally using the MFT with the OF1010 is probably going to cut down on my router table use too which has similar issues with space in the garage. I do need to get the clamping elements for sanding though, I can tell that already. For sander use I don't find it to be much different then using my regular bench but it does have a nice setup for clamping so I think as an assembly table it is going to work nicely as well.Bottom line:
I like the table a lot. Overall I am very happy with the purchase. The only downside is that it opens up a whole new set of expensive Festool accessories that I need to get
I was on the fence for a year on it, it is a lot of money for what seems like something that could be duplicated, maybe improved on for less money on my own but the fact is, out of the box it is very useful and the accessories will all work without any hassle. As has been mentioned on other threads, the MFT/3, or something like it, is really a core piece of the Festool system. You really get a better idea of how much can be done with the tracks and how much thought goes into the other tools when you start plugging them together in the table. While I understand completely that the table is expensive, and as a hobbiest/DIY guy it was tough to justify that outlay of cash. It really does make so many operations so much easier and smoother though that I think in a very short time I am going to wonder why I waited so long on it.
And that is my Day One thoughts and impressions of the MFT/3.
-Jim
")