gnlman said:
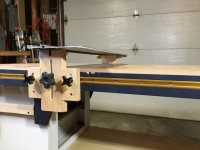
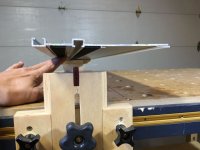
I find that if I put the material under the rail before adjusting the height the rail lays flat on the material and keeps the back hinge from going out of square, then bring the front guiderail support up til it touches the guiderail and it stays square for me...
This is a great, simple tip that I'll start doing from now on.
Ive had all the same trials and errors that many others have had, detailed in the many posts on the subject. After scanning the posts, I bought the parf dogs, qwas dogs and slop stop. Those additions have improved my cuts but I'm not completely satisfied with the entire process - still having off-square cits more frequently than what i expected from such a high-quality line of tools.
lately I've been setting it up as follows: I line up the guide rail on both supports without tightening the rail to the back support. I then loosen and slide the stops that lie on the edge tracks out of the way so both support brackets are free to move. Then I align the guide rail to two dogs placed vertically to the left of the rail and clamp them both supports down. This takes any track stop alignment errors out of the equation. To avoid having the business end of the guide rail fall across the centers of holes, i use the fence as a spacer between the dogs and rail. That places the rail nicely so i don't cut across holes. Then i tighten the rail to the back support while making sure the rail stays snug to the spacer/dogs. I tighten the back/bottom support screw with the allen wrench and only hand-tight on the front/top one - as recommended in one of the videos from a festool cabinets class. Next I set up the fence, squaring it to two dogs placed behind it. Once I'm confident that is properly aligned with the dogs / holes , I carefully tighten the fence clamp on the end of the table making absolutely sure that it doesn't knock the fence out of alignment . Those dogs basically reside behind the fence any time I'm using the fence so a quick eyeball will verify that the fence is square to the holes. a periodic lift of the dogs to hear that they are still in contact is a good double check. Note: the dogs I use for the fence are the low profile ones so i can get them spaced out laterally as far as possible without interfering with the guide rail. Lastly, I'll set the height of the rail using the actual work piece as a reference, then clamp both supports down tight. I do a final check of square by using a high-quality square between the fence and the rail with the rail now at the final height.
As mentioned many times before on FOG, if I have to adjust the height of the support brackets for different material thickness, the chances of it remaining square are slim to none because of the rock or tilt of the brackets when loosened. In that case I will re-verify square with the same high quality square, sometimes you repeating the entire process just to make sure.
Now, having done all that I find that I have to continually check for square, as often as after every three or four cuts when the cuts really count, making sure theres no debris along the fence, or tearout on the material that could interfere with the cut. Sometimes I find that it remains square for a while, and sometimes I find that if I so much as look at it, the squareness is lost.
I'm going to add raising the supports to the proper material thickness with the actual material still underneath the rail so the supports come up evenly without any tilt (thanks for the tip).
I'm not ready to give up on it, but it seems like i spend a lot of time worrying about the squareness, especially on those important cuts. The only sure-fire, absolute certain way to get a square cut in my opinion is to use rail dogs and bench dogs exclusively, eliminating the protractor and support brackets altogether so that everything is perfectly aligned to the grid. However, one of the things that originally drew me to the mft was the flag stop adjustment being readily available and easily adjustable as well as being able to lift the rail to get work pieces in and out and set it back down without having to worry about the squareness of my cuts, effectively speeding up the process greatly.
This forum has been a great resource for me, and i appreciate the participation from those with a lot of years of experience behind them.
Edit: failed to mention that I tighten the support brackets down tight with the knobs after tightening the rail to the rear bracket, making sure the front bracket's pin is properly engaged in the slop stop, and when i'm confident that the rail is perfectly aligned to the grid. Ill then move the track stops back into position and tighten them down but it's not necessary given that i always loosen them to align the rail anyway. I guess this is just so i dont forget to tighten them back down and lose them when i go to break down the table.