Midcentury Renovation - in deep over my head

A cheap option for counters will be tile.  Lucky for you there are all kinds of new modern ceramics in great sizes as well.  I'm setting a floor using 12"x24" and its less then $4 a foot. 

I get all my tile and solid surface from OTM(oregon tile and Marble).  There flagship store is in Portland so go check it out.

www.oregontileandmarble.com/home.html

If your going to do laminate consider getting the panels already done.  Lots of time savings. 

Another option which would be much easier would be Corian.  My wholesale wood supplier sales Samsung Corian in colors that compare to quartz at a fraction of the cost.  The plus is the material can be machined with woodworking tools such as saws and routers.  The material can also be glued to build thicker edges and integrated backsplashes.  This would easily match your design and you could do the fabrication and installation.

www.staron.com/staron/eng/products/introducing.do

 
Wow, I'm really impressed with the depth of knowledge and the generosity - it's more than I expected. Thanks!

As for ripping the plywood I had no idea about the internal stresses. I suppose I should have figured it as metal can have that but more often we're controlling distortion from welding and there's always springback when making a big cut on steel or aluminum so you always make your finish pass a light cut. Same thing I guess.

I did try to keep all my panels with clean cuts. I made my rips from the factory edge and kept the inside strips for the correct width and leaving the first strip to be ripped narrower for shelves. It never occurred to me to start in the middle and I'll try that when I go to build the first thing that "counts" which will probably be the bathroom vanity. That will be my first experience with prefinished ply.

Also, I used the wrong terminology when I said "skin" because I meant facing with 3/4 walnut veneered plywood and not actually using veneer. I know that's beyond my skill set. If all the boxes are made in the prefinished maple than the rest is a matter of making very consistent and very square drawer/door fronts and end panels that I'd either edge band or cut hardwood strips to band. Undecided.

As for counters, Mark, I love the look of the apple ply you did. In fact that whole kitchen and the cabinets is just stunning! I love the playful way the doors are cut for handholds and I hope to do that with the kids room in apple ply. They're very excited for a bunk bed. I am considering doing that for the cool look of the edge - it's very period looking and is also very slick and clean. When we first talked about the counters we considered Corian and I'd like to do that but I think that the cost would be prohibitive. When we found the Karran sinks it sort of sealed the idea for the laminate. We did consider other surfaces but with all the wood in the house and the dark walnut we're planning on for the cabinets we really want the white as a counter point. My wife isn't a fan of retro and prefers the "modern" aspect of midcentury modern. I'm not a fan of retro for the sake of it either actually and love midcentury for what I consider the timeless feel. It also helps that it's not a very complicated method of building. I thank my lucky stars every day that I'm not doing a victorian!

Again, thanks so much for the advice and help. I will really lean on you guys as I get into this.

Gregor
 
sakurama said:
I made my rips from the factory edge and kept the inside strips for the correct width and leaving the first strip to be ripped narrower for shelves.

Ya, try not to use the factory edge for anything other than resting the sheet on the floor.

sakurama said:
I'm beyond remedial in Sketchup so I just use paper and I have some travel coming up that will give me time to start to draw out the cabinets and make a cut list.

I saw some of your sketches on your GJ site and they are very good, tons of detail.
After you are all done you should frame a couple.

Tim
 
I'm a firm believer in full support under a panel when you cut it. Supported just on horses the panel can dip, causing problems. You also need to avoid side thrust on the saw as you cut, it can cause discrepancies in cuts also.

Nice job on everything by the way.

Tom
 
Nice job. We just finish remodeling our kitchen 1960. To save cost consider using High density particle board from Roseburg Oregon, $27 a sheet versus $80 plus for high quality plywood. Our cabinet maker recommended it and after some serious research agreed with his recommendation. I have been using it on different projects and the only draw back it is heavy and it will dull you Domino bits.

For counter tops we used at our cabin 24x24" ceramic tiles butted together. $11 a square foot, best work surface I ever had in kitchen.

Sinks at build.com, Kraus 16g steel with faucet 500-600 dollar best buy out there we have been using it for 6 months and it is great.
 
Hi Gregor,

WOW! [not worthy]

I've read what you've posted here and on the Garage Journal, and am in awe.  [eek]  My wife and I started on our much more modest house remodeling in April 2012 (and on a much more modest house!). We're both retired and don't have to fly coast to coast to a job, rear two youngsters, etc., and we still ain't done! How do you do it? Keep up the good work and the good reports.

Regards, Dick
 
sakurama said:
Ha! If there was a forum for the OCD this might be it. Probably why I like it here.

Jobsworth: I watched almost all of Joe's videos and they're very good. I like the no nonsense way he approaches stuff. It very much reminds me of my step dad who did a great job but was all about just getting it done as fast and efficiently as possible. I do completely realize that I could be slamming the garage cabinets together really quickly to get them done but I'm also using them as a learning experience for doing the kitchen cabinets so I'm being a bit anal and overly meticulous. Partly because I'm learning and don't know yet where I can get away with compromises and partly because it's my nature.

I've done a lot of research on methods of construction and I chose to use the domino's because they really help with alignment and they're strong. The garage cabinets are going to be mounted high up and hold a lot of weight. I want to overbuild them so that they never rack, sag or collapse and won't have any trouble holding a few hundred pounds. I don't yet have the sense of how strong that is or what methods will get me there so that's the reason for this thread - to learn from others. You've convinced me to forgo the pocket screws which I like but find a bit fussy and slow. If there's no disadvantage to just screwing them I'll do that. They're going to butt up against each other in one big row so I could just use end caps to cover the screws if I wanted to - but it's the garage so I probably won't.

In watching a lot of videos from the Fine Homebuilding site I see people use screws and glue and then clamps to help square them. How much does the glue help? I've heard that it's stronger than the screws and so it was my intention to glue these. If using screws the clamps only purpose is to assist squaring them right?

Thanks guys. It's very nice to get the support and kudos from the GJ thread but here I expect criticism and suggestions because you guys are the pros. I know there are a lot of ways to skin a cat so I want to practice "best methods" and learn where I can make compromises as I go. I hate doing things half assed but I'm not opposed to finding quicker or easier ways because I'm an inherently lazy perfectionist - if that makes sense.

Gregor

I use the domino to. What I do is use 2 dominos one on each side of the cab to align and straighten the joint then use 2 screws inbetween to secure the sides. This makes a incredibly strong joint. Like Joe, I dont use glue mainly because its a added step that I dont need to do b/c of the strength of the joint and if there is a problem I can readily take the cab apart and make the corrections and reassemble to square the carcase there are 2 methods I use.
1) Use the nail strips to square it up(pieces installed in the back of the cab to attach it to the wall

and or

2) a method I learned from Paul Levines video and book,  cut the back piece of ply about 1/8-1/4" larger then the cab. screw 3 corners of it on the back of the cab, take a square, square up the cab and screw in the 4th screw finish attaching the back panel , take a router and trim the panel.

there are a lot of methods to skin a cat these 2 seem to work for me.
 
Okay, I have some progress to report and of course some questions for the pros and experienced woodworkers.

i-SqBSbQN-XL.jpg


So I bought a 3000 rail and that helped a great deal with consistency. I also sold both of my MFT 1080's after taking some time to really look at the newer MFT/3 and deciding it was in fact a much better table. These changes helped a great deal and my next batch of panels for the cabinets were all within 1mm.

i-2tjf7Vf-XL.jpg


I also picked up an MFK which makes edge banding, well, not the most fun task but certainly fast and simple and clean. I'd go so far as to say it's enjoyable. I could never go back to one of those hand trimmers and their inconsistency.

i-ZHjZQrW-XL.jpg


I intended to spray the cabinets but after making a makeshift booth it was just too much mess and all the overspray was making the coats fuzzy. Sounds crazy but since I'm using satin I was able to get a very nice finish with a roller.

i-r2RfFqs-XL.jpg


i-8XhkzQh-XL.jpg


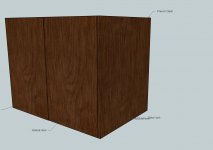
So I now understand one of the limitations of the french cleat across a number of cabinets - the inconsistencies add up. You can see in that upper photo that I used a jigsaw to notch a space for the cleat. I don't like that solution. It felt sloppy. In order to get the cabinets to all align I had to lift each one and clamp them together and then I drilled a 5mm hole through (in line with my 37mm row) and used a panel screw to hold them aligned. It worked but I'm sure that it's compromised some of the cleats interface. I think from now on I will go with traditional nailers and then use a jig to hold the boxes level and in place and then drill though the nailers. Are there other options? Would it have been better to not have inset the back?

i-NRCMX3n-XL.jpg


i-XGxs723-XL.jpg


Since I had mistakes that I wasn't keen on repeating I decided to make a Sysport to work on my box skills and learn about drawer slides.

i-ZVfWQ2V-XL.jpg


i-3jGVWtN-XL.jpg


i-sR55WcW-XL.jpg


The good part was that my boxes were dead nuts square and perfect. Both to the mm on diagonals. That was the good.

The bad is that I was so accurate that I didn't give any space for the Systainers as I measured them and the slides and used that. And it was too tight. Also I didn't really test fit them to figure out that the 37mm was for the false front drawers which I didn't want. So I set them by hand with the Systainers to get my spacing. It worked but I had to offset the ply high in the slide which wasn't ideal. The newer Systainers fit much better as they're beveled at the bottom so I think I need to replace all my older tools. Kidding! Sort of.

i-P48NdZ9-XL.jpg


i-JJS7DXk-XL.jpg


In the end I got it together and it works fine. It's not perfect for sure but again I learned a lot which was the point.

Finally I tackled an actual house project. The downstairs bath vanity. I used glue as I found I like the tightness I get with it. And more dominos.

i-4T9mVr7-XL.jpg


That tear out is from the bottom of the cut on the MFT - how do you prevent that? Going slow certainly helps but not enough.

i-Bp96TGg-XL.jpg


This box worked out really well so far but I have yet to finish it and hang it. Hopefully Monday.

So, other questions: Occasionally I'll have pocket screws drive through and point out the side of the mating piece. I suspect that this is almost entirely the fault of the Home Depot plywood but I've had it happen with the better shop grade birch I got from my lumber supplier. I've set the depth less but still it seems to happen if I torque it enough to really tighten the boards. I'm using the Ti-15 and maybe I shouldn't? Thoughts?

Also, another pain in my axe - if I cut my dado with the router it always will reference off the back of the cabinet so when you drop in your back panel the back is forced into alignment and not the front. Obviously you'd like your parts to be exactly the same size but if I'm 1-2mm out it it shows up on the front. What's the solution other than not screwing up the depth cuts?

I think I had another question but I can't think of it right now so I'll try to remember it.

Thanks!

Gregor
 
Good job man.  Very inspiring!

On your second to last photo with the dominos... looks like you set them to all be "floating".  If that is the case, I would set your first domino (the one nearest the front of the cabinet) to be exact.  No slop in it at all on both parts of the box.  Then do your others towards the back with some wiggle room.  You will be amazed on how easy it is to piece together these things.  Great alignment tool!!

Interested in where you head next.  Chin up man... I know that is a lot of work.

One other thing... on referencing your dado for the back.  Are you using a router to cut it?  If so, (and it is a festool) line up all four parts of the box by the front edge... lay down your rail and route out the back slot in one foul swoop.  If you are using a table saw, I am sure some others have some help on that subject, I have never had a decent table saw... hence the TS55.  [big grin]
 
Wow, both very good ideas. I did use a guide rail for my first cabinet (with the 1010) and it worked fine but the did the others with the 1010 and the MFK and the edge guide as it seemed easier.

Doing that will take the fear out of a zero clearance domino.

Thanks!

Gregor
 
For the pocket screws.... don't crank them in so hard. It sounds like you are probably crushing and compressing the wood fibers at the bottom of the pocket hole and shortening the distance you need.

Try using a driver with a clutch and set it to just snug up the screw to the bottom of the hole. If you think you need to get the pieces tighter together (and it sounds like you do) then put a couple of clamps on the piece and tighten it up before screwing. Put your pocket screws in and then remove the clamps.
 
For the tear out I find the blade you use in the TS 55 makes a difference in the amount of tear out you get. If you want to use the rail for routing you dado I recommend you use the Edge Stop - 485758 from the LR 32 set to set you rail consistently from the front.

I use the Edge Stop constantly with my rails to set up cuts from 2mm to around 44 cm. I have the parallel guides but the Edge Stops are easier to set for small numbers of cut or for routing dado consistently on multiple panels.

Try this clamp http://www.rockler.com/how-to/pock-it-hole-clamp-mdash-every-shop-should-have-a-few/ . Then don't over tighten the screw.

Good luck and nice job

Bruce 
 
Thanks, I'll pick some of those clamps up and switch to the C12 for screwing them in. I guess an impact was the wrong choice. I suppose it's just common sense but I thought the point of pocket screws was to avoid having to use clamps. Well, another practical lesson learned. I feel like most of the lessons I learn are like the joke about the guy who goes to the doctor and says it hurts when I do this (whatever) and the doctor says, we'll, don't do that. That's the sort of thing I have to learn it seems.

I'm using a fine blade on a TS75 as I took the option of a swap when the recall happened. I really love the saw and the power so maybe I'll look at a Tenyru blade for it.

I did try the guide rail with the parallel guides early on but I think my panels were off so I threw the idea out with the bath water so to speak. I'll revisit that. I think I'll watch eRocks cabinet series again...

Thanks guys!

Gregor
 
BMH said:
For the tear out I find the blade you use in the TS 55 makes a difference in the amount of tear out you get. If you want to use the rail for routing you dado I recommend you use the Edge Stop - 485758 from the LR 32 set to set you rail consistently from the front.

I use the Edge Stop constantly with my rails to set up cuts from 2mm to around 44 cm. I have the parallel guides but the Edge Stops are easier to set for small numbers of cut or for routing dado consistently on multiple panels.

Try this clamp http://www.rockler.com/how-to/pock-it-hole-clamp-mdash-every-shop-should-have-a-few/ . Then don't over tighten the screw.

Good luck and nice job

Bruce 

I just invested in the Precision Parallel Guides this week and let me tell you it is a VERY nice all-in-one solution!  It is like combining the edge stops, parallel guides and thin stock guides in one. I am going to be writing a review soon but very flexible option for a nice price tag.
 
sakurama said:
Thanks, I'll pick some of those clamps up and switch to the C12 for screwing them in. I guess an impact was the wrong choice. I suppose it's just common sense but I thought the point of pocket screws was to avoid having to use clamps. Well, another practical lesson learned. I feel like most of the lessons I learn are like the joke about the guy who goes to the doctor and says it hurts when I do this (whatever) and the doctor says, we'll, don't do that. That's the sort of thing I have to learn it seems.

I'm using a fine blade on a TS75 as I took the option of a swap when the recall happened. I really love the saw and the power so maybe I'll look at a Tenyru blade for it.

I did try the guide rail with the parallel guides early on but I think my panels were off so I threw the idea out with the bath water so to speak. I'll revisit that. I think I'll watch eRocks cabinet series again...

Thanks guys!

Gregor

Might also want to get some of the woodpecker BC4-M2 clamps. Great for pocket hole work. They might still be on sale through woodpecker.com
 
Hi there,

I haven't been posting here because I haven't really had any questions but progress has been good. We finally moved in which is a real godsend but I still have a boat load of work to do to get the place livable. Well, closer to finished. I'm learning that a house is never actually finished.

Anyway, here's a few photos of the progress.

Garage cabinets are done and came out well.

i-XGxs723-XL.jpg


Built a rolling Sysport to fit under a bench/miter station.

i-JJS7DXk-L.jpg


i-H6zw96x-XL.jpg


i-Sq5jWx2-XL.jpg


i-rhv6WTW-L.jpg


i-fT87BNN-XL.jpg


For my upstairs vanity I decided on Domidrawers over dovetails which I'm happy with.

i-tgBJr8Q-XL.jpg


i-qhssqHn-XL.jpg


i-XjK4gS2-XL.jpg


Then began work on the kitchen carcasses and counters.

i-5KqRgjM-XL.jpg


i-Gsmk4hX-XL.jpg


i-pCbNJhk-XL.jpg


Then we moved in. Yeah!

i-RDvtMQt-XL.jpg


i-Sw6VLzP-XL.jpg


Okay, that's enough of an update for those who haven't followed my Garage Journal thread where I detail the whole thing.

Now for my question.

Today I'm building the upper cabinets for the kitchen. Much like the upstairs vanity they will have walnut ply doors and sides - anything exposed. I am using prefinished maple for the top and bottom panels of the cabinets and the shelves and walnut for the sides and doors since they'll be visible. Obviously the walnut is not prefinished. What's the best time to finish those panels?

My build method is to rabbet a 12mm on the full back of all sides to fit a flush 1/2" prefinished maple back (the back wall is 3/4" ply so I don't need nailers). The walnut sides are going to be drilled 37mm back from the front and a suitable number from the back for Euro style shelving. I will use dominos and glue to hold the cabinet together so there's no screws visible anywhere.

My best guess is that I should edge band, sand and stain (we want a darker walnut) the walnut first and then apply the satin polyurethane that I'll be using for finish taking care to tape out the 18mm top and bottom that will join to the upper and lower panels. This would basically give me a "prefinished" walnut panel that I could then drill the system holes and domino mortises into.

Does that sound like the best method?

Gregor
 
You wrote:

Now for my question.

Today I'm building the upper cabinets for the kitchen. Much like the upstairs vanity they will have walnut ply doors and sides - anything exposed. I am using prefinished maple for the top and bottom panels of the cabinets and the shelves and walnut for the sides and doors since they'll be visible. Obviously the walnut is not prefinished. What's the best time to finish those panels?

My build method is to rabbet a 12mm on the full back of all sides to fit a flush 1/2" prefinished maple back (the back wall is 3/4" ply so I don't need nailers). The walnut sides are going to be drilled 37mm back from the front and a suitable number from the back for Euro style shelving. I will use dominos and glue to hold the cabinet together so there's no screws visible anywhere.

My best guess is that I should edge band, sand and stain (we want a darker walnut) the walnut first and then apply the satin polyurethane that I'll be using for finish taking care to tape out the 18mm top and bottom that will join to the upper and lower panels. This would basically give me a "prefinished" walnut panel that I could then drill the system holes and domino mortises into.

Does that sound like the best method?

----------------------------------------------
Place looks great

So you are going to rabbet the back and then screw the cabinet it to the wall?  I think you might want more holding strength than just a rabbet and nailed/glued back.  1/2 inch back in a rabbet won't hold well with Dominos if I understood your method.  Perhaps a dado set in and then using top and bottom 3/4 nailers to give you more support with those Dominoed to the sides and glued to the back??  Then you can screw through those to the wall, or use a french cleat.

Did you do a 1/2 back in a rabbet and then screw to the wall on the vanity?  It looks to be floating, so curious how much strength you have there.

As to finishing, I'd suggest you do all the milling on the sides - dominos, dado's, holes for shelves, etc.  Then assemble and do final staining and spraying.  I just don't have good luck with pre-finishing completely and then assembly.  Something always seems to 'ding' the sides in some way.

neil
 
Great job thus far.  I was thinking about this thread the other day so I'm glad you popped up.  The vanity looks great and I like the drawers.  Keep the pics and updates coming.
 
neilc said:
----------------------------------------------
Place looks great

So you are going to rabbet the back and then screw the cabinet it to the wall?  I think you might want more holding strength than just a rabbet and nailed/glued back.  1/2 inch back in a rabbet won't hold well with Dominos if I understood your method.  Perhaps a dado set in and then using top and bottom 3/4 nailers to give you more support with those Dominoed to the sides and glued to the back??  Then you can screw through those to the wall, or use a french cleat.

Did you do a 1/2 back in a rabbet and then screw to the wall on the vanity?  It looks to be floating, so curious how much strength you have there.

As to finishing, I'd suggest you do all the milling on the sides - dominos, dado's, holes for shelves, etc.  Then assemble and do final staining and spraying.  I just don't have good luck with pre-finishing completely and then assembly.  Something always seems to 'ding' the sides in some way.

neil

Thanks. I was thinking about that this afternoon and realizing that I need a dado and not a rabbet. Everything I've done so far has been dadoed (is that the spelling?) so I guess I was thinking I could streamline it with the rabbet but then, of course, it wouldn't be nearly as strong. The back of the vanity is 3/4 with about 40-50 pocket screws around the back and it's screwed into studs on two sides.

i-sM8TTPQ-XL.jpg


That back panel is pocket screwed in pairs every 6" and it's glued as well. It's bombproof. I suppose I could do something similar but I have the 1/2" for the backs already. A dado seems like a simple and classic and most importantly strong way to do this.

I think my question was more about mixing prefinished and unfinished. I suspect that it would be very difficult to try to finish only the walnut panels after it's all built - at least that's what I was imagining. We are looking for a darker walnut so I'm experimenting with stains right now. I suspect I'm making this more complicated than it needs to be. Go figure.

rnt80: Sorry, I don't think I could keep this and my blog, and my Garage Journal posts both up to date so you could always check that out every once in a while. I can't even keep the blog updated. I read FOG every day and have been watching erocks video series (good job man!) and picking up tips as I can. This has been great resource for me. I tend to post here when I can't find the technical advice I need. Of course the longer I'm at this the more I'm learning and the less help I need. That's a nice thing.

Thanks,

Gregor
 
sakurama said:
Today I'm building the upper cabinets for the kitchen. Much like the upstairs vanity they will have walnut ply doors and sides - anything exposed. I am using prefinished maple for the top and bottom panels of the cabinets and the shelves and walnut for the sides and doors since they'll be visible. Obviously the walnut is not prefinished. What's the best time to finish those panels?

I always want to finish the panels before I attach them unless there is a reason I can't.

sakurama said:
My best guess is that I should edge band, sand and stain (we want a darker walnut) the walnut first and then apply the satin polyurethane that I'll be using for finish taking care to tape out the 18mm top and bottom that will join to the upper and lower panels. This would basically give me a "prefinished" walnut panel that I could then drill the system holes and domino mortises into.

Does that sound like the best method?

Gregor:
Alternatively you could save yourself some time and just add the finished Walnut end or gable panels to the prefinished cabinet boxes. You could attach the cabinet with a french cleat like you did with the Garage cabinets but cover the cleat with the Walnut gable end.

Here's an exploded view...
[attachimg=#]


and an assembled view

[attachimg=#]
 

Attachments

  • WalnutCab.jpg
    WalnutCab.jpg
    185.2 KB · Views: 1,152
  • WalnutCabAssembled.jpg
    WalnutCabAssembled.jpg
    254.2 KB · Views: 1,107
Back
Top