Murphy Bed knock-down hardware - Domino Connectors?

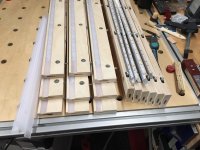
I think you should be fine with the holes on either side.  The kit does come with little plastic covers that look reasonable enough if you have a light colored or white project.

You can always reference off the inside instead of outside face.  Use the base of the domino instead of the plate as your reference point.  Use an offcut that is the same thickness as your intersecting piece to flush up with the outside, then clamp another piece of wood (or even a square) to your workpiece to but your Domino base against.  The technique is pretty much exactly the same as doing a midpanel shelf; just at the end instead of in the middle.

 
With a DF700, I'm not going to reference off the base. The fence is actually quite good and is calibrated in actual distance from center on both scale and stop.
 
Michael Kellough said:
[member=74278]Packard[/member]  “ I used straight fluted dowels.  By rolling them on a hard surface under pressure with a flat file, I reduced the diameter for easy assembly.”

Thanks for the tip! I didn’t know that one.

I tested the modified dowels by “painting” them with water and assembling a right angle joint.  I let it sit overnight.  The dowels expanded from exposure to the water and I had to use a mallet to take the joint apart.

The flutes on this type of dowel are rolled (compressed) in, and they are designed to expand when exposed to the water in the PVA glue. 

The spiral cut dowels expand far less.

Like biscuits, store the dowels in an airtight jar.
 
Packard said:
The flutes on this type of dowel are rolled (compressed) in, and they are designed to expand when exposed to the water in the PVA glue. 

The spiral cut dowels expand far less.

Like biscuits, store the dowels in an airtight jar.

Yeah, there was some test done on YT and the spiral dowels weren't as strong as the fluted. That was surprising to me, since the spiral looks like they have more long grain contact area, but apparently expansion from glue moisture wins.

 
Actually, if you wet a fluted dowel and let it air dry, the surface expands and it is entirely smooth.  So you are getting close to 100% long grain surface.

Plus, as it expands you get a mechanical bond.

The same happens with biscuits which are likewise compressed.

Just don’t use a glue that has no water in it.
 
OK, so thanks to quick shipping from Tool Nirvana, I've got the D8 hardware, guide, and drill bit.

The plan is to use a mix of the connectors with some actual unglued dominos for alignment and sheer strength. Now, the question: should I use 8mm dominos to keep everything consistent, or should I use 6mm dominos since that's what I normally use on ¾" material?
 
smorgasbord said:
OK, so thanks to quick shipping from Tool Nirvana, I've got the D8 hardware, guide, and drill bit.

The plan is to use a mix of the connectors with some actual unglued dominos for alignment and sheer strength. Now, the question: should I use 8mm dominos to keep everything consistent, or should I use 6mm dominos since that's what I normally use on ¾" material?

When I use the connectors, I just leave the 8mm bit in the machine and go to town for all of the joints.  I can't necessarily change my mind about the connector access holes after they've been drilled, but I leave myself the option to change course if I haven't quite decided which I want to be dominos and which I want to be connectors when I'm doing the initial mortising.
 
With dowels, (and I assume with Dominoes), I can assemble with no glue but by wetting the straight fluted dowels which will swell making a decent mechanical bond.

You can’t just pull it apart, and constant flexing probably will loosen the joint, but you can break it down using a rubber mallet and a protective board to prevent damage to the assembly.

So, if the Domino does expand when exposed to moisture, then I would use the Domino connectors in conjunction with the wet dominoes.  (Wetting the mortise will add to the effect as the wood fibers will grow. 

If you live in Arizona, eventually the dryness will loosen the fit of the Dominos.  But it is an added mechanical strength costing no extra money or extra time.

I would encourage someone to test a domino using water only.  It takes a day for the wood to swell.

 
I've always used the 8mm mortises whenever using the connectors - even for wood dominos.

You'll still have 5.5mm on each side (instead of 6.5mm) of the tenon; and I think it makes sense to keep everything simple rather than risking using the wrong bits or depth because you haven't reset some aspect of the machine.
 
Here's some storage cabinets being built with LED lighting...8 mm for everything.

[attachimg=1]

[attachimg=2]
 

Attachments

  • 6823.JPG
    6823.JPG
    318.3 KB · Views: 137
  • 6831.JPG
    6831.JPG
    340.6 KB · Views: 138
Packard said:
With dowels, (and I assume with Dominoes), I can assemble with no glue but by wetting the straight fluted dowels which will swell making a decent mechanical bond.

You can’t just pull it apart, and constant flexing probably will loosen the joint, but you can break it down using a rubber mallet and a protective board to prevent damage to the assembly.

Hmm, not sure I want to do that for this project. This isn't like an Ikea bookcase that I would just move intact, it's a queen-sized bed with encasing box that would just fit though a door, but wouldn't make the turn down the stairs, so it'll have to come apart some day, assuming I don't die in this house.
 
OK, one more question on the connectors: I've seen Sedge unrotate the pin so that it's oriented properly to catch the set-screw from the other piece. I've heard Peter Millard worry that doing this releases pressure on the expanding wedge, which might weaken the joint. What is the best procedure? Is it to tighten the pin pretty tight (PT, as opposed to PDT (Pretty Damn Tight), as opposed to PFT, which you can guess) and then loosen? Or to guess how tight one can go and end up with the proper orientation?

Cheese said:
Here's some storage cabinets being built with LED lighting...8 mm for everything.

Cool. Just a note that I recently replaced the understep lights in my suken living room with new model COBs that have a built-in diffuser and give off very even illumination where you don't have space to put the leds in a channel with separate diffuser. And they were pretty cheap, too.
https://www.amazon.com/gp/product/B091KH7ZV5

[attachimg=1]


Attachments

  • Screenshot 2024-12-11 at 11.07.56 AM.jpg
    Screenshot 2024-12-11 at 11.07.56 AM.jpg
    58.5 KB · Views: 142
smorgasbord said:
Packard said:
With dowels, (and I assume with Dominoes), I can assemble with no glue but by wetting the straight fluted dowels which will swell making a decent mechanical bond.

You can’t just pull it apart, and constant flexing probably will loosen the joint, but you can break it down using a rubber mallet and a protective board to prevent damage to the assembly.

[…] assuming I don't die in this house.

It would save all the headaches associated with packing up an entire house filled with furniture, clothing, supplies, not to mention all the woodworking stuff.  I’m 76 and that is my biggest worry.
 
smorgasbord said:
OK, one more question on the connectors: I've seen Sedge unrotate the pin so that it's oriented properly to catch the set-screw from the other piece. I've heard Peter Millard worry that doing this releases pressure on the expanding wedge, which might weaken the joint. What is the best procedure? Is it to tighten the pin pretty tight (PT, as opposed to PDT (Pretty darn Tight), as opposed to PFT, which you can guess) and then loosen? Or to guess how tight one can go and end up with the proper orientation?
The wedge digs into the wood pretty darn well, I wouldn't worry about loosening the pin up to a half turn.  I've had cases where if I completely took it out, the wedge would get lost in the mortise and I could not get it back.  This is potentially user error, with a mortise that was too deep but something to watch out for.

The D14 connectors don't have this problem, because there is no separate wedge to drive the connector into the side of the mortise; the pin just pushes on them itself.
 
cpw said:
The wedge digs into the wood pretty darn well, I wouldn't worry about loosening the pin up to a half turn. 

Yeah, I just did some sample joints to test out my measurement, and for sure the wedges stay in the piece pretty well, which stays in the wood very well. I even tried banging the wedge down to loosen it, but I had to cut around the thing to get it out.

BTW, when the parts arrived, in separate bags in a box, some of the wedges were loose from the pieces. I ended up replacing the wedges and putting the pin in a few turns. I also pre-assembled the hex set screws into the other piece (just a turn and half). That makes for less pieces to deal with when pulling parts. FWIW, I had 3 extra set screws and one extra pin out of the 50. For companies doing this in volume, that pre-assembly is kind of a pain - something I'd have my 7 year old do for me back in the day, but that's so last century.

Now my problems are:
1) Depth. For some reason my DF700 is cutting 1.25mm-1.4mm deeper than the setting. That's not a problem with what I'm doing here, but I can certainly think of cases where a 16.4mm depth mortise instead of a 15mm depth mortise might be problematic. I can't figure out if there's an adjustment for this.

2) Locating the face mortise for a T joint. Some of this is caused by me using a DF700, for which the base is 15mm from the centerline, so that's out for ¾" plywood, but some is also caused by me wanting the edge mortises to be closer to the middle. I found that a 4mm spacer on top of the 15mm setting block when using the 10mm Domniplate centers the mortise well enough for me. But, now I have no reference against which to place anything on the DF700 against.

I ended up penciling the front face of the mating piece on the face of the panel into which I'm mortising, and then offsetting a tad over 9mm from there, using the side marks of the DF700 that indicate center of the bit. I also found that I have to use the bottom of those marks (which are themselves at least a 1mm thick), so there's that, too. I'm also using the TSO foot to stabilize, and it's got a center mark that's useful.

Any thoughts on depth trimming or locating on the face appreciated.

 
smorgasbord said:
OK, one more question on the connectors: I've seen Sedge unrotate the pin so that it's oriented properly to catch the set-screw from the other piece. I've heard Peter Millard worry that doing this releases pressure on the expanding wedge, which might weaken the joint. What is the best procedure? Is it to tighten the pin pretty tight (PT, as opposed to PDT (Pretty darn Tight), as opposed to PFT, which you can guess) and then loosen? Or to guess how tight one can go and end up with the proper orientation?

The Festool D8 connectors are made from a very malleable metal that has little/no spring-back. Once you crank it down to the PFT stage, it's been deformed and is starting to seriously engage the wood fibers. If you then back off on the fastener, the connector is still expanded and will continue to hold.
 
Here's a good example of what I was talking about in my last post. A photo of the connector before and after tightening.

[attachimg=1]

A photo of the connectors when all compression from the nut has been relieved.

[attachimg=2]
 

Attachments

  • 7781.jpg
    7781.jpg
    266.9 KB · Views: 112
  • 9561.jpg
    9561.jpg
    423.9 KB · Views: 112
So, to follow-up:
1) As I posted in another thread, I figured out a work-around to limit the cutting depth.
2) For my particular DF700, the domino centerline is at the bottom of the 1mm wide centerline at the sides of the fence unit. Yeah, that those centerlines that Sedge loves to talk about are good to have, but as they're cast in the aluminum, they're far too thick to be actually accurate. I end up placing the bottom of the centerline groove on my intended domino center and that works out, accurately enough for me at this stage (I wouldn't trust it for aligning panel glue-up, though, could be off by 1/4mm or so)..
3) I decided that the 10mm lowest fence offset is too much for my 18mm(plus a hair) plywood, so I'm using the Seneca 10mm Domniplate with a fence setting at 19mm. To get 19mm repeatably, I'm using a 4mm gage block on top of the 15mm depth block. That works great for the deeper domino mortises in the ends.
4) 30mm depth is OK even though 28mm is specc'd and even with my domino cutting over 31mm deep on that setting. It just means the connector with the pin doesn't get pushed all the way into the mortise before tightening the pin.
5) For locating the 15mm deep mortise in the face, where all of these a essentially "T" joints instead of corner joints, I'm placing the board with the end-cut mortises standing vertical on the face of the board needing the face-cut mortises, aligning that up exactly where I want it, then tracing around the board onto the face (which has making tape applied). I also mark the centerline of the end-cut mortises, which I left on those boards. Then I use calipers on the end-cut mortises to get the mortise wall thickness, add 4mm to get to the domino center, and than mark that centerline on the masking tape. Then I can, finally, line up the Domino and cut the face mortises (again using the bottom of the thick domino centerline marks on the DF700's fence sides).

It's a bit of intense measurement and lining up, but the pieces are fitting together well.

Another question is when to add actual un-glued dominos to these joints? The Murphy Bed is essentially a carcase whose purpose is to support two tall side panels, to which the bed pivot/spring mechanism is attached. The side panels are supported by the floor. So, the front kick, back bottom stretcher, and top panel are really just there to keep those side panels in place. As such, I'm not putting any actual dominos in those joints. There is also a headboard, and that may get some forces from people doing, uh, not actual sleeping in the bed (to put it nicely). So for that I have two connector joints at each end to the side panel (one in the vertical headboard panel itself and one in the horiztonal shelf that is already glued to the back of the headboard). And, I've added one actual domino on each side in the vertical panel to give that joint some additional shear strength. Thoughts on this plan?
 
Follow-up to the follow-up:
1) All joints are cut. I ended up leaving the back bottom stretcher using unglued dominos and pocket screws as I didn't want to make another piece. The pocket screw holes face the rear, so they'll never be seen. Will make for a weird take for move, but I'm sure someone will figure it out.

2) Figuring out all the dimensions relative to the Murphy Bed hardware has always been a challenge. While the hardware I bought (murphybeds.com) is high quality and the company support is responsive, they just don't have all the data, such as where the actual pivot point it, where the bottom arc of the front panel is, etc. I was going to use the Domino connectors and not drill the ones in the front kick's ends until after assembly when I could see exactly where the front panel would swing (and then trim the front kick down if necessary as I made it wider than specc'd). But, I ended up bailing and deciding to use the angle brackets they supply after all. I pre-drilled for the angle brackets in the Side Panels and will see where the kick needs to line up during assembly.

3) I probably should have investigated the Lamello S-20 connectors before ordering the Domino connectors. The Domino connectors will work out fine, I'm sure, but the Lamello system with my old Top-20 joiner would have been simpler and easier to setup/use. I can explain if anyone actually cares. But, I feel like the Domino connectors will result in a stronger joint (8mm metal vs 4mm plastic), so maybe I would have chosen the Domino Connectors anyway. If anyone has used both, I'd be interested in hearing your experiences. I know Peter Millard likes the Lamello system as the protrusions extend out the ends instead of the face (doesn't matter to me since I'm not flat pack shipping this), and also because you only need 5mm of space to assemble versus 25mm (doesn't matter here, but might matter for my next wall to wall bookcase project). But, I haven't seen any tests of strength.

4) For finishing, I ended up using my old standby - Sutherland Welles stain (Mahogany) diluted 1:4 with their tung oil sealer, and then topping with Odie's Oil. And I really like Odie's Oil, but that's maybe because I had been using Pure Tung Oil previously, and that takes weeks to really dry. I also started down a rathole of the 2-part hard wax oils having toxic hardeners, but that's a discussion for another thread. And I did see references to the owner of Odie's Oil being a real jerk on social media.....

5) Assembly is scheduled for this Saturday, just in time for X-Mas. I'll post pictures when it's done.
 
Back
Top