As others has already said - brilliant!
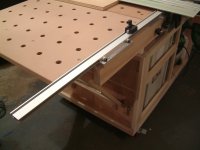
Is this the first version of your MFT? I have built a simpler design and I already have lots of things that I will try to incorporate in the next version. Your table looks pretty finished to me.")
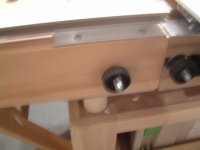
I guess that you use dogs to align the guide rail in both rip and crosscutting operation but I am wondering about the Qwas rail dogs - how accurate are they with thick material?
Is this the first version of your MFT? I have built a simpler design and I already have lots of things that I will try to incorporate in the next version. Your table looks pretty finished to me.
I guess that you use dogs to align the guide rail in both rip and crosscutting operation but I am wondering about the Qwas rail dogs - how accurate are they with thick material?