You are using an out of date browser. It may not display this or other websites correctly.
You should upgrade or use an alternative browser.
You should upgrade or use an alternative browser.
My small shop
- Thread starter travisj
- Start date


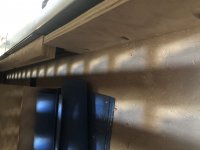
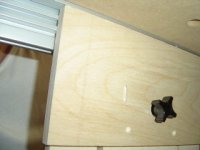
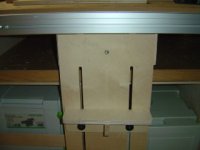
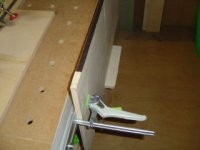
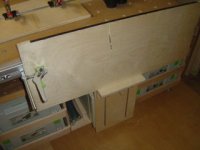
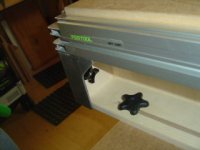
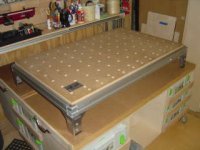
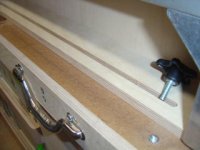
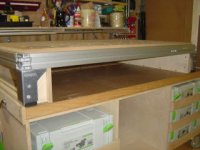
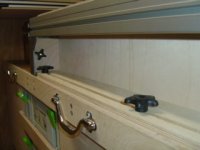
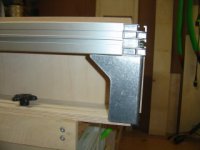
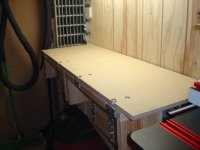
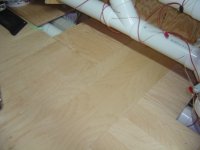
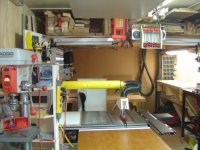
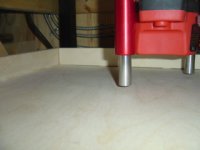
Thank you. When I built the table, I made furring strips on the back angle iron of the table saw rail to set the height so the MDF sat just a hair shy of the table saw. My original intent was to countersink some screws through the MDF into the furring strips to fasten everything into one solid unit. However, in practice, I found that it hasn't been necessary yet. Everything is heavy enough that nothing moves. The furring strips but up to the supports for the MDF and the top is sandwiched between the saw and the maple edge of the bench. I have had the top slide a little occasionally towards the wall, but not enough to force me to do anything yet. I slightly lifted the top to take a picture. The furring strips can be seen along the right side and one as well as one of the supports perpendicular to it.
Attachments
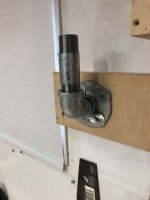
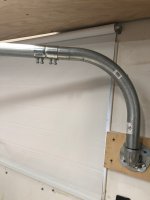
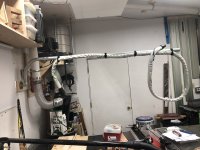
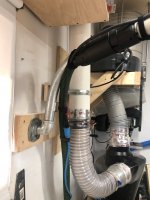
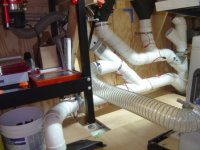
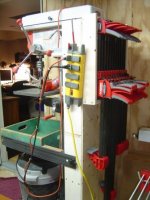
About a year ago, I came upon this thread (http://festoolownersgroup.com/festool-jigs-tool-enhancements/homemade-wall0-mounted-boom-arm/) by [member=30149]secutanudu[/member] concerning a DIY boom arm he created. I purchased the necessary pieces awhile ago, but finally got around to making a version for myself. It was dirt simple and works amazingly. I picked up a tapered sleeved hose when they were getting clearanced out (actually 2 of them). I have one on the tool end of my boom arm and I connected my original 27mm hose (with the proper parts) to that hose to run to my CT26 which now resides under the extension table of my table saw. It solved a few problems for me. It keeps the hose off of the floor and it keeps my CT out of the way, freeing up floor space.
Attachments
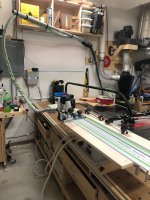
travisj said:Thank you. When I built the table, I made furring strips on the back angle iron of the table saw rail to set the height so the MDF sat just a hair shy of the table saw. My original intent was to countersink some screws through the MDF into the furring strips to fasten everything into one solid unit. However, in practice, I found that it hasn't been necessary yet. Everything is heavy enough that nothing moves. The furring strips but up to the supports for the MDF and the top is sandwiched between the saw and the maple edge of the bench. I have had the top slide a little occasionally towards the wall, but not enough to force me to do anything yet. I slightly lifted the top to take a picture. The furring strips can be seen along the right side and one as well as one of the supports perpendicular to it.
Simple and effective, love it. Thanks for sharing.
Vondawg
Member
Travis - in regards to your PCS tablesaw...did you find 1 3/4 hp to be way under powered? I’m assuming you did to go to the 3hp conversion. Great space to work!
Vondawg said:Travis - in regards to your PCS tablesaw...did you find 1 3/4 hp to be way under powered? I’m assuming you did to go to the 3hp conversion. Great space to work!
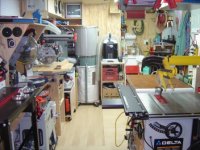
It was really struggling one day cutting through some 8/4 hard maple that had a lot of tension in it. Tripped the 20amp breaker a few times. Also tripped the internal breaker several times. That was what pushed me over the edge. But that was the only time I ever had an issue in almost 6 years. Honestly, I converted more because I could and less because I needed to. At our old house 230v was not easy to get to the garage whereas now, I had to run the new circuit for the saw all of 5 feet.
There are definitely benefits to the 3hp version (power, lower amp draw, etc...). It also took care of my breaker issue on the rest of that maple. Also the conversion is relatively easy and very straightforward. It was about $550ish IIRC for the necessary motor, strut, and cabling. So overall I am into the saw for about $200 over PCS3.0 retail.
Sent from my iPhone using Tapatalk
travisj said:Thank you. I have been pretty happy with everything. My biggest problem is that since my shop time is limited I tend to try to rush things. It tends to create problems at times. I need to learn to slow down a bit. Being organized should help.
Sent from my iPhone using Tapatalk
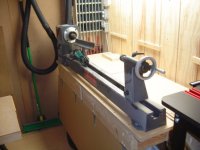
What model Sjoberg Workbench is that? Elite 1500? I really like those custom built draws.
Cheese
Member
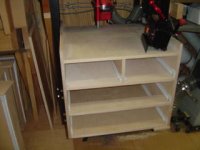
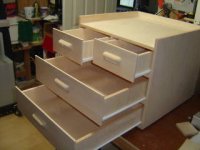
I like your Vac Sys mount and also the double deep Systainer drawers. How do you know remember what's behind what?
krudawg said:What model Sjoberg Workbench is that? Elite 1500? I really like those custom built draws.
It is a Nordic Plus 1500. I think it is their entry level option. I have been really happy with it. I did not care for the cabinet that Sjoberg’s makes for this line of benches. Flimsy and small. My drawer box is twice as big and much better built for about the same money.
Sent from my iPhone using Tapatalk
Thanks!Cheese said:I like your Vac Sys mount and also the double deep Systainer drawers. How do you know remember what's behind what?
The VacSys mount is basically the one in the Conturo manual. I drilled a series of mounting holes so that I can move the t-track hardware and use it vertically on my bench or on my MFT. However I have found that I like it as posted in the pictures. I can just slide it over when I need it or back to the wall and it is out of the way.
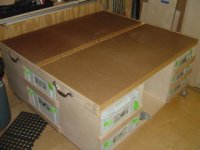
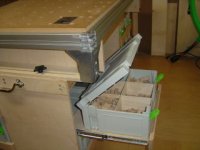
As for the double deep drawers, I grouped my systainers to make it easier. One drawer is all VacSys, one is my two Carvex systainers, one is my two Domino 500 systainers, three drawers are sanders. It isn’t as hard to keep track as I thought it would be.
Sent from my iPhone using Tapatalk
[quote
Snip.
It was really struggling one day cutting through some 8/4 hard maple that had a lot of tension in it. Tripped the 20amp breaker a few times. Also tripped the internal breaker several times. That was what pushed me over the edge. But that was the only time I ever had an issue in almost 6 years.
Sent from my iPhone using Tapatalk
[/quote]
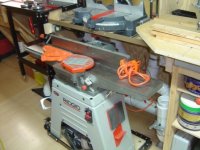
Mine is 1.75HP and to rip 8/4 materials (once in a blue moon), I use two passes. Lumber should be acclimatized in your shop before ripping.
Snip.
It was really struggling one day cutting through some 8/4 hard maple that had a lot of tension in it. Tripped the 20amp breaker a few times. Also tripped the internal breaker several times. That was what pushed me over the edge. But that was the only time I ever had an issue in almost 6 years.
Sent from my iPhone using Tapatalk
[/quote]
Mine is 1.75HP and to rip 8/4 materials (once in a blue moon), I use two passes. Lumber should be acclimatized in your shop before ripping.
CherryHatchetWoodworks
Member
- Joined
- Oct 13, 2018
- Messages
- 5
This is really inspiring. [smile] That outfeed table is genius. Did you design it in Sketchup or the old fashioed pencil and paper way?
CherryHatchetWoodworks said:This is really inspiring. [smile] That outfeed table is genius. Did you design it in Sketchup or the old fashioed pencil and paper way?
Thank you! I did it the old fashioned way. Pencil sketch and then modified it as I went.
Sent from my iPhone using Tapatalk
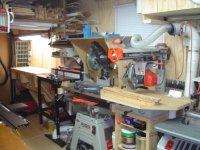
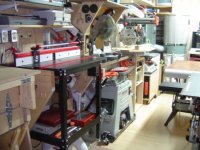
Hey Travis. You did some same or similar things that I've done in my small one car sized garage. Getting the DC motor onto the wall being one of them.
I also looked at your MFT table and it just looks like another version but smaller of mine. I added the ability to lock down the MFT to the surface of the tabletop and even have it overhang for a variety of purposes. Mine also does double duty as an infeed table for my Unisaw.
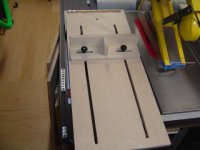
I really like your TS outfeed table. Looks slick and practical. Wish mine would have been that easy, but because of the mechanism of my Excalibur fence which requires components to be able to move freely on the back side of my saw below the surface, I had to take another route.
Here are old pics of mine that I offer to further inspire you or give you some ideas for yours. There's been a lot of updates since I took those pics, but that's the beauty of a shop, doing upgrades and enhancements as time goes by.
I also looked at your MFT table and it just looks like another version but smaller of mine. I added the ability to lock down the MFT to the surface of the tabletop and even have it overhang for a variety of purposes. Mine also does double duty as an infeed table for my Unisaw.
I really like your TS outfeed table. Looks slick and practical. Wish mine would have been that easy, but because of the mechanism of my Excalibur fence which requires components to be able to move freely on the back side of my saw below the surface, I had to take another route.
Here are old pics of mine that I offer to further inspire you or give you some ideas for yours. There's been a lot of updates since I took those pics, but that's the beauty of a shop, doing upgrades and enhancements as time goes by.
Attachments
-
 MFT Sheet Holder 002.JPE15.3 KB · Views: 339
 -
 MFT Sheet Holder 003.JPE14.5 KB · Views: 352
 -
 MFT Sheet Holder 004.JPE15.8 KB · Views: 335
 -
 MFT Sheet Holder 005.JPE13.9 KB · Views: 360
 -
 MFT Sheet Holder 006.JPE15.4 KB · Views: 363
 -
 MFT Sheet Holder 007.JPE14.8 KB · Views: 365
 -
 MFT Sheet Holder 008.JPE15 KB · Views: 388
 -
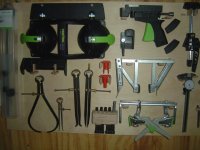
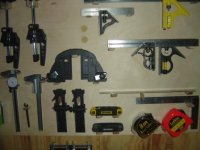
 Shop Shots II - Flippable Table Saw Accessories Board.jpg27.7 KB · Views: 419
 -
 Shop Shots II - Air Filtration Unit.jpg41.3 KB · Views: 410
 -
 MFT Sheet Holder 001.JPE14.6 KB · Views: 382
 -
 MFT 1080 Table Mods 014.JPE14.9 KB · Views: 367
 -
 MFT 1080 Table Mods 001.JPE14.6 KB · Views: 456
 -
 MFT 1080 Table Mods 003.JPE14.6 KB · Views: 433
 -
 MFT 1080 Table Mods 007.JPE14.9 KB · Views: 401
 -
 MFT 1080 Table Mods 008.JPE15.1 KB · Views: 408
 -
 MFT 1080 Table Mods 009.JPE14.9 KB · Views: 384
 -
 MFT 1080 Table Mods 010.JPE15.2 KB · Views: 381
 -
 MFT 1080 Table Mods 011.JPE15.1 KB · Views: 366
 -
 MFT 1080 Table Mods 012.JPE14.8 KB · Views: 391
 -
 MFT 1080 Table Mods 013.JPE15.1 KB · Views: 402
Hmmmm....a lot of pics didn't load up. Must've hit the volume limit for such. Here's the rest....
Attachments
-
 Shop Shots II - Machinery Wall Other View.jpg62.1 KB · Views: 407
 -
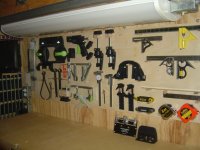
 Shop Shots II - Machinery Wall.jpg63.2 KB · Views: 436
 -
 Shop Shots II - Planner in use position.jpg58.1 KB · Views: 406
 -
 Shop Shots II -Cover on Lathe Folded to Table Position.jpg44.8 KB · Views: 388
 -
 Shop Shots II - Lathe Cover Panel Open.jpg46.5 KB · Views: 390
 -
 Shop Shots II - Lathe in out position.jpg46.1 KB · Views: 389
 -
 Shop Shots II - Machinery Wall Dust Collection.jpg56 KB · Views: 399
 -
 Shop Shots II - Mach Wall Dust Coll WO Floor Boards.jpg47.4 KB · Views: 419
 -
 Shop Shots II - Mach Wall DC With Floor Boards.jpg43 KB · Views: 383
 -
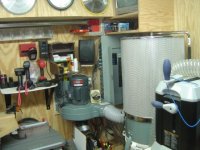 Shop Shots II - DC Far View.jpg51.9 KB · Views: 469
 -
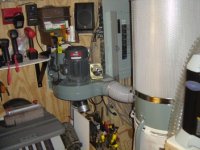 Shop Shots II - DC Modified to wall mount.jpg48.9 KB · Views: 401
 -
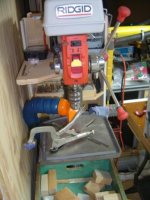
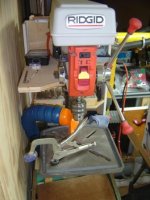
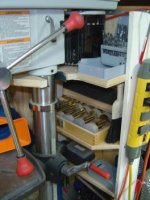
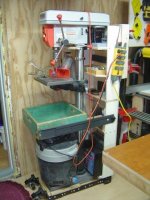 Shop Shots II - Drill Press with Waste Tray and Vac.jpg33.1 KB · Views: 435
 -
 Shop Shots II - Drill Press RearSide Clamp Rack View.jpg30.1 KB · Views: 406
 -
 Shop Shots II - Full Shop View Facing Garage Door.jpg57.8 KB · Views: 401
 -
 Shop Shots II - Full Shop View.jpg57.2 KB · Views: 453
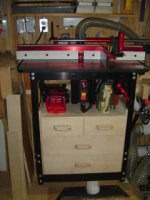
Some upgrade/enhancements to my Jessem router table setup since those previous pics....
Attachments
-
 Router Table Base Cabinet Pics 020.JPE15.1 KB · Views: 365
 -
 Router Table Base Cabinet Pics 015.JPE15.1 KB · Views: 347
 -
 Router Table Base Cabinet Pics 012.JPE15.1 KB · Views: 362
 -
 Router Table Base Cabinet Pics 011.JPE15.2 KB · Views: 356
 -
 Router Table Base Cabinet Pics 008.JPE14.7 KB · Views: 355
 -
 Router Table Base Cabinet Pics 004.JPE15.2 KB · Views: 378
 -
 Router Table Base Cabinet Pics 001.JPE14.8 KB · Views: 371
More stuff updated....
Attachments
-
 14MAR2009 021.jpg28.1 KB · Views: 363
 -
 14MAR2009 019.jpg29.3 KB · Views: 387
 -
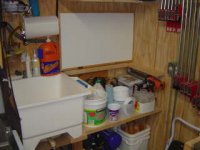 Shop Sink Area JAN2012 006.JPE14.7 KB · Views: 365
 -
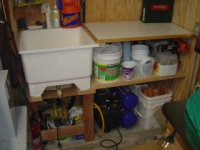 Shop Sink Area JAN2012 001.JPE15.4 KB · Views: 401
 -
 Shop Sink Area JAN2012 012.JPE15.3 KB · Views: 408
 -
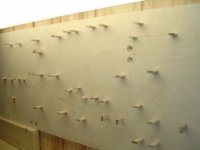 Peg Board a la DOMINO 025.JPE14.9 KB · Views: 397
 -
 Copy of DOMINO Pegboard 021.jpg80.8 KB · Views: 395
 -
 Copy of DOMINO Pegboard 020.jpg20.8 KB · Views: 386
 -
 Copy of DOMINO Pegboard 019.jpg89.9 KB · Views: 465
 -
 14MAR2009 022.jpg27.6 KB · Views: 396
Similar threads
- Replies
- 10
- Views
- 697
- Replies
- 25
- Views
- 2K
- Replies
- 15
- Views
- 944
- Replies
- 23
- Views
- 3K