Mario Turcot
Member
- Joined
- Nov 26, 2017
- Messages
- 1,247
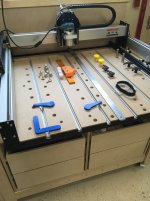
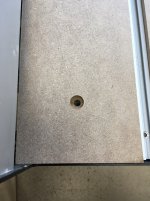
My CNC spoilboard was over due so I decided to give it a fresh look. The original had a very basic clamping capability. Butt the board against the two pieces and screw the four corners.
[attachimg=1]
The MDF available here is of poop quality but it's just a spoilboard right! Here some material that will be used. Out of a 4'x8' sheet I got enough material to make 3 spoilboards.
[attachimg=2]
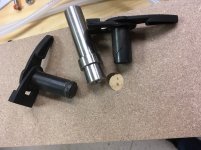
I changed my mind about the brass inserts. They look nice for sure but are prone to strip easily so I went with a more sturdy ones that can be installed with allen key instead.
[attachimg=3]
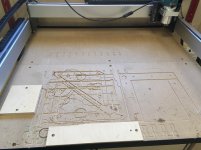
I did a dry fit just for fun [big grin]
[attachimg=4]
Installing the first strip, easy peazy.
[attachimg=5]
You know the satisfaction when you use a template to bore holes and everything fit perfectly for the first time ever in your life [eek]
[attachimg=6]
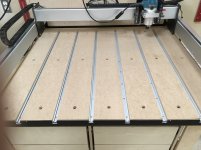
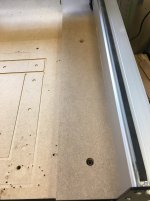
The t-track (6) are 36" long.
[attachimg=7]
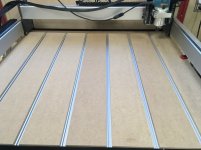
And the final result.
[attachimg=8]
Coming soon: I will make some 20mm holes for clamping purpose
[attachimg=1]
The MDF available here is of poop quality but it's just a spoilboard right! Here some material that will be used. Out of a 4'x8' sheet I got enough material to make 3 spoilboards.
[attachimg=2]
I changed my mind about the brass inserts. They look nice for sure but are prone to strip easily so I went with a more sturdy ones that can be installed with allen key instead.
[attachimg=3]
I did a dry fit just for fun [big grin]
[attachimg=4]
Installing the first strip, easy peazy.
[attachimg=5]
You know the satisfaction when you use a template to bore holes and everything fit perfectly for the first time ever in your life [eek]
[attachimg=6]
The t-track (6) are 36" long.
[attachimg=7]
And the final result.
[attachimg=8]
Coming soon: I will make some 20mm holes for clamping purpose
Attachments
-
 cnc-before.jpg167.1 KB · Views: 3,834
 -
 cnc-final.jpg167.6 KB · Views: 1,656
 -
 cnc-tracks.jpg144.4 KB · Views: 2,584
 -
 cnc-satisfaction.jpg209.4 KB · Views: 1,543
 -
 cnc-firststrip.jpg184.7 KB · Views: 1,583
 -
 cnc-dryfit.jpg167.6 KB · Views: 3,053
 -
 cnc-inserts.jpg207.2 KB · Views: 1,653
 -
 cnc-material.jpg173.3 KB · Views: 1,919