I've been planning to build the "3rd generation" of my workbench box beams for quite some time and finally got the time in between guitar builds. This time I decided to use the CNC machine for all the holes.
These started based on a radical design from FWW (http://www.finewoodworking.com/2008/12/01/forget-what-you-know-about-workbenches), but I've been modifying it every time to suit my needs and improve it as I see fit.
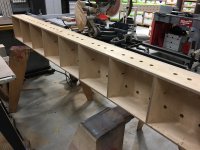
Here is the 2nd gen (which as you can see has not been demoted to an outfeed table for the TS):
View attachment 1
View attachment 2
Two rows of holes on the top, one on the side, and I left the bottom off thinking I didn't really need it. But as my mechanical engineer nephew pointed out, they weren't as strong without the bottom part, and indeed they have sagged between 1/32" and 1/16" over the years. Also, those interior partitions were ALWAYS in the way. Everytime I went to clamp something, there was a partition in the way of the festool clamps.
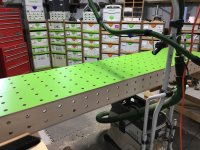
So I decided to do them up as proper box beams, with a bottom, and create cutouts so I could still use the Festool clamping elements knobs to secure them. I also made them based on a multiple of 32 mm dimensions, 3 rows of holes in the top and 2 on the sides. I used dominos for alignment during the glue up, and then just glued everything without any other fasteners.
Note that decided to use 1/2" ply for the top this time just to save weight. I'm surprised at how much lighter they are actually. One last thing, I chose to laminate the tops in formica (bright green of course!) to make them resistant to glue and chemicals.
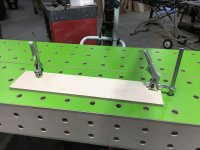
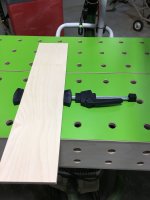
Here are some pictures, and a CNC video about how I did the holes. Kudos to Peter Passuello of the CNCNutz youtube channel for the basics of how to CNC an 8 foot long board on a 4x2 machine.
View attachment 3
View attachment 4
View attachment 5
View attachment 6
And finally, here's the video of the CNC process:
These started based on a radical design from FWW (http://www.finewoodworking.com/2008/12/01/forget-what-you-know-about-workbenches), but I've been modifying it every time to suit my needs and improve it as I see fit.
Here is the 2nd gen (which as you can see has not been demoted to an outfeed table for the TS):
View attachment 1
View attachment 2
Two rows of holes on the top, one on the side, and I left the bottom off thinking I didn't really need it. But as my mechanical engineer nephew pointed out, they weren't as strong without the bottom part, and indeed they have sagged between 1/32" and 1/16" over the years. Also, those interior partitions were ALWAYS in the way. Everytime I went to clamp something, there was a partition in the way of the festool clamps.
So I decided to do them up as proper box beams, with a bottom, and create cutouts so I could still use the Festool clamping elements knobs to secure them. I also made them based on a multiple of 32 mm dimensions, 3 rows of holes in the top and 2 on the sides. I used dominos for alignment during the glue up, and then just glued everything without any other fasteners.
Note that decided to use 1/2" ply for the top this time just to save weight. I'm surprised at how much lighter they are actually. One last thing, I chose to laminate the tops in formica (bright green of course!) to make them resistant to glue and chemicals.
Here are some pictures, and a CNC video about how I did the holes. Kudos to Peter Passuello of the CNCNutz youtube channel for the basics of how to CNC an 8 foot long board on a 4x2 machine.
View attachment 3
View attachment 4
View attachment 5
View attachment 6
And finally, here's the video of the CNC process: