RKA said:
I'm scratching my head here. It would seem like your domino might be a little more skewed but still perfectly acceptable, but the 10mm domino stock you have is unusually thicker? Can you try again using thicker scraps of wood and the 12mm tenons I sent? At least to see if the results are acceptable?
You could try the microwave trick on your 10mm tenons. I know you said it's dehumidified in the basement, but it's an easy thing to try. I can tell you that 10mm tenon is old. I never use them, so those came with the 4-10mm assortment set I got ~6 years ago?
I'm not familiar with the microwave trick and will have to google it.
I tried the 12 mm Domino in the stock you sent and the while the front piece laid perfectly flat on the MFT the back piece was raised into the air 4.5 mm. It seems I will not get an offical response from Festool here and will need to call them to find out what they consider acceptable.
I've several shop cabinets waiting to be assembled, way more after that needing to be built, and decided to test the XL on an actual cabinet since worst case it'll be in my shop. I made several mistakes, learned a few things, and now have to figure out how to avoid making some of these same mistakes in the future.
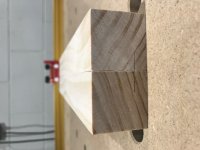
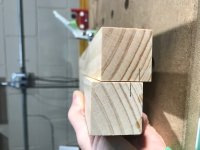
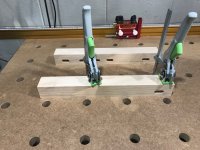
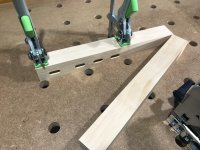
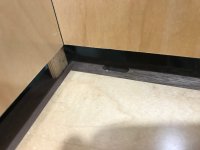
My first mistake involved using the 6 flexible tabs on the front of the Domino to cut the first mortise holes on each corner. I used the first tab for the sides going front to back to avoid having a Domino 37mm from the edge where drawer glides or shelf pin holes are located and the 2nd tab for all the other holes. I wasn't paying enough attention, got the 2nd tab over the top of the material, aligned the 3rd tab instead, and plunged the hole! I did this 3 times and learned the importance of slowing down to ensure the first holes are exact.
View attachment 1
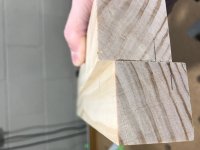
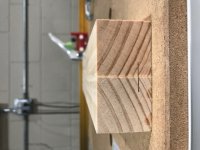
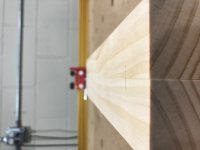
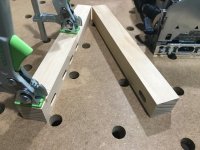
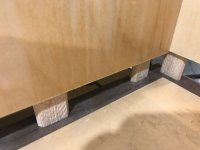
My second mistake is a result of the first. I used the wings which attach to reference off previous holes in order to space out the Domino's. Since the first hole on the edge banding was different than the plywood, the bottom of the back does not line up and needs to be re-done!
The back right corner, aligned properly, but unfortunately the bad corner was the one everything in between was referenced from.
View attachment 2
My third sort of mistake was the setting on the extension wing. After plunging the corner holes, I measured the distance between them, counted how many Domino's I'd like, subtracted 20mm x the # of Domino's, and divided by the # of Domino's + 1 to determine the spacing between Domino's. I set the wing to this value and when I got to the other end, it wasn't spaced out evenly. Afterwards I discovered the number on the wing takes you to the center of the Domino, not the edge, and I should've added +10mm for the small mortise setting ... lesson learned!
My fourth "almost" mistake was that while referencing with the extension wing, I went top to bottom on one side of the back but bottom to top on the other side. Luckily I checked before plunging the sides and referenced them in the same way. I've decided it best to label the parts with back, front, top, bottom and move alphabetically when doing this. For example, Left to Right, Bottom to Top, Back to Front, etc. ... hopefully this will form a good process which avoids future mistakes.
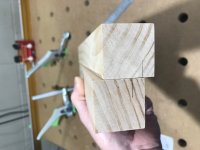
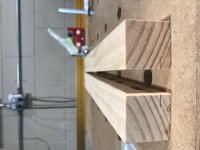
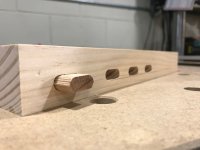
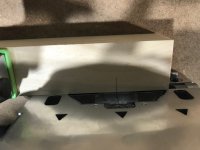
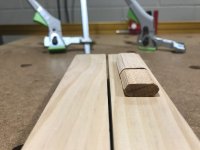
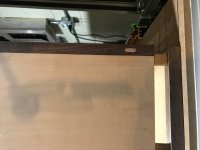
My fifth and final mistake was that I was switching between plunging edge banding (15mm) and plywood (25mm) but forgot to switch back to 15mm and plunged right through the edge banding on one hole. I'd caught myself twice before this so it could've been worse but I need a better process so I don't forget this again. At least it's in a back corner on the bottom but now I'm wondering if I cut all back 4 corners or more and make it uniform, pound it in a bit and use glue and Walnut shavings/dust to fill in the void, etc. I was able to laugh about the mistake as this is only a shop cabinet but I need to figure this out before it's an important cabinet. I'm considering switching from 6x40 to 5x30 Domino which would then always be 15mm plunge and perhaps less likely to crack anything while under pressure from the skew ... thoughts?
View attachment 3
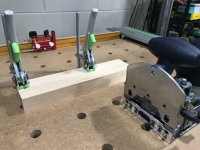
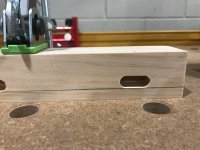
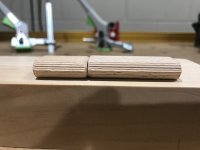
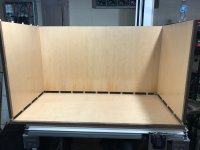
Mistakes aside, I used the small setting on all mortises and was able to assemble the sides to the bottom but it did require I reach in between and put some pressure on a few Domino's. After disassembly and re-assembly, I think it went together slightly easier the second time around which is a good sign. I've to re-plunge the bottom back plywood before it will go together but otherwise everything seems to be good so far. I should be able to get to the stretchers/partition tonight which is what I'm really interested to see. The stetchers are 100mm wide ... should I use 2 Domino's or Kreg screws? For the partition, I assume I should determine the distance from the top/bottom of the mortises I'm making in the plywood, calculate the offset, and clamp a straight edge that offset away from the center and butt the bottom of the XL to it? FWIW - I'm not using the Seneca plate as it really messed up using the line for alignment; however, I've only used the pins/extension wing so far. That said, if this is the method most people use, and perhaps the Seneca plate allows better centering of material, then perhaps I should add it back on?
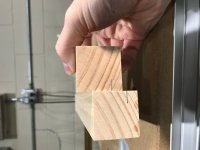
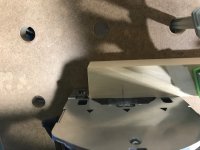
All that said, because of the way this cabinet is built with Domino's in different directions, I'll have to assemble sides and stretchers to the partition first, slide that assembly onto the back, and then assemble the tops/bottoms. I'm not certain how I can do this all quickly, especially while adding glue, and having to fiddle with the Domino's, perhaps I'm using to many Domino's? If using Domino's, I could use the larger setting for the Domino's in the middle of the panels but that doesn't seem very structural and I've ready many who do not recommend? Should I have incorporated dado's in some of this instead?
View attachment 4")