New Sweepstakes! Win an HK 55 or HKC 55 (North America only)

TylerC

Member
Joined
Sep 4, 2015
Messages
1,078
To celebrate the launch of new tools in the US and Canada and the beginning of autumn, we’re launching a new sweepstakes.

Best of Summer - HK+HKC 55 Giveaway

To enter, tell us about your favorite project that you’ve worked on this year. Did you build a really cool piece of custom furniture? Did you remodel a bathroom that turned out really well? Tell us for a chance to win!

Dates: Now through Friday, September 30 at 11:59 p.m. ET
How to Enter: Reply to this thread by telling us about your favorite project that you worked on this summer. Share 1-3 pictures of the projects (and preferably the Festool tools that you used on it).
How Winners Are Selected: Random drawing among entrants
Prize: The winner will have the option of either the HK 55 with FSK420 Guide Rail (575085) or HKC 55 with FSK420 Guide Rail (564626)
Number of Winners: 1
Eligible Countries: United States and Canada
Complete Rules: http://blog.festoolusa.com/fog-hk-sweepstakes/

A few notes:
1. IMPORTANT: Please keep your photo file sizes small. Ideally, each photo should be under 100 KB. On the last contest, we crashed the thread with too many large photos. If you need help decreasing your file size, try a tool likehttp://jpeg-optimizer.com/. (Your maximum width should be 800 pixels or less.)
2. We’re taking a very loose definition of “summer”. If you worked on it during a time in 2016 when there wasn’t snow on the ground, we’ll count it.
3. Sorry, non-North Americans. International contests are really difficult given various laws and regulations.

[attachimg=1]
 

Attachments

  • fog-HKsweeps.jpg
    fog-HKsweeps.jpg
    91.1 KB · Views: 1,421
Thanks fot he opportunity Tyler!  I will give it a go...

What I did on my Summer Vacation no Holiday no  woking staycation!

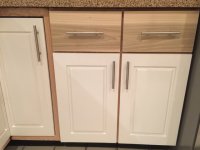
I built a number of doors and drawer for a kitchen project at my in-laws.  Made the rails and stiles out of soft maple and the panels out of MDF.  Used quite a few sanders... ETS EC 125 and ETS 150 on the frames and panels and drawers and my LS 130 on the drawer ends/sides as well as the panel profiles and even for the edges of the doors.

I used my CMS to machine the rails and stiles and mill the profile on the MDF panels.  MFT to assemble and paint.  PDC 18 for cutting the hinge cups and the CXS (my baby) to assemble onto the boxes.  I used a lot of Festool but also a lot of Blum to make it look sharp!

And without further ado... the only thing people care about.. the pics (click to zoom):

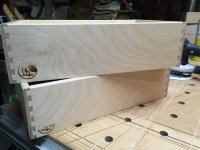
Some dovetailed drawers:
View attachment 1

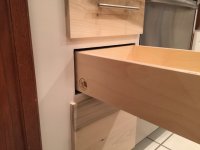
Sanded, branded and sealed (and installed):
View attachment 2

Drawers and doors to check 10mm spacing:
View attachment 3

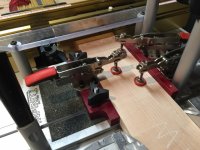
Coping sled (love it from Inifinty tools):
View attachment 4

Coped and ready to go!:
View attachment 5

MFS to route for electric box:
View attachment 6

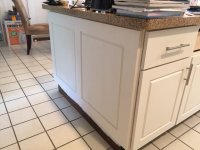
Panel installed on island:
View attachment 7

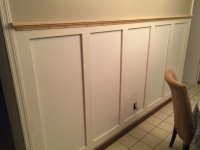
Also made matching wainscoting for a wall across from island:
View attachment 8

Thanks for the new contest!  (fingers crossed!)

Cheers.  Bryan.
 

Attachments

  • Festool - 1.jpg
    Festool - 1.jpg
    51.3 KB · Views: 365
  • Festool - 7.jpg
    Festool - 7.jpg
    75.6 KB · Views: 297
  • Festool - 8.jpg
    Festool - 8.jpg
    92 KB · Views: 373
  • Festool - 6.jpg
    Festool - 6.jpg
    83.1 KB · Views: 346
  • Festool - 5.jpg
    Festool - 5.jpg
    100.1 KB · Views: 360
  • Festool - 4.jpg
    Festool - 4.jpg
    57 KB · Views: 277
  • Festool - 3.jpg
    Festool - 3.jpg
    52.1 KB · Views: 298
  • Festool - 2.jpg
    Festool - 2.jpg
    76.3 KB · Views: 351
[member=57769]TylerC[/member] Does the project need to be completed or can it be a project still working on?
 
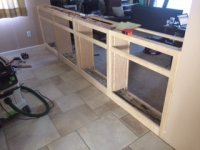
currently building a built-in cabinet that divides dining from living room that are on two different levels. Festools used: TS75, vac, domino, RO90

View attachment 1
 

Attachments

  • image1.JPG
    image1.JPG
    34.4 KB · Views: 368
Wooden Skye said:
[member=57769]TylerC[/member] Does the project need to be completed or can it be a project still working on?

The idea is to promote the HK55, and spread some good will here on the FOG.  I think they going to fairly loose with the rules as they pertain to the projects. 
 
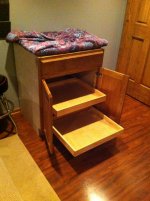
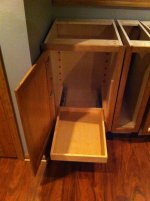
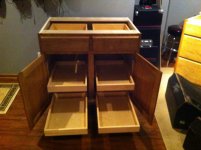
This is by far my favorite project I've made this year. Mainly because with this being completed I only have a few more things to do and this kitchen build will be complete. I made these pull out trays using the Festool TS55 to rip and cut the drawer parts to length on the MFT/3 table. Also used the Rotex RO 125 & ETS 125EQ sanders to sand all parts. Of course I make the cabinets they go into as well!
 

Attachments

  • IMG_1989.jpg
    IMG_1989.jpg
    104.5 KB · Views: 577
  • IMG_1987.jpg
    IMG_1987.jpg
    92.2 KB · Views: 446
  • IMG_1986.jpg
    IMG_1986.jpg
    48.2 KB · Views: 533
Hello All,

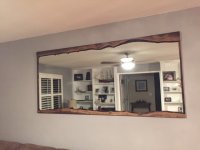
This summer my wife saw a mirror that she fell in love with.  It was a live edge walnut mirror 3' x 4' and cost $750.00.  She wanted it to be much bigger so I built this mirror.  It is 3' x 7'.

[attachimg=1]
I used my TS75 to cut the walnut top and bottom boards off an 8/4 piece of live edge walnut that I picked up for $35 in a little town near Sacramento, California.  I then finished the boards with my ETS125 sander down to 2000 grit.  The vertical pieces were from the same board just cut and planed down to size. They are joined to the top and bottom with a rabbit in the back of the top and bottom boards.  Picked up the mirror at work during a remodel of one of our building for free so the whole thing was under $50 and the wife loves it and actually tells all her friends about it.

Thanks,
Trevin
 

Attachments

  • IMG_2560.JPG
    IMG_2560.JPG
    75 KB · Views: 1,217
Thanks for the opportunity, I like the format of the contest, it rewards the woodworkers on this site!

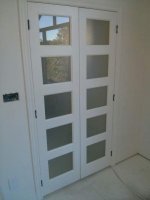
I built a set of doors for a customer after it was discovered that the doors would be a 5 week delay, and would still need to be modified. These doors were also able to have consistent dimensions.

I used my TS55 in all facets of this project. Of course my CT26 and Rotex got a workout, and the Kapex too!
 

Attachments

  • IMG_20160915_093142__1474423468_24.36.217.129.jpg
    IMG_20160915_093142__1474423468_24.36.217.129.jpg
    12.9 KB · Views: 405
Baartman said:
Thanks for the opportunity, I like the format of the contest, it rewards the woodworkers on this site!

I built a set of doors for a customer after it was discovered that the doors would be a 5 week delay, and would still need to be modified. These doors were also able to have consistent dimensions.

I used my TS55 in all facets of this project. Of course my CT26 and Rotex got a workout, and the Kapex too!

And how did you join the rails to the stiles?
 
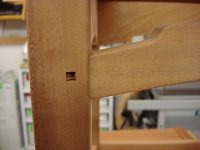
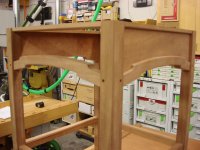
This is a Greene & Greene style nightstand to match one previously built in Darrell Pearts' class.  It is obviously still a work in progress which has been slowed by work demands, vacation (IWF), and a shop reorganization.  I also slowed construction  to monitor adequacy of a new construction technique on the breadboard top to ensure my combination of Dominos and Tenso 14 fasteners permitted adequate movement (so far so good).  I varied from Darrell's techniques to match some of my own methods and tools.  Festools used were the CT22, Rotex 150, ETS150, RO90, and the Domino 500.

Overview
[attachimg=1]
Breadboard top
[attachimg=2]
I messed up my planned integral tenon on the drawer rail and recovered using 8x40 Dominos without having to re-do the rail.  The accuracy of depth control and slot placement of the Domino prevented any blow-through even with a very small end grain bearing surface.
[attachimg=3]
 

Attachments

  • DSC03127.JPG
    DSC03127.JPG
    802.3 KB · Views: 1,229
  • DSC03126.JPG
    DSC03126.JPG
    784.1 KB · Views: 1,203
  • DSC03125.JPG
    DSC03125.JPG
    814.7 KB · Views: 1,233
Thanks for sponsoring a new contest!  Great to see projects on FOG.

I wish I had had an HK or HKC saw for this project.

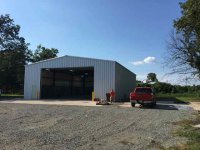
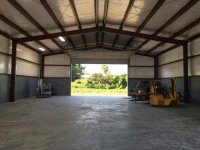
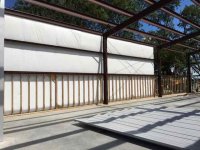
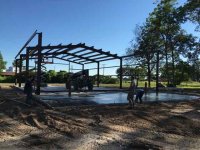
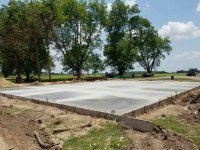
I normally do furniture or other projects around the house.  But this summer I took on a bigger task.  And the Festools were up for the job!

We built a new 50x75 shop on our farm with 18' sidewalls, a front overhead door that is 30x16 and a rear overhead door that was repurposed from 40 years ago that was 24x16.

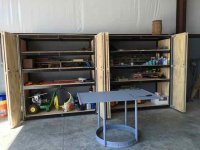
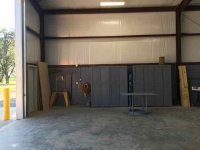
Studwall, plywood wainscoting, cabinets, workbenches all completed with Festools.

TS55 / Midi Vac / 1010 Router / Domino for rails & siles on cabinets / Rotex 150 and ETS EC 150/3 for sanding and paint prep / T15 and CXS Drills. 

Used the new rail square from TSO Products cutting 55 sheets of 3/4 plywood.  The only non-festools on the framing job was a DeWalt Hammer Drill drilling the TapCon screws for the Studwalls, and a Paslode Framing nailer and a Dewalt wire brush for cleaning up the 40 year old doors from rust and flaking paint.

About 30 days of work over several weeks through the summer as the project progressed.  The Festools delivered!

Neil
 

Attachments

  • IMG_0517.jpg
    IMG_0517.jpg
    30.9 KB · Views: 555
  • 8.completed.jpg
    8.completed.jpg
    25 KB · Views: 563
  • 7.cabinets.jpg
    7.cabinets.jpg
    27.3 KB · Views: 544
  • 6.cabinets.jpg
    6.cabinets.jpg
    21.1 KB · Views: 513
  • 5.studwall.jpg
    5.studwall.jpg
    34.1 KB · Views: 496
  • 4 paint prep.jpg
    4 paint prep.jpg
    34.8 KB · Views: 554
  • 3 door panels.jpg
    3 door panels.jpg
    33.6 KB · Views: 549
  • 2 steel.jpg
    2 steel.jpg
    37.9 KB · Views: 518
  • 1 foundation.jpg
    1 foundation.jpg
    39.6 KB · Views: 516
Wooden Skye said:
[member=57769]TylerC[/member] Does the project need to be completed or can it be a project still working on?
It doesn't need to be complete. There's a bit of an "honor system" to this contest, so I'd just ask that you've spent a reasonable amount of time/energy on it.
 
Michael Kellough said:
Baartman said:
Thanks for the opportunity, I like the format of the contest, it rewards the woodworkers on this site!

I built a set of doors for a customer after it was discovered that the doors would be a 5 week delay, and would still need to be modified. These doors were also able to have consistent dimensions.

I used my TS55 in all facets of this project. Of course my CT26 and Rotex got a workout, and the Kapex too!

And how did you join the rails to the stiles?

How could I forget?! The Domino DF500.
 
I built my wife a new dresser this summer. I used my TS55 to straight line rip the maple for glue line joints, my Domino 500 for all joints and my drawer boxes, and tons of time with my Rotex 125 and ETS 125!
4f576df0bcf16eea0515137b857ebf11.jpg
581cd2afc9f205248c2e26475c6e72b0.jpg
1b232992af73a8d4f19047db3758469b.jpg
e61392c37249cc495886b7dc3babb1a0.jpg
 
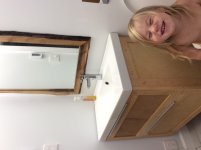
This August was busy with two bathroom projects. For this one I made the mirror (similar to [member=62034]Trevin[/member] ) and used the domino 500 and TS55, I couldn't image making that without those tools. For the vanity it was made from reclaimed bowling ally using similar tools. Some of the trim and baseboards were ripped with the TS55. All products were sanded with an ets150 and/or RO 90. The little girl helped too, but she's not a festool, just a tool.  (Jk)
 

Attachments

  • image.jpg
    image.jpg
    732.8 KB · Views: 438
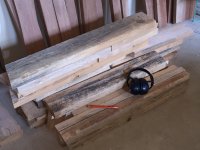
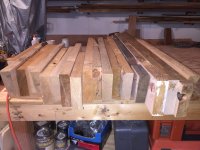
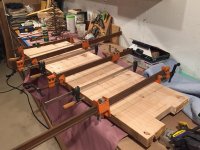
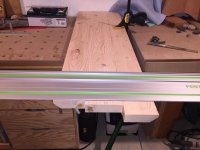
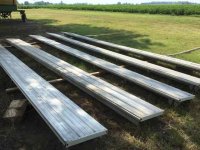
My favorite project of the summer was flattening some big Madrona slabs I had milled up on a beach in the San Juans (WA state) a few years back. Ended up being able to get all the tools needed on the ferry in on trip in a VW Passat station wagon.  The list included: TS 75 with multiple rails, OF2200 and the router sled, CT-Sys, EC-150 sander, Domino 700 and assorted tenons, a bunch of Bessey parallel clamps, saw horses, and some misc 2x material. Jointed and glued up a few slabs and am waiting until I've got a free moment in my schedule to finish the project, making a large coffee table. Still need to inset some butterfly inlay pieces to control some cracks and fill some voids with epoxy.
ba69d48f322e90e9ef7b90acf04bb8ec.jpg
6e3734d08d419dbfbf56a9062f7a9c91.jpg
344876b84a927f94235624bc57373a0f.jpg
 
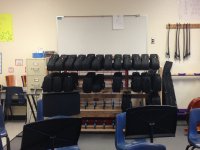
Mobile rack to hold 48 violins for local school system. Making 4 more now.

Used df500, ets125, cxs, kapex, and of1400
 

Attachments

  • IMG_0123.JPG
    IMG_0123.JPG
    2.1 MB · Views: 679
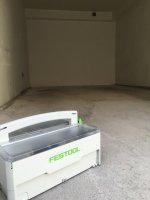
I'm a new homeowner and an aspiring Festool owner. To date, I only own the SYS-Storage, which just arrived two days ago. And, as we speak, I've just sat down after finally patching and plastering badly damaged garage walls. I know this isn't exactly the most impressive project, or really something that fits in with the woodcraft nature of Festool in general. But, I'm proud. And I'm just dying to get my hands on some more gear so I can take on bigger things.

Not two days ago, I made my very first post to this forum, asked for advice about my first saw purchase. Everyone's been incredible, wonderful advice and opinion. Obviously, the HK 55 is in my wish list.
 

Attachments

  • IMG_0279.JPG
    IMG_0279.JPG
    80.2 KB · Views: 521
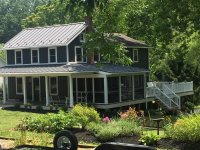
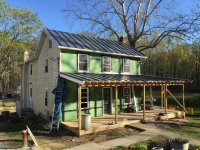
Built this monster wrap around deck and front porch. Used all of my Festool sanders, vacs and ts75 and Ts55. Could have really used an HK55 though.
 

Attachments

  • image.jpeg
    image.jpeg
    3.5 MB · Views: 596
  • image.jpeg
    image.jpeg
    1,011.1 KB · Views: 526
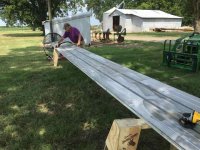
Thank you for the opportunity Tyler. One of several projects that I'm about to wrap up is building a bench for my son, using cutoff's from baseball dugouts that he built for his Eagle Scout project at the local school two years ago (at age 14). He reached out to a number of suppliers, one of which was a local mill that cut him 2x6's for rafters. They were as green as could be, of varying lengths, but everything came together overall.

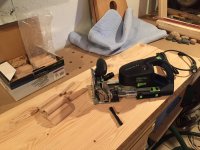
So following two years of drying in the shed and a recent clean-out, all the cutoff's came to the surface.  After the basic planing and jointing last week, I finally got the chance to break out my new DF 700 for it's inaugural spin. I've had it since the Festool-a-Friend deal back in January, but life happened, and here we are. It felt great to make that first mortise, and even better knowing that the cost of every hole after that initial one will drop in half with each successive plunge.

I measured out an equal distance from the center of the middle board, and made 45 degree cuts along the length & width with my TS 75.  Then made a 90 degree cut a half inch in from each edge to give the top some shape. The legs are angled outward at 7 degrees, and everything went together with domino's (no hardware). Sketches and practice boards helped me make sure that while the top mortises required a plunge at 90 degrees, the mortise angles on the matching legs required 83 degree plunges to compensate for the 7 degree angle cuts (whew!). Some sanding with a 5" non-festool sander and got into the tight spots with my RO 90. I plan on adding an Eagle Scout logo on the bottom before I sign, and finish it with multiple coats of poly.

A very fun, quick and useful project that will allow him to take a little bit of the dugouts with him wherever he goes.
 

Attachments

  • IMG_4409.JPG
    IMG_4409.JPG
    1.5 MB · Views: 578
  • IMG_4412.JPG
    IMG_4412.JPG
    2.2 MB · Views: 552
  • IMG_4416.JPG
    IMG_4416.JPG
    1.9 MB · Views: 499
  • IMG_4417.JPG
    IMG_4417.JPG
    725.6 KB · Views: 523
  • IMG_4420.JPG
    IMG_4420.JPG
    2 MB · Views: 413
  • IMG_4432.JPG
    IMG_4432.JPG
    2 MB · Views: 449
  • IMG_4438.JPG
    IMG_4438.JPG
    678.8 KB · Views: 569
  • IMG_4448.jpg
    IMG_4448.jpg
    700.4 KB · Views: 506
Back
Top