New vanity

Neal W

Member
Joined
Jan 6, 2015
Messages
133
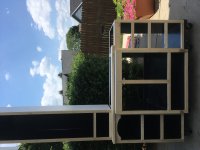
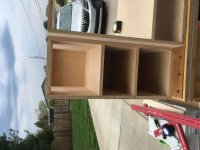
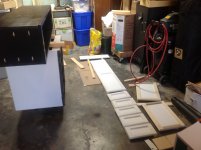
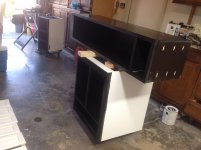
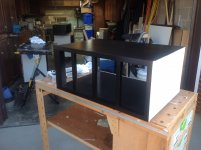
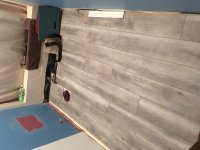
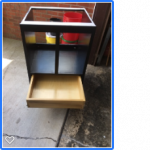
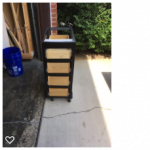
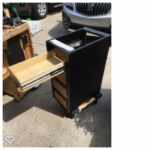
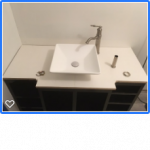
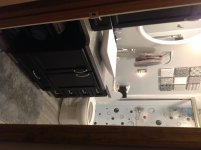
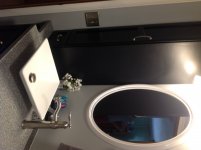
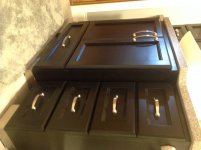
My big project for this summer is to remodel my upstairs bathroom. Part of that includes building a new vanity.

Here are a couple of project pics for the work in progress. View attachment 1View attachment 2
 

Attachments

  • IMG_1171.JPG
    IMG_1171.JPG
    2.1 MB · Views: 607
  • IMG_1153.JPG
    IMG_1153.JPG
    2.1 MB · Views: 484
Good luck.

I have the same thing to do but with a small bathroom in my basement, soon.

I want a small floating vanity with solid-surface. Have to redo the entire ceramic tiles, shower and a closet.
 
Progress continues...

I'm down to finishing now.... So I have parts everywhere...

Drawer boxes, doors drawer fronts and painting the cabinet carcasses.

It's kind of sad in way when you know you aren't going to to drag all of the toys out to cut things.
 

Attachments

  • image.jpeg
    image.jpeg
    1.3 MB · Views: 417
  • image.jpeg
    image.jpeg
    1.2 MB · Views: 388
  • image.jpeg
    image.jpeg
    1.1 MB · Views: 407
  • image.jpeg
    image.jpeg
    1.3 MB · Views: 431
This project is part of a total bathroom remodel. As such the flooring had to be replaced.  That was my weekend project. Vinyl click lock stuff.

(for some reason, pics from my phone turn sideways on here, and I'm not sure how to correct them.)
 

Attachments

  • IMG_1175.JPG
    IMG_1175.JPG
    1.7 MB · Views: 437
Neal W said:
Progress continues...

Drawer boxes, doors drawer fronts and painting the cabinet carcasses.

Looks good!

What material are you using for the drawer boxes and how thick is it?  Will you apply a finish to them?

Thanks,
dr
 
The smaller drawer boxes are 1/2 poplar with 1/2" plywood bottoms.through domino joints at the corners.  The large drawer box is 3/4" poplar with 1/2" plywood bottoms. The large drawer is roughly 22" wide so it needed to be more robust.

All have been coated with min wax polyeurathane.
 
More progress...

First thing I had to do was make a template for my counter top out of melamie.  The adventures in getting a custom vanity top through the big box stores has been interesting.  I had to send them an exact drawing.  So in order to get what I wanted I had to make a template for the top.  I purchased a piece of melamie board and here it is. 

View attachment 1

It has a vessel sink.  The manufacture Home Depot uses wanted a model number of the sink.  Why I don't know.  They need to cut two holes. 

Anyhow, this will be used temporarily while I wait on the solid surface top.

I also was able to install the drawer boxes in the cabinet boxes.

View attachment 2

View attachment 3

View attachment 4

View attachment 5

I can say this, I have a new found respect for the people who paint things and paint them well.  This black cabinet paint I bought at Lowes has been a royal PITA.  It has just been awful to work with. 

Still have to paint the drawer faces and doors.
 

Attachments

  • box4.jpg.png
    box4.jpg.png
    72.2 KB · Views: 169
  • box3.jpg.png
    box3.jpg.png
    73.2 KB · Views: 150
  • Box2.jpg.png
    Box2.jpg.png
    77.8 KB · Views: 169
  • box1.jpg.png
    box1.jpg.png
    75.4 KB · Views: 168
  • top2.jpg.png
    top2.jpg.png
    43.4 KB · Views: 209
Progress continues. Painting the doors and drawer fronts.

View attachment 1

The painting process has been a significant learning experience.  The paint we are using is the Lowe's brand of cabinet water base enamel paint.  We painted the cabinet boxes with brushes and rollers.  It was a pain in the neck.  We tried a variety of things.  WE put it on with a heavy nap roller and then rolled it out with a dry roller to smooth things out. Did the same with brushes and a dry roller.  Used Floetrol to help improve things, but it was still a time consuming PITA.

I decided I would try to spray the doors and drawer fronts.  I purchased a gravity fed Devillbiss spray gun that hooks to my Air compressor.  This has improved the process significantly.  Better more even coverage, more efficient etc.  By no means will I claim this to be easy, but each time I do it I learn a little bit more.  I've been pleased with the results so far. 

Two more coats of paint in the next few days, then I'll let them dry for a week and put some general finishes water based poly on them. 

The more I spray, the more I like the finishing process.
 

Attachments

  • image.jpeg
    image.jpeg
    2 MB · Views: 194
Finally finished with this project.

As a a somewhat inexperienced woodworker, there were many lessons learned.  Especially with respect to finishing.

THe "cabinet paint" from Lowe's is the worst possible stuff I have ever used and it caused me more stress than anything.  But at the end of the day, the boss is happy and I'm generally pleased with the results.

Here are some pictures of the finished product.


Attachments

  • image.jpeg
    image.jpeg
    1.1 MB · Views: 225
  • image.jpeg
    image.jpeg
    1.1 MB · Views: 229
  • image.jpeg
    image.jpeg
    945.2 KB · Views: 199
  • image.jpeg
    image.jpeg
    1.1 MB · Views: 239
Back
Top