New workshop build

HAXIT

Member
Joined
Nov 19, 2016
Messages
247
Hi Folks,
I bought my house about 12 years ago based on 30 years mortgage but I paid double any month I could and will close it less then 2 years from now. Since then, I have been working all over from kitchen to basement and doing the hardcore stuff in a garage.It has been for hobby but it seems like turning into the business now. Any new business involves risk but I must have a shop no mater what.
I have a two car garage which I could use for shop but I have no choice and I have to build the shop in the basement. I work with metal as well and I always add them to wood when I need to and I like to be independent. I have a full time job as a welder fabricator which I have been doing for 25 years and I could get the metal work done at work but do not want to do it so. I have to split the garage in half and I am planning to make the half for welding and lumber storage and make the other half as a spray shop.
I won,t use the whole basement for the shop so the space I have there would be 600 square feet only which is the same size as my garage and exact half the basement. I have been buying and looking into the shop plans and magazines but I do not like the Ideas!
I am doing this totally in the different way and because of being in the basement the maximum safety, noise and dust control is my priority and I do not care about the cost.
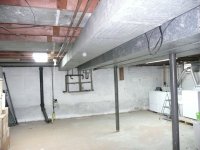
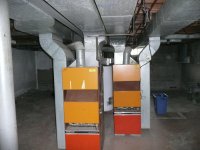
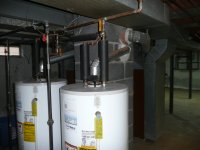
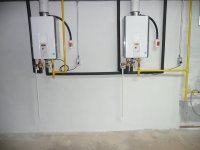
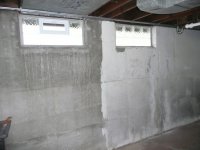
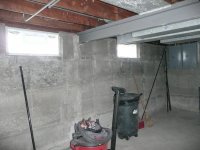
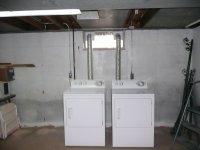
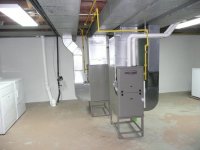
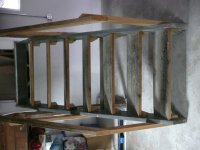
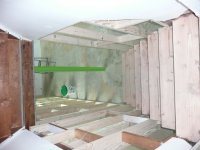
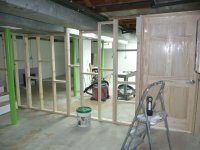
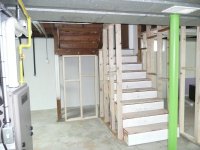
I will update the progress every weekend and most likely I will upload some pictures later to show you guys what kinds of nightmare  I have to deal with. I have to go now to find out why the snowblower does not want to work. [doh]
Please, feel free to comment or giving advise most likely any of you guys who has been working in the basement for the long time or share some pictures.
       
 
I have a basement shop and here are some of the basics for my shop.

What kind of access do you have to the basement?  I've got a French door walkout which enables me to get things into the shop that can fit through a 5'4"x6'8" (more or less) opening.  I also have easy pickup truck access to the back door.  Without that, I'm not sure how I would have gotten the bigger machines down there.

I ran a separate electrical panel for the shop.  That allows me to be flexible with outlets and lights as my needs change.  I also installed all outlets to outdoor code to keep as much dust as possible out of the outlets.

I ran good lighting to all parts of the shop, and made sure that there was direct light to where I needed it the most.  I used fluorescent fixtures, but if I were doing it today, I'd use the new generations of LED shop lights.

When placing outlets, I took bench locations into account, so that my benches have outlets slightly above bench level.  Unfortunately they poured the floor before I got around to putting conduit in the floor for outlets, but there's only one spot where I miss it.

For dust control I have the following:
*  Dust Collector, cyclone, 1300+CFM, HEPA cartridge filter, to the stationary machines that generate a lot of chips/dust.  I wish I could have isolated it from the rest of the shop, but it did not work out that way.
*  Two air cleaners, needed because of how my shop is laid out.  I have them set up so that I can use activated charcoal filters when finishing.  All of my finishing is rubbed, so I don't have to worry too much about explosive volatile hydrocarbons.
*  CT 36.  I switched from DeWalt sanders and a Fein vacuum to Festool sanders and vacuum, and it has made a significant difference in air quality in the shop when sanding.
*  About once a year when a wind comes up (and we get 50 MPH several times a year), I open the exterior doors and windows, start both air cleaners, grab my Milwaukee M18 blower, and blow out the shop.  Takes a half an hour or so, and some papers usually end up blowing around which is irritating.  The end result is that most of the stuff that cakes on over time gets cleaned out.

For noise, I have 32dB earmuffs, but at the same time I really try to pick the quietest tools possible.  I also put insulation for sound in the ceiling to keep the noise out of the main level as much as possible.

That's the part of shop setup that I think is independent of what kind of work you are doing.
 
Thanks HarveyWildes,
My access would be from 8 steps stairs but I still can get a lot of stuff down there but not too big.
I am agree on LED lights but I did buy a lot of fluorescent fixtures long time ago and the lights which I am going to use but in the future I would change it to LED tubes. I am not sure but I think you can fit the LED tubes in the fluorescent fixtures if you bypass the starter and the ballast. I am going to find out about this tomorrow. 
 
[member=63059]HAXIT[/member] there are couple of styles of led tubes. The ones that are direct wire where you bypass the ballast and the newer styles that can be a direct plug and play with electronic ballasts.
 
rvieceli said:
[member=63059]HAXIT[/member] there are couple of styles of led tubes. The ones that are direct wire where you bypass the ballast and the newer styles that can be a direct plug and play with electronic ballasts.
Then my search is over. Thank you
 
OK, I have been trying to post some pictures but I end up with no luck.
I do not know what I am doing wrong but I think the problem could be the size.
Now I am going to post only one picture for test and I am attaching as inline full size.
Is this a good size or it is too large?

[attachimg=1]
 

Attachments

  • P1050122.JPG
    P1050122.JPG
    1.8 MB · Views: 15,283
For my screen, the pic is fine.  I have a small basement shop. My biggest problem is probably dust control.  I have two CT's. My CT33 is at permanent home at end of my MFT/3 work bench.  I can move the hose to most of my other machines.  The ones that cannot be reached I have a CT22 that is easy to move around as needed.  For my planer, I have a Penn State vac with 4" hose to the planer.  That is the only machine needing the 4" hose.

I don't do very much metal work, altho in the past i have done some work with sheet metal.  Because my shop is so small and crowded, any time i do any metal work that sets sparks (My grinder)into the air, i take that out to my barn where i work on and store my outdoor landscaping equipment.  I don't want any sparks or flame in my wood shop.

Richard/RMW has done/doing a great and informative thread on his very tight woodworking shop. Look for something like 10 pounds in a 5 pound box.  I don't have that quite right, but you will get the idea if you do a search.  He has a lot of pics of some very great ideas.

Good luck
Tinker
 
My shop is in the basement as well.  I have a couple fold able saw horses in the garage to break down the sheet goods before carrying into the basement.  Bill Mueller, utube poster, posted a video of a collapsible torsion box for this reason.

As for noise, I would also recommend
constructing a 2x4 wall along exterior walls and a small room for the dust collection and air compressor,
insulating the exterior walls,
hang either drywall or plywood (Plywood is great for holding up cabinets etc.)
box in the duct work and use either soundproof drywall or noise cancelling channels (not sure what the exact name is for the channel.  The duct work being made of metal creates a nice path for noise to travel upstairs.  More than likely, there isn't enough room between drywall and duct work for insulation to be effective, imo.
The entry door into the basement may need to be a insulated door if it enters into the house as well as a weather strip.  Weather strip is to keep dust from entering the house as well as noise.  there are probably better alternatives.
run 20 amp outlets and dont forget to add some outlets in the ceiling for air filter and possible tools, especially over the workbench.

FYI -  Jay Bates has a nice miter station that creates plenty of storage while providing wings for the miter
  Also, he has a video of someone's garage setup which helps condense the work area by placing the workbench, planer, jigsaw, dust collection etc. in negative areas to maximize the space.  Cant seem to find the video.

Jeff

 
Thanks for the ideas and suggestions guys very appreciated. I am working till late time so the week ends are the only time that I can be online. I will post the whole plan that I have in my head over the weekend. Here is more pictures from the current situation.

[attachimg=1]

[attachimg=2]

[attachimg=3]
 

Attachments

  • P1050119.JPG
    P1050119.JPG
    2.2 MB · Views: 15,441
  • P1050128.JPG
    P1050128.JPG
    523.1 KB · Views: 14,451
  • P1050136.JPG
    P1050136.JPG
    3.3 MB · Views: 15,592
Finally Friday! I took off today and Monday to finish some stuff before weather gets very cold. If you look at these two pictures, here is where the shop will be and as you can see the house is double which means two hot water tank and two furnaces siting right there.
The hot water tanks are not too bad but the furnaces are junk but still work. Any way I don not want them in the middle of the shop so they will be replaced.

[attachimg=1]

[attachimg=2]

I always wanted to go with tankless water heater and this is the great time and I am doing it today. I just came up stairs for a cup of tea break and over the weekend I am changing the two furnaces as well. Both the tankless water heater and the furnace are 98% high efficient and have two pipes that goes outside the wall one for vent and another one for combustion intake. Now because chimney is not required, I am moving the system to the other side of the basement, completely outside the shop area which will be here in this picture.

[attachimg=3]

In this case, not only I open a huge space, but I am sure that it is safer and they take the fresh air from outside for combustion not from basement.
 

Attachments

  • P1050133.JPG
    P1050133.JPG
    2.2 MB · Views: 14,406
  • P1050135.JPG
    P1050135.JPG
    553.2 KB · Views: 14,163
  • P1050121.JPG
    P1050121.JPG
    2.7 MB · Views: 15,060
The two hot water tanks are gone and replaced with two tankless ones.

[attachimg=1]

And here the new glass block windows and clean up all the wires. All the wires in the basement are going in the conduit.

[attachimg=2]

[attachimg=3]

[attachimg=4]
 

Attachments

  • P1050777.JPG
    P1050777.JPG
    2.5 MB · Views: 14,140
  • P1050152.JPG
    P1050152.JPG
    1.8 MB · Views: 13,475
  • P1050151.JPG
    P1050151.JPG
    2.2 MB · Views: 13,629
  • P1050145.JPG
    P1050145.JPG
    1.5 MB · Views: 13,083
Keep going! it looks great so far. You've created so much more space. And the symmetry in the pictures really rustles my jimmies!
 
I am already happy for what has been done here. The two monster furnaces are replaced with two 98% 2 stage and variable speed  ECM maintenance free blower. The furnace is sealed and was designed for residential and commercial. For me and where I live, I really do not need the AC but if I want to I can add it any time. The stand in the picture is not include the furnace itself. I made the stand from 1" square tube and paint it same color as furnace. I bought these two units about three months ago when they were agree to give me a best deal on two. When they arrived, I measured everything that I would need and made these stands. There is a paint store near where I work so I opened the door on the furnace and took it with me to show it to them. They scanned the color and mixed the pant for me.
It is working great right now. I just have to finish the drain pipe.

[attachimg=1]
 

Attachments

  • P1050788.JPG
    P1050788.JPG
    1.9 MB · Views: 12,827
I have been down there in the basement since 6am in the morning and it is about 4pm now. I just did some painting and closed the opening on the duct where the old furnaces were located but mostly I was working on electric and running conduit. And here is the shop area which is 23' x 26' just about 600SF but I will have storage area under the stairs as well.

[attachimg=1]

About the power:
The shop will have 5 120v 20amp and 3 220v 20amp separate breakers and all the wires will be in the conduit dropped dawn from ceiling excluding one wall as you can see it in the picture. I will talk about this more later.
The walls.
What you see in the picture below, is not paint or drylock. It is a material that called Surface Bonding Cement (SBC) which is alkali resistant,fiberglass reinforced and cement mixed based material. It is much better then drylock. It takes 30 days to cure completely and during this time you have to spray it with water and it will get harder and harder. It is not as easy as you see in the videos on line to apply this product on the wall. I did this a month ago so it is cured now but it took me a long time to do it. I had to do this first before hanging the tankless water heaters and screw the electric boxes and conduits to the wall. Only the shop area will be paint over it but the other half will stay as is.

[attachimg=2]
 

Attachments

  • P1050789.JPG
    P1050789.JPG
    2.1 MB · Views: 12,944
  • P1050155.JPG
    P1050155.JPG
    1.3 MB · Views: 12,382
All the wiring and lights are done. Hopefully I will build the wall and put the door up over the weekend.
The shop will have 12 fluorescent fixtures. Each one will hold 4 4' T8 tubes.

[attachimg=1]

[attachimg=2]

[attachimg=3]

[attachimg=4]
 

Attachments

  • P1050805.JPG
    P1050805.JPG
    2.5 MB · Views: 12,069
  • P1050804.JPG
    P1050804.JPG
    2.5 MB · Views: 12,237
  • P1050803.JPG
    P1050803.JPG
    2.6 MB · Views: 12,304
  • P1050801.JPG
    P1050801.JPG
    474.1 KB · Views: 11,793
Am I alone in thinking this could be more shrine than workshop??  [big grin] [big grin] [big grin]
 
Today,the old stairs which was good for nothing came out and replaced with the new one which is more stable as well. Finished the wall and the door. As you can see in the picture, there will be some storage area under the stairs which is great. I have to cut that post and move it to the right for about 10" to open up my way.

[attachimg=1]

[attachimg=2]

[attachimg=3]

[attachimg=4]


Attachments

  • P1050912.JPG
    P1050912.JPG
    2.1 MB · Views: 11,820
  • P1060014.JPG
    P1060014.JPG
    1.8 MB · Views: 11,396
  • P1060015.JPG
    P1060015.JPG
    1.8 MB · Views: 11,361
  • P1060016.JPG
    P1060016.JPG
    2 MB · Views: 11,566
[member=63059]HAXIT[/member] have you checked the floor thickness at the location to whih you will move the post?  The appearance of the overall original construction looks like there is no problem.  However, whenever a row of posts  ar installed, there should be either a continuos footing or a footing under eack post.  I don't know how much weight is involved or even the thickness of the floor.  If i were doing the job, i would very definitely check before moving the post.  In previous pics, it appeas the beam is steel, but I am not certain. Checking is just an old habit.  A few years ago, i looked at a job that was going to support five fireplaces and a couple of support beams at two floors.  The first thing I noticed was there was a side wall that had been constructed because the builder had made a 8 foot error in placement of the wall.  The concrete floor had already been poured.  I told the builder I would not do an estimate until i had proof the chimney footing was in the right place.  After considerable argument, I walked away.  Ten years later the main part of the house was torn down. I never checked on why.  It was not in my town.  I just thought that maybe that chimney could  be the culprit and just maby it was creating a major problem starting at cellar floor level. >>> or below.
Tinker
 
Project is looking great. Everything is nice and clean and organized looking. I suspect you may have OCD as I do😀

Thought about what you are going to do with the floors? Polished and then possibly stained would look great and would be easy for cleanup. I'm thinking of doing this with my garage workshop (once I finally get it cleaned and organized). If you put in a big Festool logo maybe they will sponsor some of your renovation??? Yeah I know, probably wishful thinking, haha.

Following your progress.
 
Back
Top