I'm duplicating the installation posting, because the other thread is so long, this may get lost.
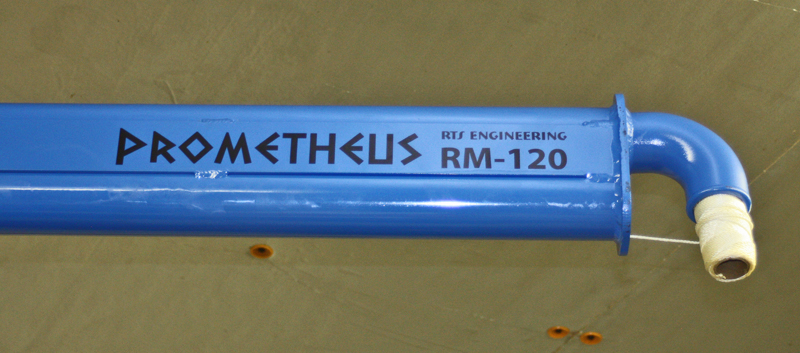
I mounted my Prometheus RM-120 boom arm in the garage yesterday. After thinking about how I was going to install the boom arm, I realized it would be way easier that I originally predicted. Not counting the gazillion breaks I'm known to take, it took about an hour of actual labor.
When planning out where I wanted to mount my boom arm, I considered the following:
- I have an unusual shape to my garage, which includes a large triangle-shaped work area at the right-rear of the main vehicle bay. So that area is the main emphasis of where I want the boom to reach.
- I have a garage heater hanging from the ceiling in this triangle area, and I didn't want the heater to obstruct the travel of the boom arm.
- I originally considered the side wall directly over my workbench, but then realized that the rear wall would give me the same coverage, and wouldn't be obstructed by the overhead door tracks.
- This also gave me the ideal location for positioning one of my CT-vacs.
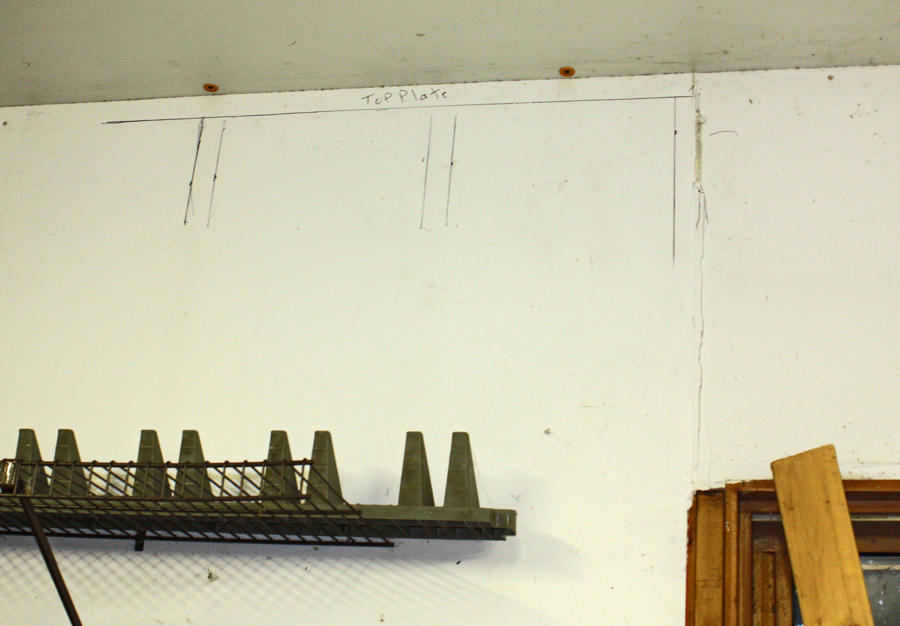
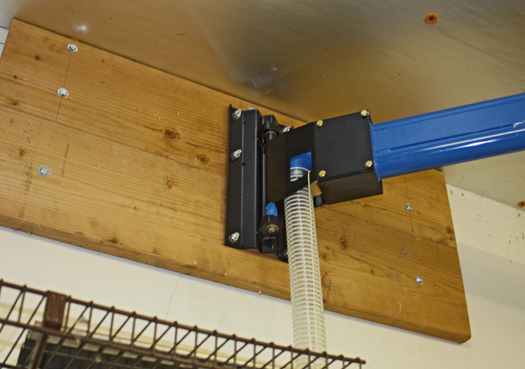
The first thing I did was carefully mark out the 2x6 studs and top plate. (I drew heavy lines so they would show better in a photograph.) It's important that the lag screws are in the center of the studs, so I marked both sides of the studs using a good stud finder. The upper 3 lag screws (see below) are secured into the top plate. This serves to lock the studs and top plate together for greater structural strength.
I had a spare 2x10 laying around, so I ripped it down to 9 inches, and cut it into two pieces 42 inches long. This is longer than what's needed to span 3 studs, but you don't want lag screws too close to the ends of a board.
I made a trip up to the home center and picked up (9) 5/16 x 4-1/2" lag screws (with washers), and (6) 3/8-16 x 2" carriage bolts.
I lined up the two boards on the floor and drilled clearance holes for the lag screws, and carriage bolts. Note that I shifted the mounting bracket slightly to the side so the middle lag screws would fall under the v-bend gap of the mounting bracket.
When drilling the 3/8" clearance holes for the carriage bolts, I used the mounting bracket to guide the drill, and after each hole was drilled, I inserted the carriage bolt into the hole to keep the bracket from moving while the other holes were being drilled. (See below for separating the mounting bracket from the boom arm.)
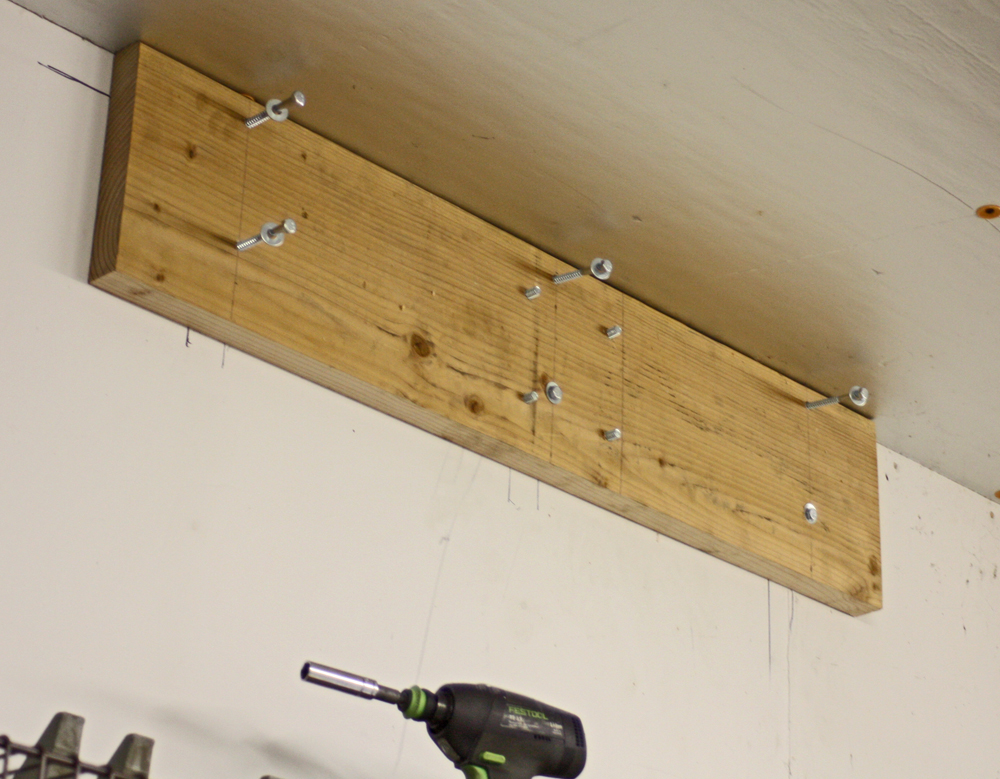
I held the upper board against the wall, and marked the locations of the lag screws so I could drill pilot holes. I then hammered the carriage bolts from the back of the board to set the square-cut of their heads into the wood. This prevents them from turning when I install the nuts on the other end.
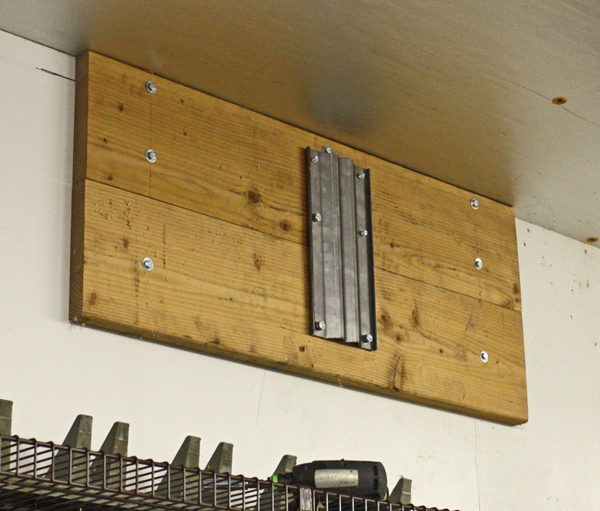
When I installed the lower support board, I loosely installed the boom arm mounting bracket onto all 6 carriage bolts to hold the two boards together. This ensured that all the bolt holes will line up with the bracket after the lag screws are installed.
Installing the Boom Arm
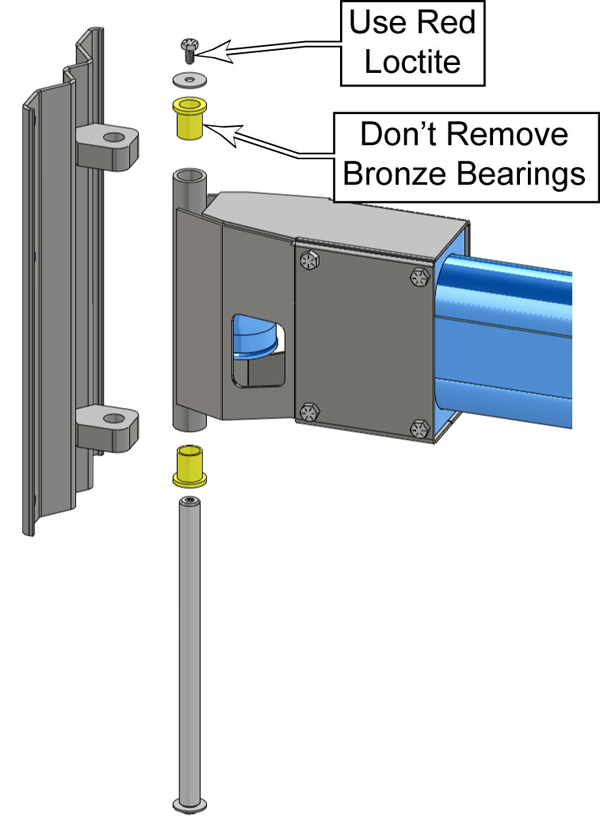
The stainless steel pivot pin of the boom arm separates the mounting bracket from the boom arm. When shipped, the lower screw will already be installed with thread-locking compound. Remove the upper screw and fender washer, and slide the pivot pin out of the bracket.
Note that there are 2 bronze bearings in the pivot tube. It is critical that those remain in place. The lower one was a little loose and would slip out during the install. So I put a small piece of tape on it to hold it in place until the pivot was reassembled.
Install the mounting bracket onto the 6 carriage bolts. Torque the nuts down firm enough to seat the heads of the bolts into the wood, but not so tight that they embed deep and crush the wood fibers.
With the boom arm still resting on my assembly table, I inserted a weighted string (blumb bob weight) through the lower tube to pull wires through later. This allowed me to just tilt the boom, and the weight would slide through to the other end. (In the picture below, you can see the string coming out of the lower tube, and I jammed the rest of the spool into the vacuum elbow just to hold it in place until later.)
To install the boom arm, I folded it in the center, and my son took the weight of the far end, while I guided the hinge back together at the wall bracket. Make sure the bearings are still in position, and slide the pivot pin back into the hinge. Use Red Loctite on the 1/4-20 screw threads.
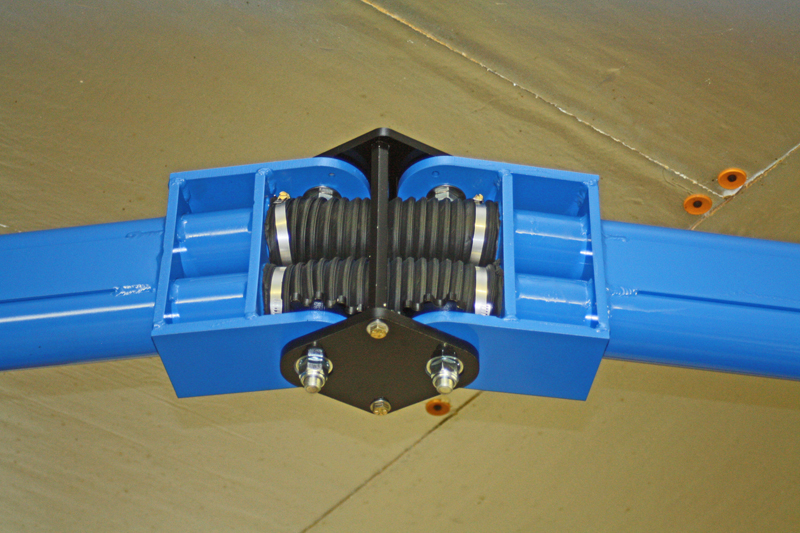
In case I haven't shown it before, here is a picture of the knuckle joint and the connecting hoses for both upper and lower tubes.