Paint Spraying Starting Points

PaulH99

Member
Joined
May 6, 2017
Messages
125
I'm just at the beginning of my HVLP experience and couldn't find starting points for many finishes. If you email the HVLP or finish manufacturer you'll get good recommendations, but none seem willing to provide their complete list, just one answer at a time. So with this post, I'm starting a list. [member=1674]Peter Halle[/member] agreed to sticky this at the top of the finishing forum to make it easier to find.

My request to all of you is, please reply with the combinations that have been recommended by the manufacturer to you, and whether you found that sufficient, or if you had to modify it. I will compile the answers into the table below.

Sherwin Williams
FinishApplicatorSizePressureNotes
Kem Aqua Plus SurfacerConventional0.055-0.070Air: 45-55 psiFord #4: 60 sec.
Airless0.013-0.015Air: 1800-2100 psiWet Mils: 4.0-5.0
AAA0.013-0.015Air: 15-20 psi; Fluid: 600-800 psiSand or re-coat after 20 min.
HVLP1.4-1.8 mmAir: 8-10 psi
Kem Aqua Plus WhiteConventional0.055-0.070Air: 45-55 psiFord #4: 40 sec.
Airless0.013-0.015Air: 1500-1800 psiWet Mils: 3.0-4.0
AAA0.011-0.013Air: 15-20 psi; Fluid: 400-700 psiSand or re-coat after 25 min.
HVLP1.4-1.8 mmAir: 8-10 psi
Target Coatings
FinishApplicatorSizeNotes
EM6500HVLP1.8mm
Zinsser
FinishApplicatorSizeNotes
BINHVLP1.0mm or smallerStir constantly to keep pigment suspended.
Seal CoatHVLP1.0mm or smaller
 
DuraLaq-WB Waterborne Acrylic White Undercoater, p/n 1WB.200

ApplicatorFuji MM5
Aircap1.3 mm
Air regulatorFull open
Fluid ControlFour (4) turns from full closed
Fan Pattern Control12 O'clock (circle) for edges, 2 O'clock for surfaces
Wet Mils3–5
 
DuraLaq-WB® Waterborne White Acrylic Finish, p/n 1WB.206 (Semi-Gloss)

ApplicatorFuji MM5
Aircap1.0 mm
Air regulatorFull open
Fluid ControlFour (4) turns from full closed
Fan Pattern Control12 O'clock (circle) for edges, 2 O'clock for surfaces
Wet Mils3–5
 
What a great idea!

It is so product based...I will try to add some of my product settings as time allows.
 
[member=64998]PaulH99[/member] Thanks for the initiative  [cool]

Last week I asked my first question about finishing. I mentioned I was not yet ready for HVLP or any spray painting. On the weekend  I asked one of my good friend "Youtube" to show me some videos to help understand. I first found that video from Easwood Company. Of course they try to sell their products, but that particular video was really informative to me. From that viseo I learned some techniques and that you can use bottom feed and gravity feed spray gun. If I was to order a spray gun before viewing those videos I would have no clue what the difference is and what to look for.
 
Great start!!!  Now, if we could just get [member=4105]tjbnwi[/member], [member=24938]JCLP[/member], and a few others with considerable expertise to compile their experiences in a similar table with appropriate notes and suggestions, we'd really be off to a good start.  I, for one, truly admire their expertise and wish it could be more available as I start into the world of HVLP. 
 
[member=7493]Sparktrician[/member] [member=66597]Mario Turcot[/member] Thank you! My hope is to take the tables others post and integrate them into the one I started so that there is a single source of "truth" for everyone. I suspect that attaching an Excel spreadsheet might be a better option though.
 
Sparktrician said:
Great start!!!  Now, if we could just get [member=4105]tjbnwi[/member], [member=24938]JCLP[/member], and a few others with considerable expertise to compile their experiences in a similar table with appropriate notes and suggestions, we'd really be off to a good start.  I, for one, truly admire their expertise and wish it could be more available as I start into the world of HVLP.

When I can find the time I will contribute to this. One of the biggest issues would be some of the equipment I use and environmental changes. Not to many here have 10K in finish sprayers set up.

Always listen to what the spray is telling you. You will hear changes before you’ll ever see a finish flaw.

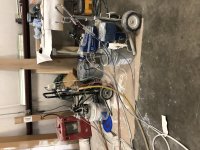
Below are 3 sprayers and 4 guns I’m using on the current job, each one is set differently to adjust for the machine and product it is delivering. The Triton I had to decrease fluid pressure on from the start at 7 AM to the temp change at 1 PM. It was just a 2 psi change, but I had to make the change to keep the finish consistent. As the day cooled I had to add the 2 psi back.

Finishing is the hardest endeavor there is in wood working.

Tom
 

Attachments

  • 7DBF8D7D-EAAD-459B-A36C-860E7F1022CD.jpeg
    7DBF8D7D-EAAD-459B-A36C-860E7F1022CD.jpeg
    2.7 MB · Views: 1,174
  • C46C93D0-6004-472E-A858-401B7DAD1ACB.jpeg
    C46C93D0-6004-472E-A858-401B7DAD1ACB.jpeg
    2.1 MB · Views: 1,165
PPG Brealthrough
Water-Borne Acrylic Interior/Exterior, produc # V51-410C

Applicator: Fuji Q5, power adjusted to the 4 o'clock position, 3M PPS, T75 Gravity gun. This may will need to be adjusted if you are using the T70 Siphon gun
Aircap: 1.5 mm for cabinet door size panels. For large panels ( fridge size ) I use a 2.5 mm to get a better fan with full power on the Q5
Air regulator: Not used
Fluid Control: never kept tracked of this as it does differ a little each time
Fan Pattern Control: Vertical spray - Horizontal postion
Wet Mils 3–4

This paint is very forgiving as long as you apply the correct wet mils. I thin this 10% with distilled water. Do not exceed as I have done this and it does affect the film and hardness. Some people use the Extender product from BM. I have tried that and found the paint does not dry as hard. Use WATER only. Make sure you fan width is about 5-6 inches and that you are not putting too much paint as it will affect the level of atomization. Keep the gun about 7-8 inches away from the surface, overlap 50%. It should take you about 2-3 seconds to do a 16" pass.

Cheers,
JC
 

Attachments

  • Breakthrough.JPG
    Breakthrough.JPG
    2 MB · Views: 1,039
PPG Breakthrough
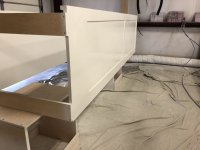
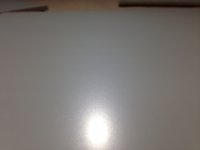
As many of you know, I have been spraying PPG Breakthrough, #V51-410C, tinted to a medium to dark grey. As I have had great success in laying down a very smooth coat I thought everything was going well until I looked at it uner an LED light. You see from the photo below that the colour turns out blotching and not smooth looking. It was smooth to the touch, but looked like crap when you look at the panel under the LED light at an angle. So I started doing a lot of testing with thinning, air pressure, needle size and spraying technique to rectify the situation, but had no luck. After much research, on the web and talking to paint experts and PPG support, I came to the conclusion that the colorant used to tint the base was not compatible.

Found out that some PPG dealers, who were also BM dealers, are using BM colourants to  tint the paint. Now many think that because Breakthrough is an acrylic paint and the BM colourant are also acrylic that it would work. WRONG.

After many discussions with PPG, they informed me that the only colourants that are compatible with Breakthrough is their 96 line of colorants. So off I went looking for a PPG dealer that used their colorants. To my surprise, it proved very difficult as many of their dealers our also BM dealers. So they gave me a location of one of their corporate stores, not a BM dealer, and I purchased a gallon using their tints. Guess what, it works perfectly.

As a warning, the acrylic that BM uses and PPG uses for their paints is not the same. Many people also use BM extender to thin Breakthrough. Do not, as the acrylic resin of BM Extender is not the same as the acrylic used in Breakthrough. Only use water to thin the paint. Also, be careful. Some PPG dealer will use the Glycol version of their colorants to tint Breakthrough. They are not compatible. You never put Glycol in an Acrylic based paint.

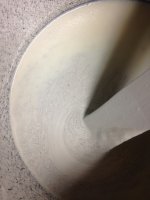
The two additional photos below illustrates the compatibilty of BM Colourant in Breakthrough. This can has been sitting for 2 days. The can tinted with PPG colorants did not do that after 2 days.

Cheers,
JC


Attachments

  • Panelbreakthrough.jpg
    Panelbreakthrough.jpg
    3.5 MB · Views: 952
  • Breakthroughpaint1.jpg
    Breakthroughpaint1.jpg
    1.5 MB · Views: 969
  • Breakthroughpaint2.jpg
    Breakthroughpaint2.jpg
    1.6 MB · Views: 934
JCLP said:
PPG Brealthrough
Water-Borne Acrylic Interior/Exterior, produc # V51-410C

Applicator: Fuji Q5, power adjusted to the 4 o'clock position, 3M PPS, T75 Gravity gun. This may will need to be adjusted if you are using the T70 Siphon gun
Aircap: 1.5 mm for cabinet door size panels. For large panels ( fridge size ) I use a 2.5 mm to get a better fan with full power on the Q5
Air regulator: Not used
Fluid Control: never kept tracked of this as it does differ a little each time
Fan Pattern Control: Vertical spray - Horizontal postion
Wet Mils 3–4

This paint is very forgiving as long as you apply the correct wet mils. I thin this 10% with distilled water. Do not exceed as I have done this and it does affect the film and hardness. Some people use the Extender product from BM. I have tried that and found the paint does not dry as hard. Use WATER only. Make sure you fan width is about 5-6 inches and that you are not putting too much paint as it will affect the level of atomization. Keep the gun about 7-8 inches away from the surface, overlap 50%. It should take you about 2-3 seconds to do a 16" pass.

Cheers,
JC

Important addition:  Breakthrough! according to PPG always has an exclamation mark at the end. [laughing]

Note:  Only the Breakthrough! with a VOC of 250 is recommended for cabinet work.  The version with a VOC of 50 is not recommended and that is the version that most stores carry in stock.

Confusingly the VOC 250 is listed as part number "50".  So watch the details.

It sprayed easily (if properly thinned), dried fast, and the finish was very hard. 

I had been using Breakthrough! and I loved the quick dry times. 

There were two PPG dealers near my house.  One required a four gallon minimum purchase (a little over $200.00) even if you only needed one gallon or less of paint.

The other dealer would order the paint, but I guess put the other 3 gallons in inventory.  Unfortunately they went out of business, another Covid 19 casualty.

I went to the nearby Sherwin-Williams paint store and said, "I need some Emerald paint for cabinets."  He said, "No problem" and mixed up the color.  It sprayed well, but would not get hard.  Some checking online showed that he sold me the wall paint which is acrylic based.  I needed the urethane based paint for cabinets. 

I came back and he said that they did not stock the urethane paint and that there was nothing he could do for me.

I went to Benjamin Moore and got Advance.  I've been avoiding that paint because of the crazy-long drying times:  16 hours for re-coat and 30 days for full cure. 

But the  slow dry time allows the paint to self-level.  I still had to come up with the right amount of water to thin it, but it sprayed out nice, leveled perfectly and I think I prefer the B-M satin over the Breakthrough! satin. 
 
My own testing this week:

KA+ Surfacer measured 24s through Ford #4 at 75 to 80 degrees. I always use a 1.8 needle and cap set fuji 5 stage hvlp.

SW gallery series the manufacturer says no thinning required. Absolute lie. It measures 2min at 75-80 degrees. Thin 10% and it goes to 40s. Also used a 1.8 with this and my setup and sprayed beautifully
 
Good luck getting your hands on the SW Chem-aqua paint.  I've tried to buy some at several different SW stores and they just don't carry it.  I also wanted to mention that there are a lot of videos on YouTube with experienced painters demonstrating how to thin paint "by eye".  Don't even think about it - Use the #4 Ford cup and thin it until the Ford cup empties is a specific time.  No guess work, No spitting of paint just a very nice spray on your project.
 
KemAqua, KemAqua+ and Hydro+ EA are only available through the Product Finish stores. A "normal" store will not have the products or the ability to work with them properly.

I was told by the DM of the Product Finish division for my area that the Gallery series is a slightly modified Hydro + that the "normal" stores can work with. 

Hydro + EA can be used for any interior wood finishing project. For primer we use Gen II, I do not know if this is available to the general public. Hydro+ EA is self sealing, you can use it as your prime coat if necessary.

Tom
 
Back
Top