Parf guide system

Paulhoward

Member
Joined
Jul 22, 2020
Messages
7
I have the parf guide system mk 1 and 2 and I have made several mft table tops. I never questioned the accuracy of the system until I purchased the 600 mm parf fence last year. I noticed that the fence dogs wouldn't fit in every position in the mft top, so I questioned the fence. I have since taken the parf 20 mm fixture and matched it to the parf fence perfectly matched holes. I have now questioned the accuracy of my use of the parf system. I have read the manual and watched Peter's YouTube videos over and over, but the new mft tops were off on some holes about 1/2 mm. Any advice from someone else that uses the system would be helpful. Thanks
 
While I am not a user of the Parf guide system, I am a user of the 600mm parf fence. I especially like the low profile of it and it's designed so that it can be used with work surfaces with dogs that are not perfect. In my case Im using it on an MFT 3 and MW1000 extension table so if my dogs are off its Festool's fault.

I also, have cheated with the parf fence and added offset holes using the 20mm holes as the drilling template for the additional 20mm offset holes. They came out perfect, although it probably isn't accurate to the 10k millimeter as some strive for.

Anyway, the most import thing, when drilling dog holes, is that the holes are 90 degrees to each other even if some of the spacing isn't exact (for standard cross cutting) If setting the table up for angles and fancier cuts then you have to worry about the diagonals, etc.

(I feels like this requires requires a "myth buster type" Youtube video to show an angle table top and boards being cut 90 on it)
 
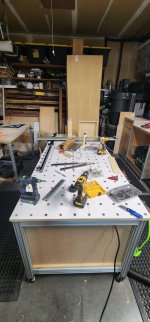
I have the MK2 version and made 200 holes (10 x 20) in my MFT-style workbench.  This was my first project with the Parf Guide system, and as far as I have measured after the build, all of the 20mm holes are perfectly aligned.

If a few holes are off, the error might be due to your technique and not the guide.

i-H2KKSjH-L.jpg
 
The most common source of error I've encountered is when drilling a row of holes with the ruler. The common sequence is drill one row of holes along an edge of the workbench top. This can typically be clamped a few places so lateral movement of the ruler can be ruled out as a source of error. Then two orthogonal rows (columns I guess) of holes can be drilled by connecting two rules in the 3-4-5 method. After those two parallel columns of holes are drilled, the next step is to use the locating pins to drill out the remaining rows, one at a time, with single ruler pinned at each end by a locating pin in the orthogonal 'columns' of holes.

It is possible when a ruler is pinned in the "0" and "10" holes to move the middle of the ruler laterally by a small amount. I have never measured this, but certainly on the order of tenths of millimeters which would be enough to throw off the accuracy to the extent you mention.

In my own use, I have had to slow down and be very deliberate when drilling these holes in the middle of the top because there is no good way to clamp the ruler against lateral movement.
 
Mine is pretty big (325 holes) at 13 x 24. It was done with the MK1 version, back in Sept of 2019.
This was my first go-round with that system, as my first one was done with a CNC template, router, and bushing. When I needed a new one, because of a fire, there was no CNC available yet. (for the same reason)
I bought the ParfGuide MK1, to get it done. I had watched Peter drill the pattern several times and heeded his advice. Checking back and forth with the sticks and triangle method, over and over.
With a table this long, accumulative errors could get out of control. Rechecking and clamping the sticks is very important to the accuracy.
Starting from the middle and working away each direction helps too.
Mine are dead-on everywhere, I've checked, since I use it for fixturing all the time. 
 
thank you All ! -
for the questions and responses. This thread will be helpful for woodworkers now considering or just starting to discover the benefits and eventual workhabits which make use of Peter Parfitt's useful invention.

Your comments will also make instructive reading for TSO's Customer Service Team in their efforts to be helpful to our ParfGuide customers.

Hans
 
I have read the advice given on my parf guide issues (some 3 mm holes being off a small amount) as the top line of holes seems to be the problem. The person who said that the sticks might have been pushed over where I drilled the 3mm holes since I could not clamp the Parf stick at the top row this seems to be my problem. I am going to redo the diy mft and take extreme care when drilling the 3mm holes where I can't clamp the sticks down to my mdf board. Thank You so much for the information on using my parf guide system.
 
Paulhoward said:
…I have read the manual and watched Peter's YouTube videos over and over…

Just double checking, because there are lots of videos on it: make sure you specifically watch the “Advice and Tips” video, if you haven’t already. It goes into the common pitfalls.
 
I've had trouble using mine to get accurate spacing and alignment. I have the original Mark one system and was thinking about getting another ruler to make it work better. That's when I found out about the differences between the mk1 & 2. I ended up using my LR32 to do the holes but the spacing between the grid lines is slightly off on some but all of the holes are 90° to each other.

Sent from my SM-S908U1 using Tapatalk


Attachments

  • 20240202_212132.jpg
    20240202_212132.jpg
    68.6 KB · Views: 94
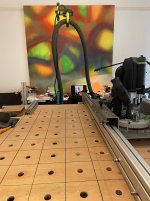
Have used Parf1 and Parf ll with variable results … these days my bench makes its own work tops! Have added Lead Screws to the X and Y axis of my router sled, this gives me CNC accuracy, thats as long as my analogue brain doesn't screw up the settings!
 

Attachments

  • IMG_2024-04-25-150431.jpeg
    IMG_2024-04-25-150431.jpeg
    308.3 KB · Views: 96
Back
Top