Project Failed....how to fix for next time

Question... As I have a hole in the top of the table that is 1/4" wide by 3/4" long how do I fill that?

I know of wood putty and I've heard about the saw dust and glue method. I was going to try to build a plug but of course it's in the middle of a weird grain texture so no matter what the patch will show.

I just want it to stain the same color of the wood. They will be using a light colored stain on it.
 
Brian247028 said:
Question... As I have a hole in the top of the table that is 1/4" wide by 3/4" long how do I fill that?

I know of wood putty and I've heard about the saw dust and glue method. I was going to try to build a plug but of course it's in the middle of a weird grain texture so no matter what the patch will show.

I just want it to stain the same color of the wood. They will be using a light colored stain on it.

You’ll learn that wood isn’t a color. Simplified, it’s lots of colors, but it’s more complicated than that. The grain/figure of course but also any filler will change colors differently than the wood once the finish is applied.

The best you can do, given that the grain in that spot is unique so you can’t find another piece of wood to patch in that will match, is to fill the hole then apply a coat of finish to the area (no doubt the first of several) then hand paint the filled area to match the surrounding grain. Might need to get an artist or furniture restoration person.
 
Brian247028 said:
Question... As I have a hole in the top of the table that is 1/4" wide by 3/4" long how do I fill that?

I know of wood putty and I've heard about the saw dust and glue method. I was going to try to build a plug but of course it's in the middle of a weird grain texture so no matter what the patch will show.

I just want it to stain the same color of the wood. They will be using a light colored stain on it.

The plug you're planning will be less noticeable than putty or filler. Maybe make it a "feature" rather than try and hide it. Make your patch contrast rather than try to blend in. Maybe use walnut and make a shape out of it...something the owners would relate to.
 
Another potential source of the router problem may be seating the cutter properly.  By any chance, did you push the cutter all the way into the collet until it bottomed out?  If it is all the way in, the collet may not tighten properly.  If that is the problem then the collet is loose when you start and the cutter will walk its way out of the collet.  Besides ruining the wood, it is also really dangerous.  The solution is to push the cutter all the way in, then pull it out a mm or two, then tighten the collet.
 
Does the hole in the table top run in the 8' direction or in the 4' direction? If the latter, you could turn the hole into a bow tie instead that would "hold" the individual boards together.  [smile] 

As far as the collet goes, it's probably trash and I'd just replace it. You mentioned really tightening it up and once it's distorted it loses its holding power and will never be serviceable again. Over tightening a collet is a common issue and a common problem.

Pushing a 1/4" router bit, and taking a 1/4" deep cut in hard maple at the same speed as using a round over bit is way too aggressive. Slow down and take a shallower cut. I'd bet that was the initial reason why the router bit loosened up. Harmonic vibrations are created and that will lead to the collet loosening...I've experienced this with aluminum several times. My solution was to reduce the depth of each pass.

Now's where it gets really ugly, again after the first mishap, it's likely you started to burn or "wear" the router bit and then when you reset the bit and "really tightened" the collet maybe you started to spring (deform) the collet. That coupled with any accelerated wear on the router bit, brought you into an endless do-loop unfortunately. CMT router bits are of good quality, I've used them for over 40 years.

Lastly, it's not only important to take equal amounts of material from each side of a board, but it's also important not to just hog it all off in several passes and then flip the board and bring it down to final thickness. I'll make 2 passes, flip the board make 2 passes, flip the board make 2 passes....

I really do feel bad for your situation, but may be with some creative thought this lemon can be turned into lemonade.  [big grin]

 
jwbcommon said:
Another potential source of the router problem may be seating the cutter properly.  By any chance, did you push the cutter all the way into the collet until it bottomed out?  If it is all the way in, the collet may not tighten properly.  If that is the problem then the collet is loose when you start and the cutter will walk its way out of the collet.  Besides ruining the wood, it is also really dangerous.  The solution is to push the cutter all the way in, then pull it out a mm or two, then tighten the collet.

This is a very very very important point. As you start to tighten the collet, it first grabs the shank of the router bit and puts a death grip on it. If the the router bit is now bottomed in the collet hole, you will never be able to fully tighten the collet into the bore of the router motor and it will start to loosen probably almost immediately.
 
Cheese said:
Snip.
Lastly, it's not only important to take equal amounts of material from each side of a board, but it's also important not to just hog it all off in several passes and then flip the board and bring it down to final thickness. I'll make 2 passes, flip the board make 2 passes, flip the board make 2 passes....Snip.
I must admit...my process is even more stringent (or stupid?) as I actually make one pass, flip, make another pass, then flip, then make another pass, then flip.... If I develop a popeye arm, I'd blame it on woodworking, or more specifically, on thickness planing.

As others have pointed out, even after everything I do, I can still experience surprises, which fortunately are far and few between.
 
As has been stated by several others, I realize that this all is a huge disappointment, and the fact that we have all been there to some degree, doesn't really make it any better.

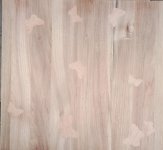
There has been a lot of good advice here. Some of these solutions depend, at least to some degree, on your client. The "patch" method, whether you are trying to make it blend in, or as an accent, is going to be far better than filler. In my experience, unless you are going for the accent look(like a butterfly) don't make your patch too small. Many times you can cut out a larger section and make it less noticeable.

I wouldn't hesitate one second to replace that collet. They do wear out (or sustain damage) and that is why they are easily available as a replacement part, at least from the major manufacturers. A 35 year old one, on the other hand, likely not, unless it's something like Porter-Cable. Even at that, maybe not because P-C is nothing but a shell of its former self.

Personally, I favor larger shanks anyway. I prefer 1/2" for most applications, but that does add considerably to the cost. As a Festool user in the US, I have gotten into 8mm shanks in recent years. They  strike a nice balance between stiffer shanks and cost, especially since they are getting easier to find.
This has gone beyond the scope of the original problem though.....sorry.

You never really can tell about wood though. A few weeks ago, I built a large room divider/screen unit out of Maple. The boards themselves were 2" x 4" (literally, not like nominal dimensions of construction lumber) and about  9' in length. They form a partiton that looks similar to vertical blinds. The timber came from a local supplier in finished size, except for length. They sat in the shop for a few weeks before I got to them, but they were all pretty straight. This doesn't have to be as perfect as a table top, since there is a 4" gap between the boards. All that to say, that one of them went crazy when I cut it to length. I was only taking off a foot or so, it's not like I cut them in the middle. Apparently there was a bundle of fibers in there somewhere that was under tension and keeping it straight, until I cut it. It bowed in both directions, becoming useless as a whole stick. It happens.

Either way, don't give up. Call it a learning experience and move on. If you are going to start getting into bigger projects like this though, a few more tools might be in order.
 
I was just about to suggest an inlay to cover the hole but I see CRG already suggested that! A butterfly would look great to cover it up. This is a low table i'm working off and on atm with inlaid butterflies.
 

Attachments

  • Low_Table_01.jpg
    Low_Table_01.jpg
    619.2 KB · Views: 165
There’s not much I can add to this great list of support and advice (and I learned a ton reading this, myself!). How frustrating.

Part of what makes this hobby and other creative pursuits special is that you give a small piece of yourself to each project. That’s what makes the highs so high. It’s also what makes things going wrong a special kind of hell.

Sorry for the trouble, Brian. The fact that you’re here still learning and post-gaming speaks volumes. FOG has got your back.
 
Oh, one more thing.  I might suggest that in passing you mention what happened to your supplier in passing and see if they volunteer to help out in some way.  It could be done in a manner like asking them if they had heard about problems with that batch of maple because...(describe what happened to you).  Maybe they will, maybe they won't.  But if you approach it this way you are unlikely to cause any bad blood and affect your relationship with them.

Just a thought.

Peter
 
50 years ago I was taught that “the person who never makes mistakes never makes anything”.

Since then I’ve added one exception, for Norm Abram.  ;)
 
Back
Top