ear3
Member
- Joined
- Jul 24, 2014
- Messages
- 4,341
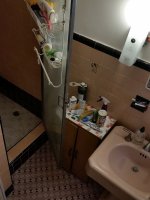
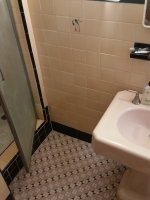
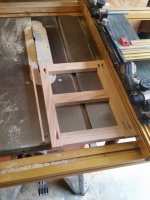
For as long as I can remember, there has been this rectangular, boxy pine cabinet in the main bathroom in my house. Not sure if my Dad made it way back when, or whether it goes back even further to my grandfather. In any case, I've decided to remove it and use the space as an opportunity to build a small cabinet.
View attachment 1
View attachment 2
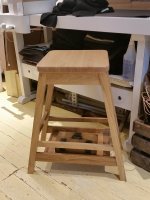
You see the peculiar space constraints. The heavy metal sink to the right, and the shower door to the left, which we gave up a long time ago ever needing to open all the way (all the fixtures and the salmon colored tile in the bathroom go back to when the house was built in the late 30s). So I decided to take advantage of the peculiarities of the space to do a design challenge for myself of making a trapezoidal/angled cabinet. I didn't have any particular model in mind, other than that it would be made largely out of QSWO and be vaguely arts and crafts/mission life. I made a stool last year that reproduces the basic frame:
View attachment 11
but never something like this which will have three pull out drawers on the top and hinged doors that open on a taller shelf on the bottom.
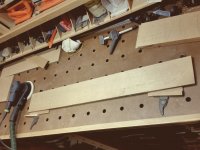
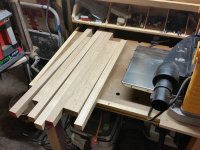
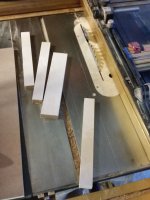
So I picked up a mix of 8/4 and 4/4 QSWO at Boards and Beams in New Jersey the other week, and got down to planing the lumber
View attachment 3
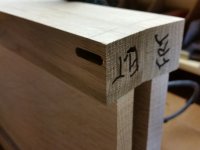
Not wanting to break the bank on the 8/4, I decided to just buy a short 3 ft piece they had there, and then use up some 8/4 scraps I had left over from the mitre saw cart I built last year. Even then, I found I was one piece short, and so I ended up laminating one of the posts, which, as you can see even close up, is barely distinguishable (and will be in the back anyway):
View attachment 4
View attachment 5
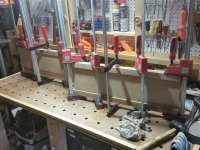
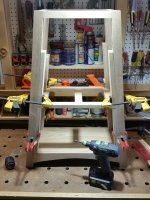
I dominoed the interior panel for the sides and glued it up to the posts
View attachment 6
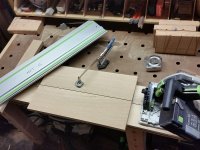
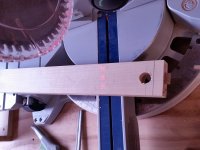
Then I began doing the mortises for the front and back cross pieces to connect the sides. I thought I could get away with plunging close the edge on the tops, but broke through the top on the first try:
View attachment 7
So I ended up shortening the 6mm dominoes somewhat
View attachment 8
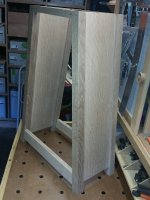
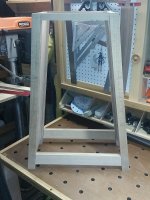
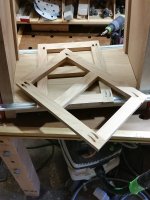
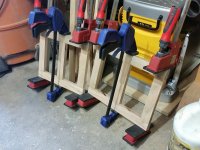
Here's what it looked like after the initial fit
View attachment 9
View attachment 10
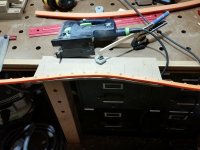
Then went to work on the bottom shelf. To conserve the QSWO, I decided to use plain white oak for the bottom shelf -- turns out this was unnecessary, as I still have enough QSWO at this point, but oh well -- I figured that it wouldn't be visible from the outside anyway. I only had 1x6s, and the shelf needed to be around 10", so I edge jointed two pieces of 1x6 white oak, fitting the boards using the split kerf method
View attachment 12
After gluing it up, so that it would fit snug on the inside post and frame assembly, I notched the corners of the shelf using the Carvex, and then cleaning it up with chisels
View attachment 14
I then dominoed the shelf, along with the bottom cross pieces -- but to cut down on all the glue messiness (and honestly, to speed things up a bit), I pocket holed the bottom, and so the dominoes served simply for alignment purposes
View attachment 13
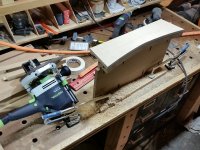
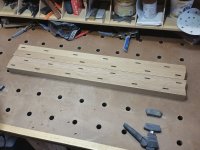
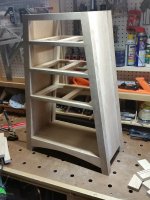
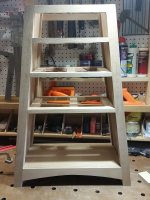
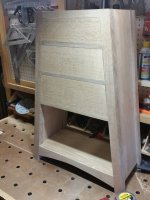
After looking at the bottom shelf assembly, I realized that it might look better to add a curve to the bottom front support, so I made an MDF template, attached it to the shelf with double sided tape, and ran the 1400 with a flush trim bit:
View attachment 15
View attachment 16
Next up, the shelves...
View attachment 1
View attachment 2
You see the peculiar space constraints. The heavy metal sink to the right, and the shower door to the left, which we gave up a long time ago ever needing to open all the way (all the fixtures and the salmon colored tile in the bathroom go back to when the house was built in the late 30s). So I decided to take advantage of the peculiarities of the space to do a design challenge for myself of making a trapezoidal/angled cabinet. I didn't have any particular model in mind, other than that it would be made largely out of QSWO and be vaguely arts and crafts/mission life. I made a stool last year that reproduces the basic frame:
View attachment 11
but never something like this which will have three pull out drawers on the top and hinged doors that open on a taller shelf on the bottom.
So I picked up a mix of 8/4 and 4/4 QSWO at Boards and Beams in New Jersey the other week, and got down to planing the lumber
View attachment 3
Not wanting to break the bank on the 8/4, I decided to just buy a short 3 ft piece they had there, and then use up some 8/4 scraps I had left over from the mitre saw cart I built last year. Even then, I found I was one piece short, and so I ended up laminating one of the posts, which, as you can see even close up, is barely distinguishable (and will be in the back anyway):
View attachment 4
View attachment 5
I dominoed the interior panel for the sides and glued it up to the posts
View attachment 6
Then I began doing the mortises for the front and back cross pieces to connect the sides. I thought I could get away with plunging close the edge on the tops, but broke through the top on the first try:
View attachment 7
So I ended up shortening the 6mm dominoes somewhat
View attachment 8
Here's what it looked like after the initial fit
View attachment 9
View attachment 10
Then went to work on the bottom shelf. To conserve the QSWO, I decided to use plain white oak for the bottom shelf -- turns out this was unnecessary, as I still have enough QSWO at this point, but oh well -- I figured that it wouldn't be visible from the outside anyway. I only had 1x6s, and the shelf needed to be around 10", so I edge jointed two pieces of 1x6 white oak, fitting the boards using the split kerf method
View attachment 12
After gluing it up, so that it would fit snug on the inside post and frame assembly, I notched the corners of the shelf using the Carvex, and then cleaning it up with chisels
View attachment 14
I then dominoed the shelf, along with the bottom cross pieces -- but to cut down on all the glue messiness (and honestly, to speed things up a bit), I pocket holed the bottom, and so the dominoes served simply for alignment purposes
View attachment 13
After looking at the bottom shelf assembly, I realized that it might look better to add a curve to the bottom front support, so I made an MDF template, attached it to the shelf with double sided tape, and ran the 1400 with a flush trim bit:
View attachment 15
View attachment 16
Next up, the shelves...
Attachments
-
 Old Bathroom Cabinet.jpg244 KB · Views: 598
 -
 Routed curve.jpg391.8 KB · Views: 418
 -
 Curve template.jpg262.9 KB · Views: 387
 -
 Notched bottom shelf.jpg296.5 KB · Views: 284
 -
 Bottom shelf pocket holed.jpg303.2 KB · Views: 389
 -
 Split kerf shot.jpg311 KB · Views: 338
 -
 Oak Stool, front.jpg270.4 KB · Views: 447
 -
 Initial fit side view.jpg290.9 KB · Views: 324
 -
 Initial fit.jpg330.2 KB · Views: 321
 -
 Shortened Domino.jpg234.7 KB · Views: 288
 -
 Old Bathrrom Cabinet Space.jpg225.5 KB · Views: 432
 -
 Planing Stock.jpg312.3 KB · Views: 318
 -
 Posts post dominoes.jpg277.2 KB · Views: 336
 -
 Comparison of solid and laminated posts.jpg271 KB · Views: 349
 -
 Sides glue up.jpg355.7 KB · Views: 390
 -
 Mortise Breakthrough.jpg169.3 KB · Views: 402


")