ear3
Member
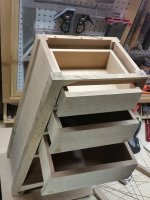
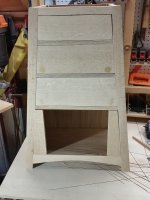
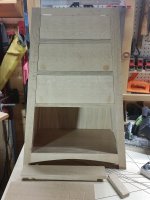
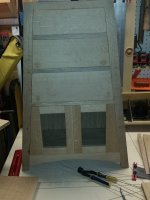
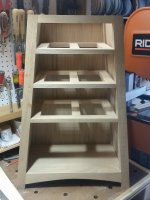
Made and fitted the back yesterday.
Funny story. The guy at the lumber yard tried to sell me a sheet of 1/4" red oak veneered ply (it's not a place I go to all that regularly) in place of the white oak I asked for. He kept on insisting that it was just the light that made it appear reddish after I raised concerns. I actually almost drove off with it, distrusting momentarily my own eyes, but then thought better of it and went back inside the office, and asked if I could rifle through the sheets myself -- sure enough someone had thrown a bunch of red oak sheets on top of the pile, and a few down in the stack I was able to get what I was hoping to find, which was a rift sawn sheet that even had a little QS effect (they don't stock QS sheets specifically). Even then he didn't believe me, and as I was walking the sheet back to my car I noticed he put the one I rejected back on top of the pile of white oak sheets!
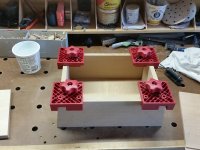
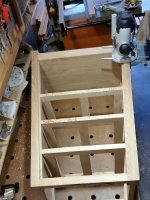
Back at home base I rabbeted out the back about 3/8". Did the top and sides with the 1010 loaded with a straight bit and the edge guide. Obviously couldn't do the same on the bottom due to the feet, so I used the 1400 with a rabbeting bit to finish it off.
View attachment 1
View attachment 2
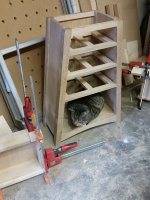
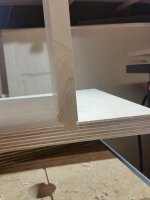
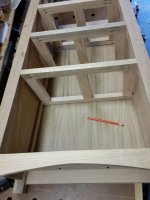
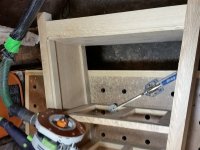
Fortunately I caught this before I ran the router on the bottom, but one of the pocket screws had become slightly exposed after I sanded the bottom shelf:
View attachment 3
You won't be able to see it once things are assembled because it's all the way in the back, but I'm actually thankful that it was exposed, because it turns out all the others had a small amount of the tip of the screw in the pathway of the rabbet, and I might not have thought of that before running the router and gotten a nasty spark shower surprise (and maybe a broken bit). So I backed out the screws a couple of turns before routing.
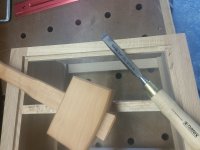
Squared the corners with a chisel
View attachment 4
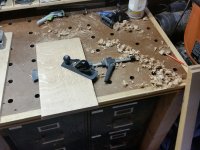
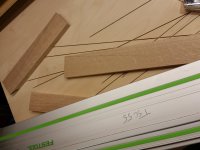
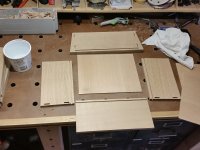
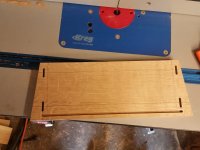
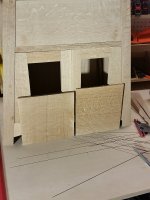
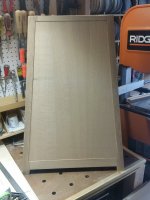
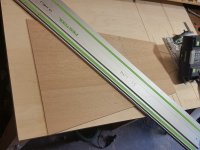
After cutting up the plywood sheet, I set about fitting the back. The tracksaw was made for this sort of operation. I got the rough dimensions simply by tracing the opening onto the piece
View attachment 5
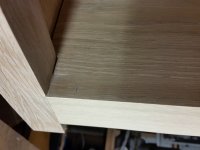
And then nibbled away at the edges until it fit snugly in the rabbet
View attachment 6
View attachment 7
View attachment 8
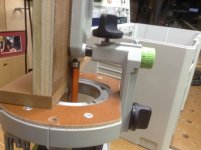
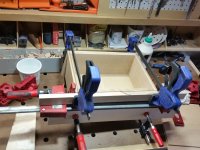
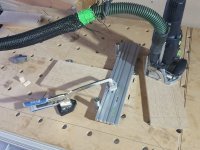
I had a little time left in the day so I decided to work on the joints for the drawers. I'm going to be using sliding dovetails to connect the sides to the front, and then domino the back board to the sides. It's been several years since I made a sliding dovetail joint (before I even got a Festool router), and I've only done it on the router table prior to this, so I decided to follow the lead of another FOG member who has done them using the 1010 and edging plate attachment.
This is actually a brilliant setup, because you can use the microadjust on both the router and the angle arm to precisely calculate the needed offset for the male joint after doing the female on the MFT table
View attachment 9
I got a satisfactory joint on some test pieces, so in a couple of days (got a busy weekend full of other things) I'll get back to the drawers
View attachment 10
Funny story. The guy at the lumber yard tried to sell me a sheet of 1/4" red oak veneered ply (it's not a place I go to all that regularly) in place of the white oak I asked for. He kept on insisting that it was just the light that made it appear reddish after I raised concerns. I actually almost drove off with it, distrusting momentarily my own eyes, but then thought better of it and went back inside the office, and asked if I could rifle through the sheets myself -- sure enough someone had thrown a bunch of red oak sheets on top of the pile, and a few down in the stack I was able to get what I was hoping to find, which was a rift sawn sheet that even had a little QS effect (they don't stock QS sheets specifically). Even then he didn't believe me, and as I was walking the sheet back to my car I noticed he put the one I rejected back on top of the pile of white oak sheets!
Back at home base I rabbeted out the back about 3/8". Did the top and sides with the 1010 loaded with a straight bit and the edge guide. Obviously couldn't do the same on the bottom due to the feet, so I used the 1400 with a rabbeting bit to finish it off.
View attachment 1
View attachment 2
Fortunately I caught this before I ran the router on the bottom, but one of the pocket screws had become slightly exposed after I sanded the bottom shelf:
View attachment 3
You won't be able to see it once things are assembled because it's all the way in the back, but I'm actually thankful that it was exposed, because it turns out all the others had a small amount of the tip of the screw in the pathway of the rabbet, and I might not have thought of that before running the router and gotten a nasty spark shower surprise (and maybe a broken bit). So I backed out the screws a couple of turns before routing.
Squared the corners with a chisel
View attachment 4
After cutting up the plywood sheet, I set about fitting the back. The tracksaw was made for this sort of operation. I got the rough dimensions simply by tracing the opening onto the piece
View attachment 5
And then nibbled away at the edges until it fit snugly in the rabbet
View attachment 6
View attachment 7
View attachment 8
I had a little time left in the day so I decided to work on the joints for the drawers. I'm going to be using sliding dovetails to connect the sides to the front, and then domino the back board to the sides. It's been several years since I made a sliding dovetail joint (before I even got a Festool router), and I've only done it on the router table prior to this, so I decided to follow the lead of another FOG member who has done them using the 1010 and edging plate attachment.
This is actually a brilliant setup, because you can use the microadjust on both the router and the angle arm to precisely calculate the needed offset for the male joint after doing the female on the MFT table
View attachment 9
I got a satisfactory joint on some test pieces, so in a couple of days (got a busy weekend full of other things) I'll get back to the drawers
View attachment 10
Attachments
-
 20160520_081837.jpg308.1 KB · Views: 284
 -
 20160520_194758.jpg195.3 KB · Views: 305
 -
 20160520_194811.jpg288.2 KB · Views: 279
 -
 20160520_181648.jpg253.3 KB · Views: 311
 -
 20160520_181630.jpg244.4 KB · Views: 239
 -
 20160520_180718.jpg313.8 KB · Views: 267
 -
 20160520_095644.jpg254.1 KB · Views: 254
 -
 20160520_175517.jpg221.2 KB · Views: 232
 -
 20160520_072531.jpg196.8 KB · Views: 242
 -
 20160520_085837.jpg281.3 KB · Views: 241