QSWO Bathroom cabinet -- finished

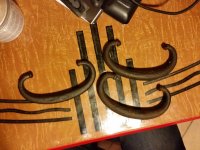
One vertical, one horizontal, and one diagonal.  So much for consensus.

Got through the doors and the rest of the drawer assembly today.

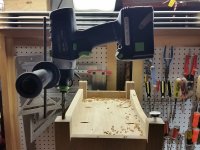
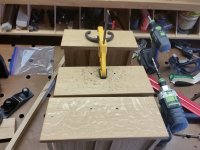
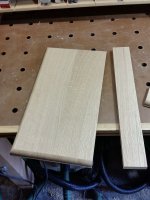
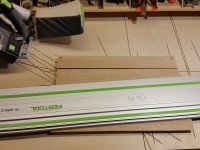
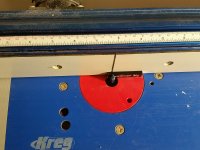
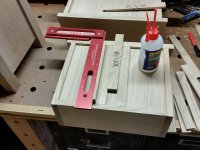
One of these days I'm going to get a real bandsaw so I can resaw my boards and not have to waste all that wood to make thin pieces.  As it is I took down a 4/4 board on the planer to 3/8" for the door panel.  One silver lining was that to make the dado for the panel I got to use the 3/8" straight bit from my 72 piece Ryobi close out special, which was my very first router bit set more than a decade ago.  I keep it around just in case, and this turned out to be one of those cases:

View attachment 1

View attachment 2

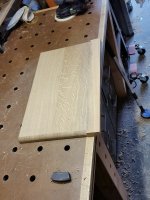
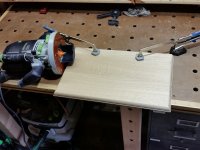
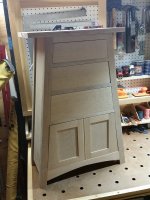
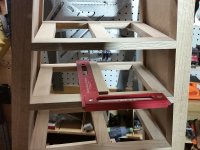
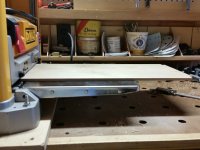
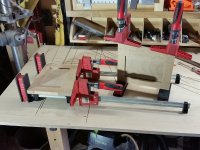
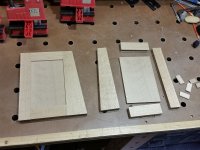
Doing the assembly on the doors:

View attachment 3

View attachment 4

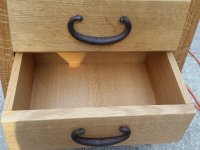
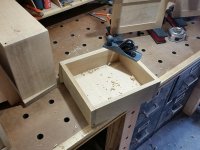
Then moved on to the drawers.  Cleaned them up a bit with the block plane so all the sides were flush:

View attachment 5

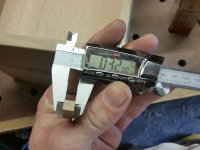
To keep the drawers sliding straight, I also added a runner in the middle, which fit in between two boards attached to the underside of each drawer.  Had to bring down another piece of oak to 5/16" -- fortunately this wasn't as much of a waste, since the board was the discarded first attempt at the bottom shelf:

View attachment 6

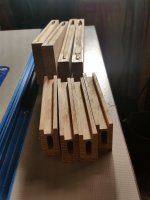
Cut the board into one inch strips, and then made a 33/32" spacer to give the slide a little play on either side.  Attached two strips to the underside of the drawer with 2P10 glue to make the channel.

View attachment 7

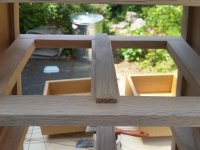
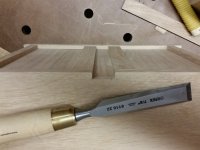
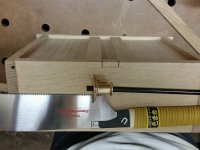
Then notched out the back of the drawer

View attachment 8

View attachment 9

The installation of the runner was a bit trickier.  After eyeballing its position through the notch with the drawer pushed in, I got some double sided tape and attached it to the drawer support  You really come to appreciate learning to build things square in the latter stages of a project, because you can just rely on a square and know that it is lining things perpendicular to the face.

View attachment 10

View attachment 11

After making sure it was positioned properly, I marked its position on the drawer support frame, took off the tape, and 2P10-ed it.  It was only on the second one that I realized that I could also use it as a back stop, moving it to the front such that the drawer face would hit it and not go in any further.  In any case, I sized all the drawers such that there is only 1/16" or so gap with the back -- but next time I know I have more tolerance on the drawer depth since I can use a runner to position the drawer relative to the front of the case
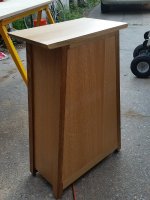
View from the back

View attachment 12

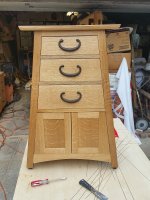
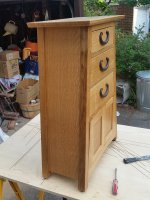
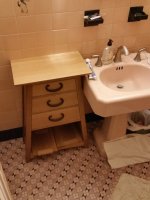
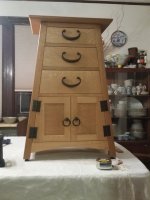
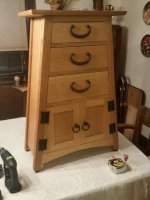
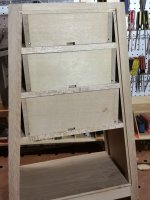
And here's the piece thus far.

View attachment 13

Still have to do hinges and hardware, as well as figure something out for the top.  Those are the actual boards I will be using on the top, but I have to final side them and choose an edge profile.
 

Attachments

  • 20160524_120214.jpg
    20160524_120214.jpg
    346.3 KB · Views: 346
  • 20160524_205534.jpg
    20160524_205534.jpg
    295.9 KB · Views: 402
  • 20160524_200447.jpg
    20160524_200447.jpg
    284 KB · Views: 381
  • 20160524_190915.jpg
    20160524_190915.jpg
    281.2 KB · Views: 346
  • 20160524_190659.jpg
    20160524_190659.jpg
    288.6 KB · Views: 337
  • 20160524_190108.jpg
    20160524_190108.jpg
    203.7 KB · Views: 346
  • 20160524_185746.jpg
    20160524_185746.jpg
    222.9 KB · Views: 360
  • 20160524_184808.jpg
    20160524_184808.jpg
    252.2 KB · Views: 364
  • 20160524_182406.jpg
    20160524_182406.jpg
    242.5 KB · Views: 349
  • 20160524_142447.jpg
    20160524_142447.jpg
    137.4 KB · Views: 346
  • 20160524_135402.jpg
    20160524_135402.jpg
    343.3 KB · Views: 378
  • 20160524_132729.jpg
    20160524_132729.jpg
    290.7 KB · Views: 357
  • 20160524_123147.jpg
    20160524_123147.jpg
    255.4 KB · Views: 339
I've had these sitting around for a couple of years

View attachment 1

View attachment 2

My wife got into antique Japanese furniture a couple of years ago, and started frequenting this fantastic dealer in Brooklyn, Shibui Japanese Antiques, owned and operated by this really excellent fellow Dane Owen,:http://www.shibui.com/

He goes on buying trips a couple of times a year and comes back with shipping containers full of Japanese furniture, from small tansu to, in one case, the whole wooden front of a house.

He often has to do a lot of restoration on the pieces, so he has drawers and drawers full of spare hardware.  On one occasion, he gave me these handles for a very decent price.  I originally was planning a Japanese style loft bed, with steps leading up to the bed with pull out drawers.  But since that project is on hold indefinitely, I'm going to try to incorporate them into this project -- I figure there's a fair amount of kinship anyway between Japanese design and the Arts & Crafts style (which this cabinet is sort of vaguely aspiring to).

So I cleaned up the rust using a mix of lemon juice and baking soda

View attachment 3

My wife freaked out when she saw them soaking, thinking it was going to ruin their patina.  I've used this method before with success to clean rust off of drill and router bits, so I thought it would work fine here.  After a bit of scrubbing and wiping, I applied a coat of Renaissance Wax to the metal to keep them protected.  No harm no foul.

View attachment 4

I'm actually going to go over to Shibui today to see if Dane has any hinges and door handles that would match the drawer pulls.  He also has this method for blackening metal to make the round washers you see in the second picture out of normal washers, but I forgot how it goes, so I'm going to ask him about that as well.
 

Attachments

  • 20160524_222922.jpg
    20160524_222922.jpg
    328.7 KB · Views: 359
  • 20160524_211754.jpg
    20160524_211754.jpg
    377.8 KB · Views: 351
  • 20160524_171215.jpg
    20160524_171215.jpg
    273.1 KB · Views: 331
  • 20160524_171159.jpg
    20160524_171159.jpg
    301.9 KB · Views: 344
Edward

With that door design, it would appear they won't stay open, given the slanted hinge pins, which may be OK for how you plan to use the cabinet.  Might have to slightly back bevel the lower inside of the bottom rails to clear the bottom on opening.

 
Thanks for the tip [member=167]neilc[/member] Yeah, I'll have to live with this "self-close", but given the space constraints, it will be fine.  When I was fishing around for design inspirations for angled cabinets, I noticed that some avoided this by doing a face frame, where the hinges would then be attached to half trapezoidal stiles (with the straight, 90 degree edge running on the inside of the frame). I'll see what if any back-beveling I'll need to do once I get them hinged up.

neilc said:
Edward

With that door design, it would appear they won't stay open, given the slanted hinge pins, which may be OK for how you plan to use the cabinet.  Might have to slightly back bevel the lower inside of the bottom rails to clear the bottom on opening.
 
Edward- since youre discussing what I was wondering about earlier I've really liked reading you're solutions...And I too would like to thank you for the great documentation, method of work and recovery. Very nice job.
Btw- are you planing to show off your slabs?
 
Has anyone else noticed that Edward has nicely picked up where Wow left off on being a very positive contributor this forum?

Hats off to you Edward! I think I speak for many of us. Wow would be pleased, I think.
 
Would that I were worthy of such exalted company.  But thanks for the kind words [member=22]greg mann[/member]

Just a bit of an update.

I finished up most of the work on the cabinet, and am basically done except for the hardware on the doors.

Got a good lesson on patience and planning as I was finishing up the top.  I decided to use a large roundover bit to make the profile -- 3/4 radius, except with an undersized bearing to create the ridge effect.  After doing a quick test on a scrap piece I ran it over the top.  But oops, I forgot to account for how much material was going to be removed by the 3/4 radius bit, and so I was suddenly left with a top that was now undersized, with the profile now beginning before the front of the top extended past the front edge of the cabinet.  Not only that, I'd basically eaten through all the usable QSWO boards I had gotten for the project.  But as I was contemplating getting in the car and driving back to the lumber yard, I realized I could fix my mistake using some of the small scraps I had left and the Domino.  So I took the widest scrap I had on hand

View attachment 1

Set up a split kerf cut with the TSC55 to get a good glue joint

View attachment 2

Then Dominoed, clamped and glued the third piece in

View attachment 3

I planned to have the top overhang the sides by several inches, so it was no big deal to shave a 1/4" off each side to get a straight line for another pass of the 2200 with the roundover bit

View attachment 4

View attachment 5

With the top now taken care of I could attach it with screws.  Not the prettiest joinery, and plugging the holes was kind of superfluous next to those additional countersinks, but none of it will be visible in the end

View attachment 6

View attachment 7

One more piece of unfinished business -- I had neglected to make the first drawer runner I had installed functional as a drawer stop, so I went back, measured the offset, and put in a tiny additional scrap of runner so the drawer would no stop closing once its face was in line with the carcasse

View attachment 8

View attachment 9

Since the cabinet will be right next to the shower (and the tile floor is not quite level), I put in some adjustable feet -- depth stop on the PDC is a nice alternative to sticking a piece of blue tape on the bit

View attachment 10

Measured and drilled the holes for the drawer handles (the clamp is holding a block on the inside of the drawer to prevent tear out as the bit exits the hole)

View attachment 11

I decided not to get complicated on the finish, and simply applied one coat of Osmo polyx Oil to the entire piece, and then a second to the outer, exposed faces, and this is what we get

View attachment 12

View attachment 13

View attachment 14

View attachment 15

I'm a little disappointed that the flecking on the drawer pieces is not visible from the front the way it is on the top or the posts.  If you look at it from the sides you can see it, but not head on.  Is there a way to be more choosy about the wood such that you can predict the visiblity of the flecking down to the angle of view?  Maybe the contrast would be more dramatic with a darker stain or the Stickley fuming method?

In any case, I've already put the cabinet into service in the bathroom

View attachment 16

My visit to Shibui a couple of days ago resulted in some good recommendations on the door hardware, so I'm going to order up that stuff in a few days.  The one other change I might make is to add a more dramatic chamfer/break to the outer edge of the posts, the way it is traditionally done in arts and crafts furniture.  I simply did a few passes with the block plane to soften it up, but at the moment there is no visual effect from this break.

greg mann said:
Has anyone else noticed that Edward has nicely picked up where Wow left off on being a very positive contributor this forum?

Hats off to you Edward! I think I speak for many of us. Wow would be pleased, I think.
 

Attachments

  • 20160525_194816.jpg
    20160525_194816.jpg
    296.3 KB · Views: 338
  • 20160526_153038.jpg
    20160526_153038.jpg
    286.3 KB · Views: 333
  • 20160526_173010.jpg
    20160526_173010.jpg
    386.8 KB · Views: 411
  • 20160526_173036.jpg
    20160526_173036.jpg
    396.2 KB · Views: 362
  • 20160526_173324.jpg
    20160526_173324.jpg
    424 KB · Views: 330
  • 20160526_173503.jpg
    20160526_173503.jpg
    351.9 KB · Views: 341
  • 20160526_200530.jpg
    20160526_200530.jpg
    234.5 KB · Views: 442
  • 20160526_111003.jpg
    20160526_111003.jpg
    262 KB · Views: 364
  • 20160526_094806.jpg
    20160526_094806.jpg
    202.6 KB · Views: 334
  • 20160525_162947.jpg
    20160525_162947.jpg
    291.4 KB · Views: 312
  • 20160525_163716.jpg
    20160525_163716.jpg
    282.5 KB · Views: 325
  • 20160525_170712.jpg
    20160525_170712.jpg
    277.6 KB · Views: 317
  • 20160525_190020.jpg
    20160525_190020.jpg
    340.7 KB · Views: 312
  • 20160525_192007.jpg
    20160525_192007.jpg
    256.7 KB · Views: 336
  • 20160525_200134.jpg
    20160525_200134.jpg
    305.2 KB · Views: 336
  • 20160525_200801.jpg
    20160525_200801.jpg
    270 KB · Views: 324
Truly  a fine job both with the final showing and with the constructon presentation.  [thumbs up] [thumbs up] [thumbs up]
Tinker
 
Edward, that turned out nice. I like the hardware choice.
Now to get busy making that bathroom look as nice as the cabinet
 
Nice job

And as I said before well documented. Made it interesting to follow

I tried this and ended up just a load of random pictures stuck together

Nice. And buitifull wood one of my favourites at the moment
 
[member=7816]Tim Raleigh[/member] Lol.  I've gotten used to the sickly salmon color after all these years.  The sink is actually quite a treasure.  Not up on my metal working but I think it's cast iron covered by enamel?  Weighs a ton. 

Tim Raleigh said:
Edward, that turned out nice. I like the hardware choice.
Now to get busy making that bathroom look as nice as the cabinet
 
Got the hardware and installed it. Pull rings from Lee valley, and then the hinges from some random person on ebay. They were handmade by him taking some china's out of them to do a faux aging. I was thinking about running everything through a muriatic acid and hydrogen peroxide solution to accelerate the aging, but Im going to hold off right now and just live with the cabinet for a bit.

My wife doesn't like the hinges, mostly because they don't really match the Japanese aesthetic of the handles. I kind of see what she means, so I might keep my eyes out for a set of antique tansu hinges on ebay. Good enough for the moment.
 

Attachments

  • 20160610_221822.jpg
    20160610_221822.jpg
    1.8 MB · Views: 541
  • 20160610_221852.jpg
    20160610_221852.jpg
    1.8 MB · Views: 535
Nice work on the cabinet.  I think it is stunning, however, the hinges really take away the beauty.  I'd try to do something hidden.  Thank you Edward for sharing.  Bill
 
Back
Top