I've been here 13 years and I think my average post rate over that time has been .002%, so I am much more of a lurker than an active participant. But I do occasionally do something I feel is both Festool related and reasonably additive to the discourse, and this is that post for 2020.
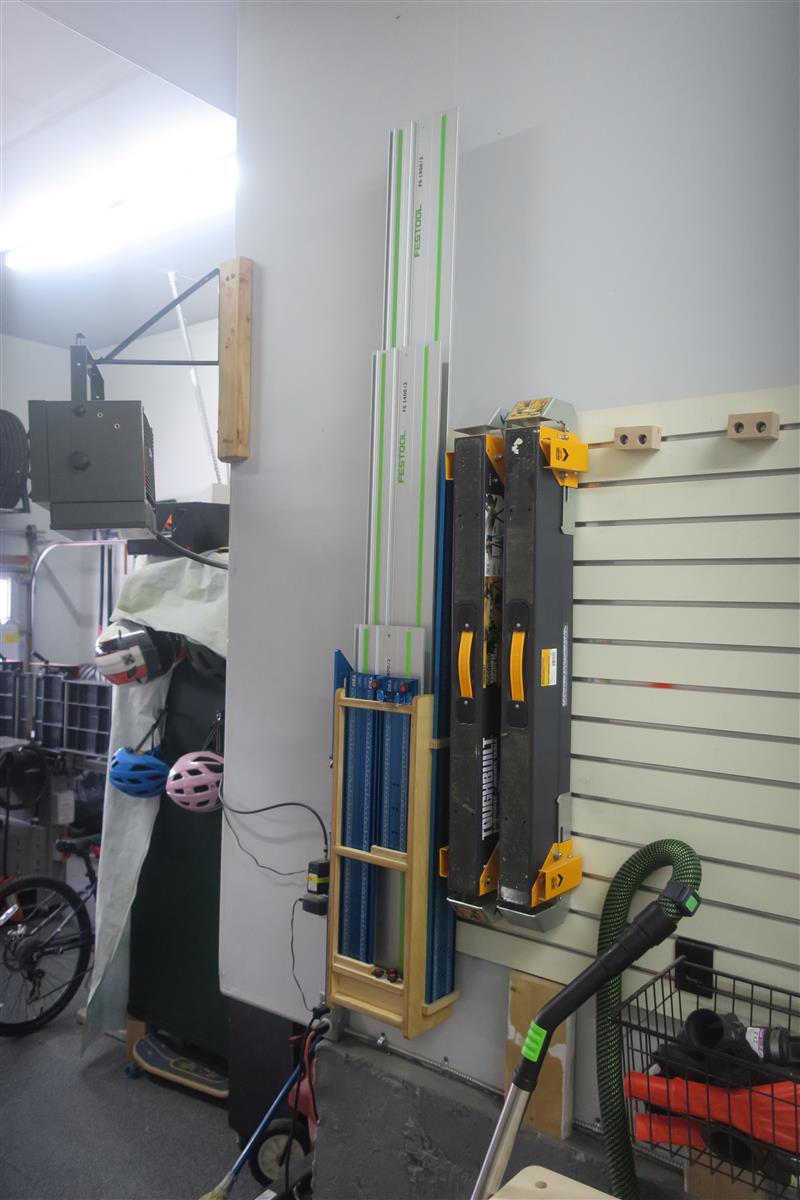
I knocked together a quick rail holder about a decade ago, when I doubled my rail collection to two rails. Nothing fancy, but it mounted to the wall easily on a french cleat, and was equally easy to pull off the wall and stand up wherever I was working. And it served that purpose for 10 solid years before the slide-hammer action of dropping rails in place blew out the bottom.
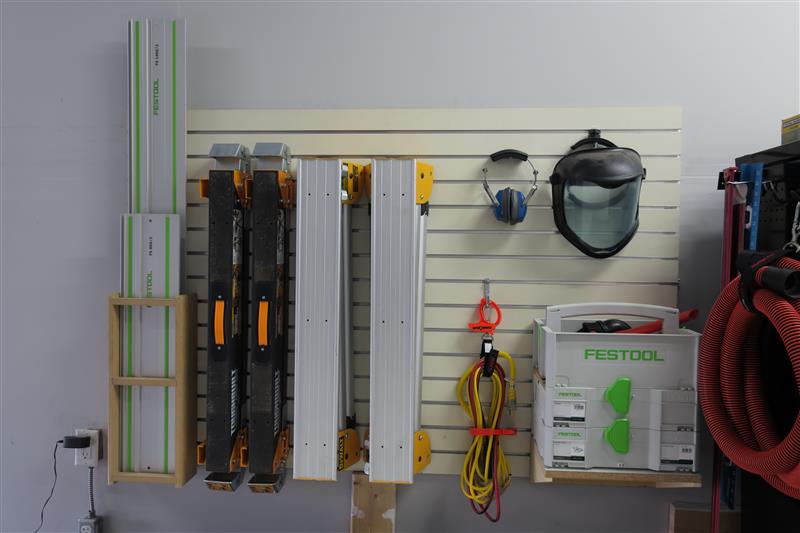
Over the years, I've accumulated a few more rails and some accessories for my TS-55, like the TSO squares and parallel guides. They usually ended up cluttering whatever corner of the shop I left them in, or put so well back in their original packaging that it seemed too tedious to pull them out. So I figured there might be some opportunity for improvement in rail quiver 2.0.
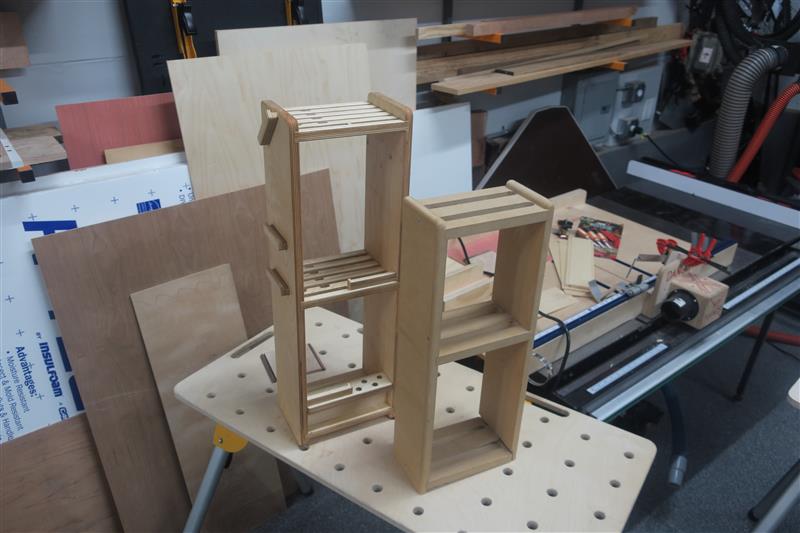
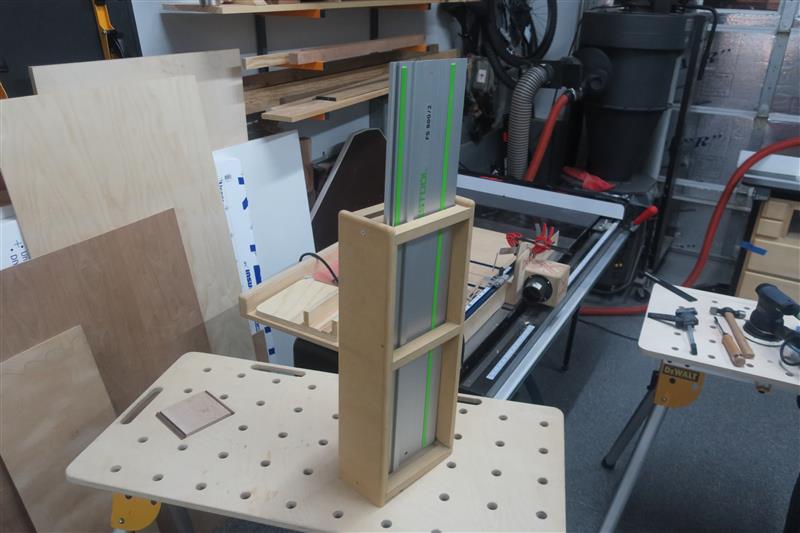
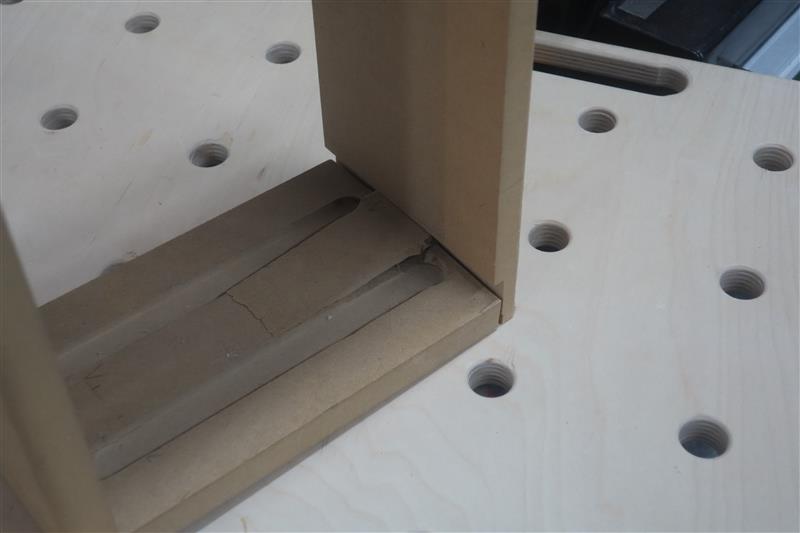
The previous version was just a through-pass of a 3/4" router bit, but for this one, I used a dado blade to notch a bunch of baltic birch scrap to accommodate the wider parts of the rail, which let me space the slots a lot closer.
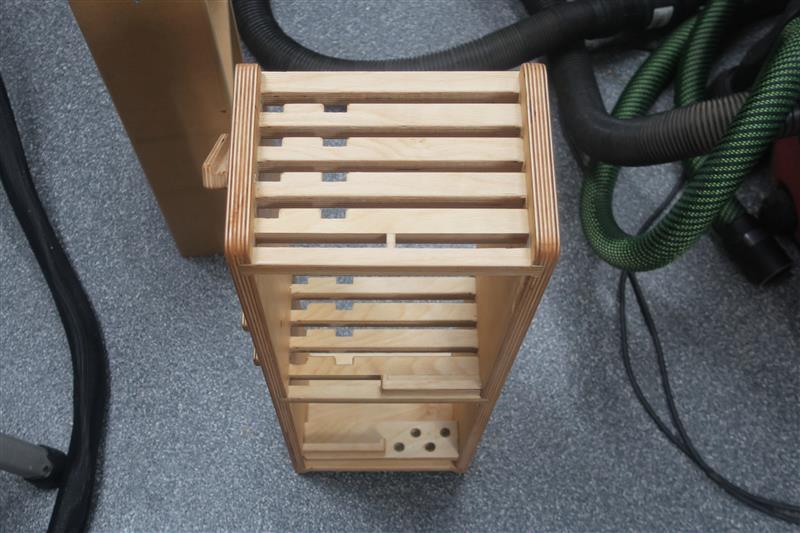
I knew I wanted it to be deep enough to accommodate the TSO squares hanging off the side. At first, I was just going to stick another rail notch in there, but I realized I could probably get the parallel guides in the same space with a little bit of additional effort.
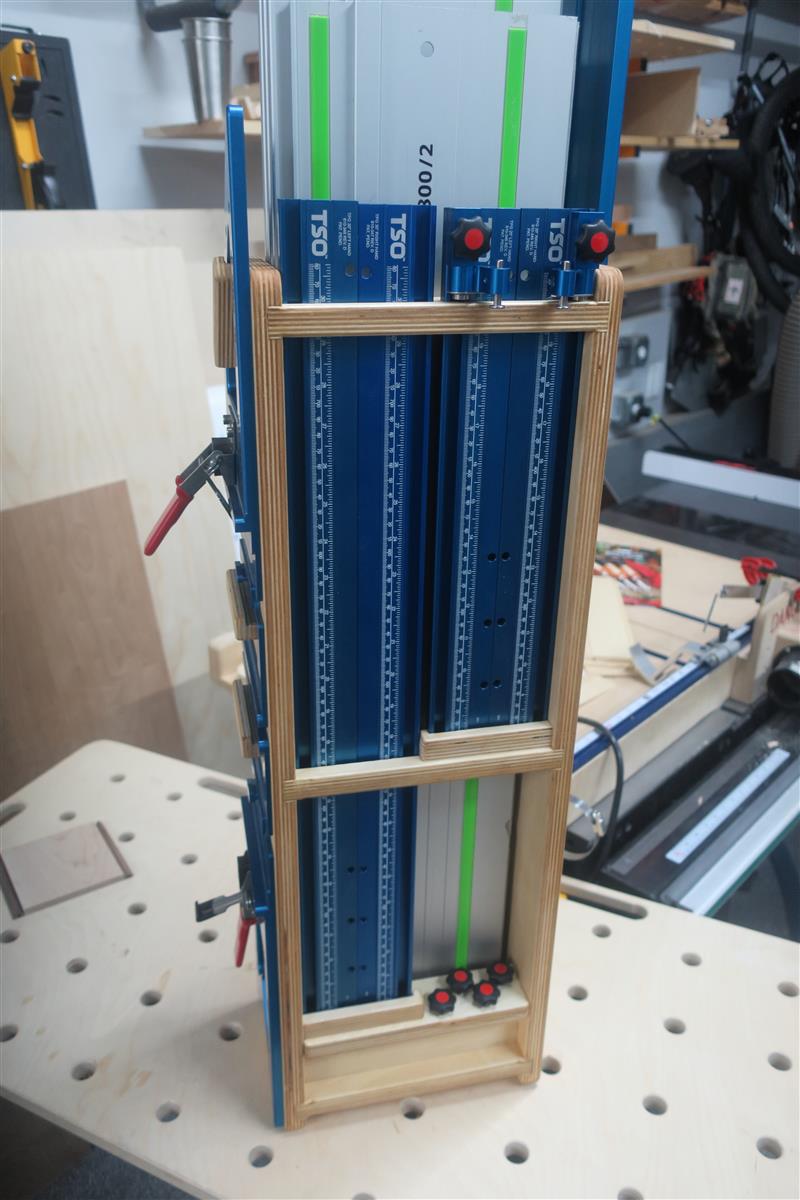

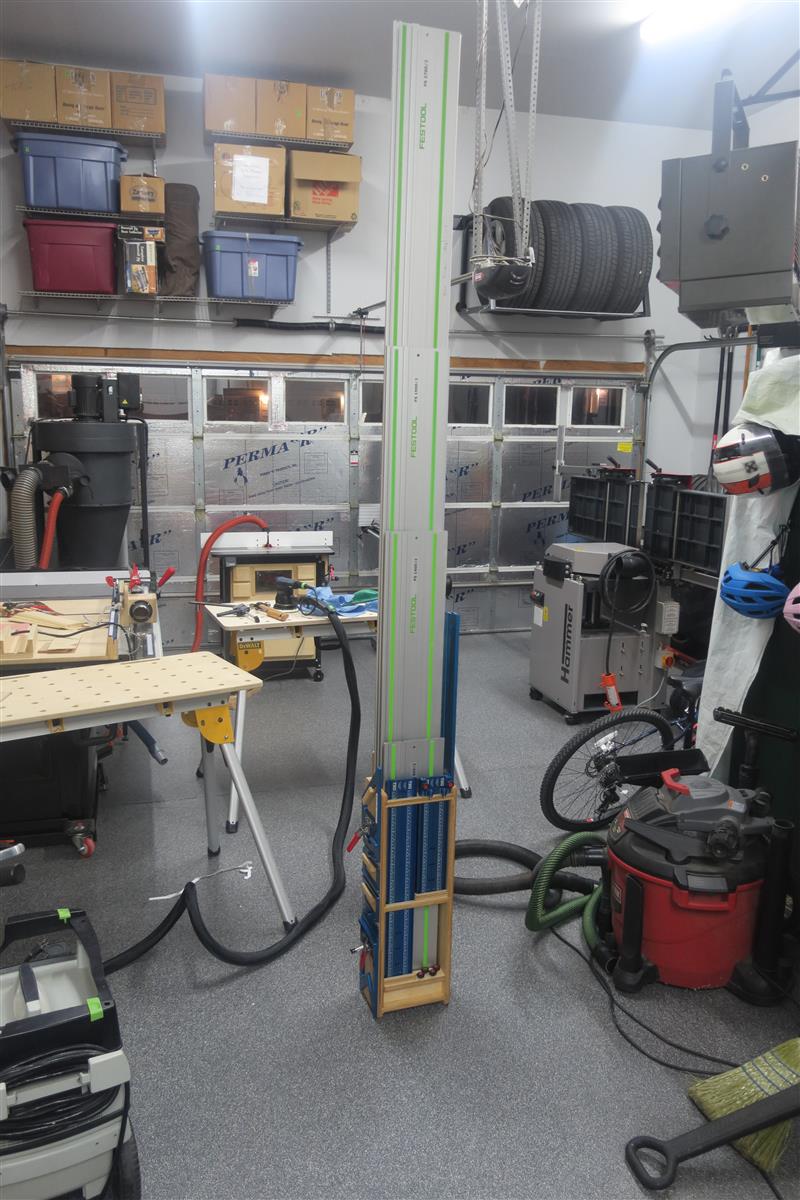
Stands stable even with the long rail in place. I have ridiculously tall ceilings in my garage, so I can mount it at the same space as the old one, and the 8' will clear the ceiling, but not by enough to pull it out of the quiver. Which is fine, because the 8' has lived on the top of whatever's on the top shelf of my lumber rack for years without any real issues. The rest of them sit at a convenient height for me on the wall and are easy to remove when needed.
While I was playing with the baltic birch scrap I had around the shop, I also built some UG rail feet. The bench my Kapex sits on when not mounted to the stand is not quite long enough to support the UG wings at the bracket, and it also has a small but noticeable dip on one side that makes an impact over the length of the UG wing. There were several ways to skin this particular cat. This was version 1:
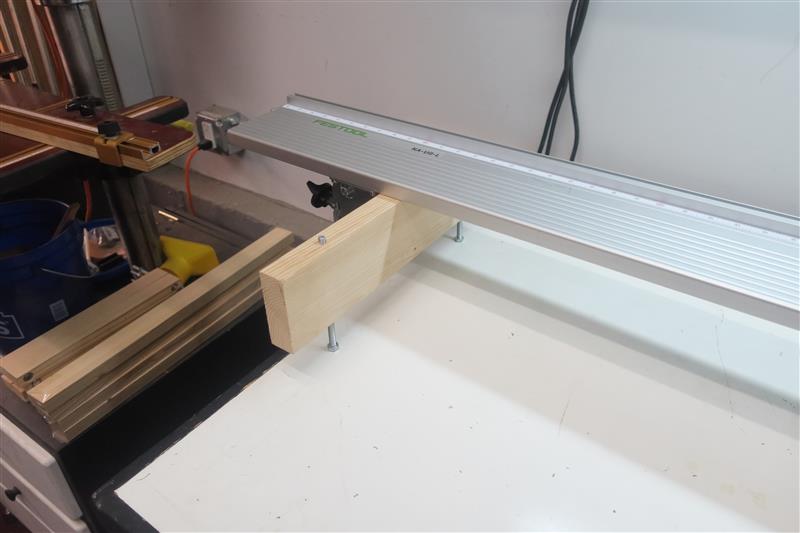
Version 2 was a little nicer, and includes levelling feet so that I could level out that dip in the bench.

These get the job done, and have minimal impact and are easy to store when I put the Kapex and wings back on the UG stand. Their 'free-floating' nature means I don't have to spend a lot of time making sure the Kapex ends up at the exact same spot on the bench when I've moved it. This was one of those simple projects that solved a specific problem quickly and efficiently, which are often the projects that give me the most joy.

Anyways, thanks for letting me share!
I knocked together a quick rail holder about a decade ago, when I doubled my rail collection to two rails. Nothing fancy, but it mounted to the wall easily on a french cleat, and was equally easy to pull off the wall and stand up wherever I was working. And it served that purpose for 10 solid years before the slide-hammer action of dropping rails in place blew out the bottom.
Over the years, I've accumulated a few more rails and some accessories for my TS-55, like the TSO squares and parallel guides. They usually ended up cluttering whatever corner of the shop I left them in, or put so well back in their original packaging that it seemed too tedious to pull them out. So I figured there might be some opportunity for improvement in rail quiver 2.0.
The previous version was just a through-pass of a 3/4" router bit, but for this one, I used a dado blade to notch a bunch of baltic birch scrap to accommodate the wider parts of the rail, which let me space the slots a lot closer.
I knew I wanted it to be deep enough to accommodate the TSO squares hanging off the side. At first, I was just going to stick another rail notch in there, but I realized I could probably get the parallel guides in the same space with a little bit of additional effort.
Stands stable even with the long rail in place. I have ridiculously tall ceilings in my garage, so I can mount it at the same space as the old one, and the 8' will clear the ceiling, but not by enough to pull it out of the quiver. Which is fine, because the 8' has lived on the top of whatever's on the top shelf of my lumber rack for years without any real issues. The rest of them sit at a convenient height for me on the wall and are easy to remove when needed.
While I was playing with the baltic birch scrap I had around the shop, I also built some UG rail feet. The bench my Kapex sits on when not mounted to the stand is not quite long enough to support the UG wings at the bracket, and it also has a small but noticeable dip on one side that makes an impact over the length of the UG wing. There were several ways to skin this particular cat. This was version 1:
Version 2 was a little nicer, and includes levelling feet so that I could level out that dip in the bench.
These get the job done, and have minimal impact and are easy to store when I put the Kapex and wings back on the UG stand. Their 'free-floating' nature means I don't have to spend a lot of time making sure the Kapex ends up at the exact same spot on the bench when I've moved it. This was one of those simple projects that solved a specific problem quickly and efficiently, which are often the projects that give me the most joy.
Anyways, thanks for letting me share!