Re: Festool Switcher....Update

CNC Paul

Member
Joined
Sep 15, 2007
Messages
54
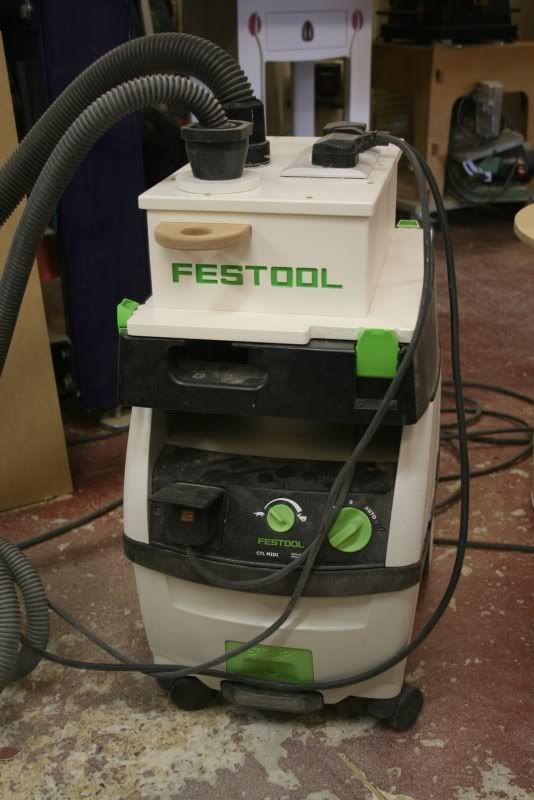
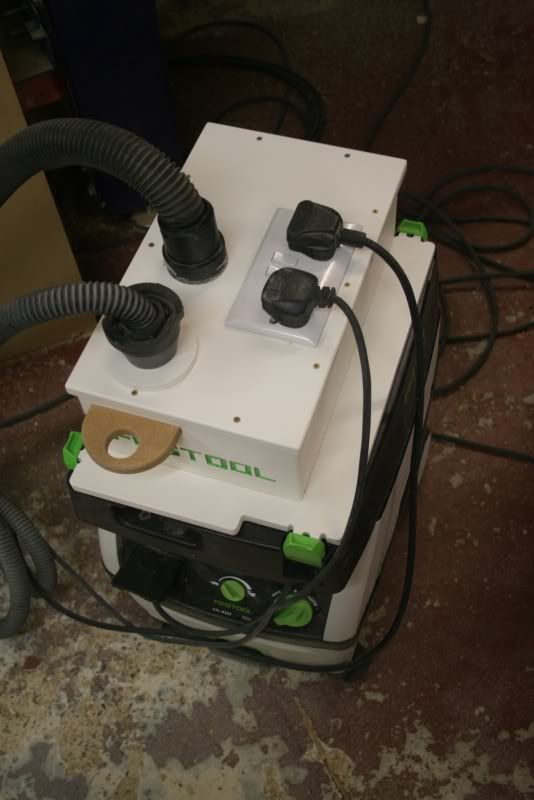
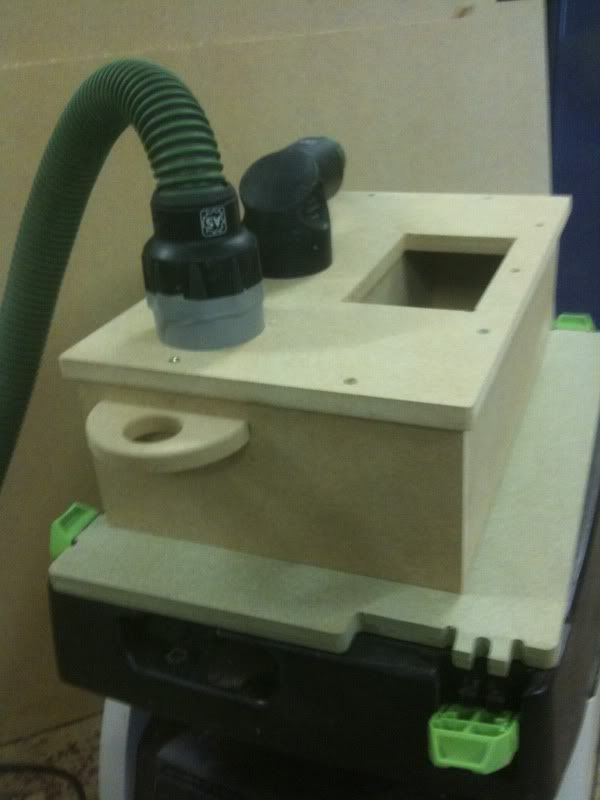
Well, I got fed up with switching over the power and the hose on my Festool vacuum when I have two power tools on the go, so I came up with the Switcher.

It is not finished yet, I just need to paint it and connect the electrics.

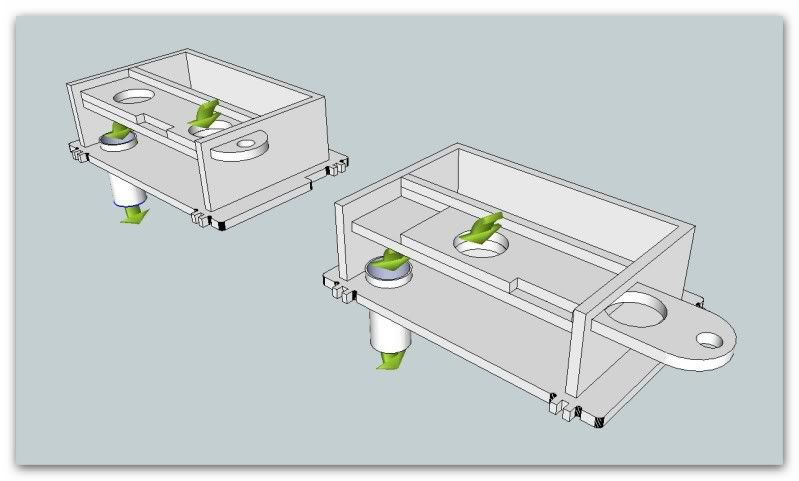
The concept was to plug in two tools to the power output on the vacuum and to be able to swap the extract hoses quickly.

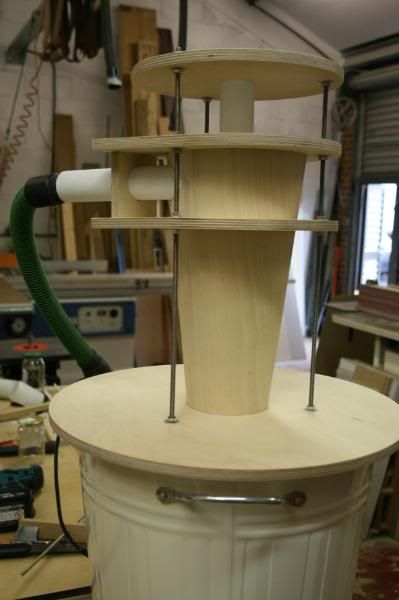
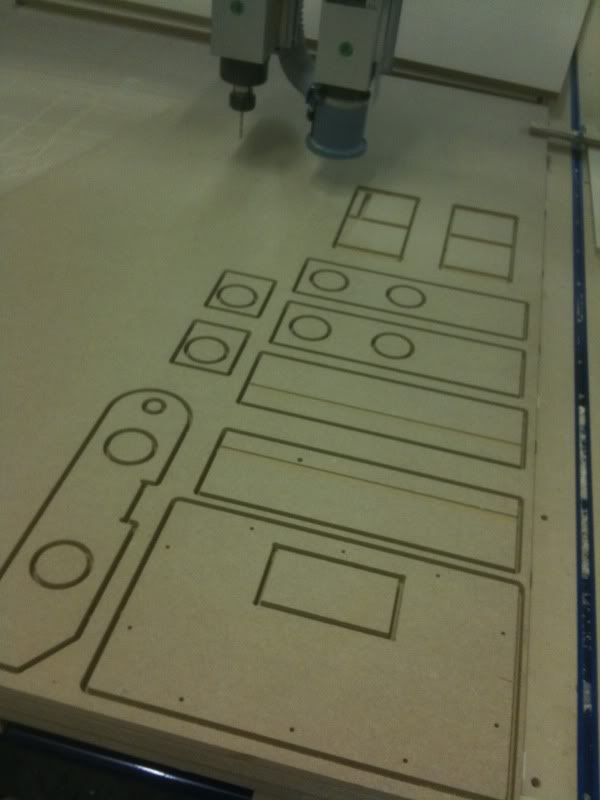
I cut the parts out on the CNC, sorry about the  cr*ppy pictures
switcher2002.jpg


The base clips into the case clips

switcher007.jpg


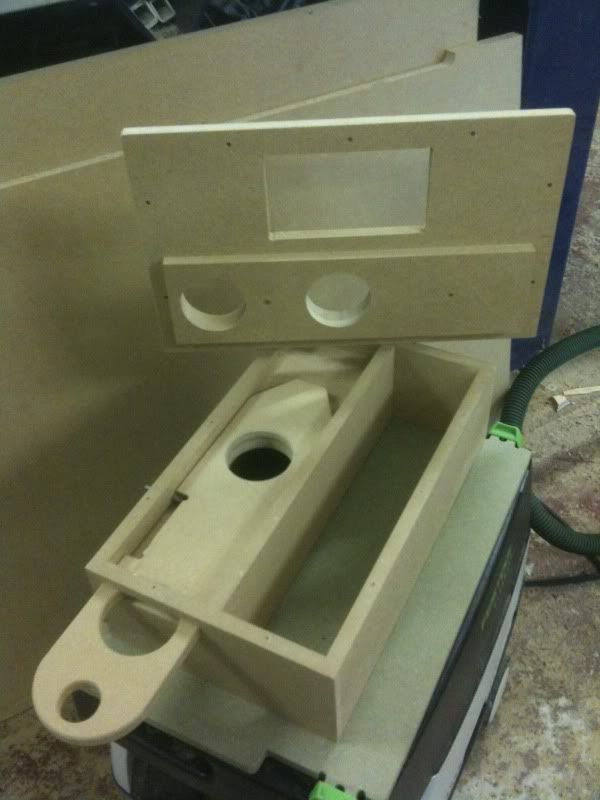
The inside has a divider for the electrics on the right, on the left is a short length of 2" waste pipe that pushes into the vacuum outlet and then enters the
bottom of the switcher, above that is a slider that has a couple of holes, one or the other is blanked off when you push or pull it.

switcher2005.jpg


switcher2003.jpg


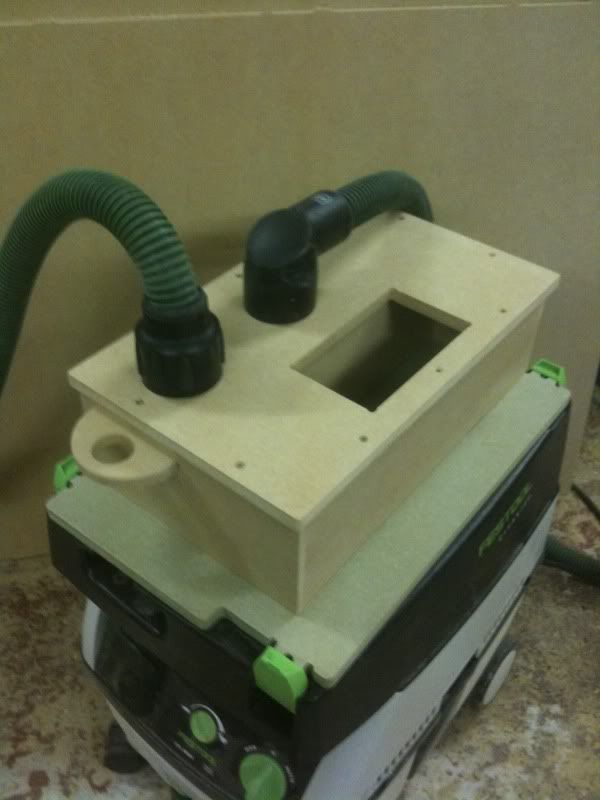
Well it works a treat, I will post some more pictures when I have painted and wired it up
 
I think what I see is a slider that is simply used to slide from one hose to another, but I still don't understand how this works?  [sad]
 
Looks brilliant. You've made me very curieus!  ::)
Please post some more pictures and, if you happen to have it available, some drawings of the design.
 
A very neat solution to a problem we all have.

Now if I was still in St Albans I'd be round demanding a demo!

Andrew  :-)
 
I don't see how this solve the other half of your problem, that is switching power cables ?
 
NuggyBuggy said:
I don't see how this solve the other half of your problem, that is switching power cables ?

if you read again he says he has to wire it up yet
 
This might be a bit clearer

This shows the airflow when the paddle is in either position

Snap_20101006204502_002.jpg


The rectangular hole in the top will have a double outlet for two power tools this is wired to the power outlet on the vacuum
 
This is great. I know over here if you want to buy a CT26 you have the option of a second plug on the vac but to be it wouldn't help because you would still have to change the hose to that tool. You however have solved that problem nicely!
 
This is a very well thought out piece of engineering. [thumbs up] Keeps us posted. FYI: I'll definitively steal the idea from you. [wink]
Just need to find me a CNC router somewhere.
 
Why such a hassle with that large mdf box on top of the Dust Extractor?

Does the Antistatic Y-Adapter (452898) not function in the same way.
Or doesn't it fit the CTL Midi/Mini models?

I use it myself on my CT22. I only wished they made a sliding disk to shut the openings instead of the Plug.
Because if two hoses are connected at the same time there is less suction on both of them.

 
Roseland said:
A very neat solution to a problem we all have.

Now if I was still in St Albans I'd be round demanding a demo!

Andrew  :-)

Andrew, any time

richard.selwyn said:
Would it be possible to have some info about your cnc setup?

Regards,
Richard

Richard,

I have a 10' x 5' Shopbot  PRS Alpha with two spindles and a drilling head, it is a great piece of kit.

neeleman said:
Why such a hassle with that large mdf box on top of the Dust Extractor?

Does the Antistatic Y-Adapter (452898) not function in the same way.
Or doesn't it fit the CTL Midi/Mini models?

I use it myself on my CT22. I only wished they made a sliding disk to shut the openings instead of the Plug.
Because if two hoses are connected at the same time there is less suction on both of them.

Neeleman,

The switcher is no problem, it is less than 5" high and clips on the vacuum the same as a Systainer, the Y-adapter will not fit the CTL,
you will still have to blank off each hose.....All I have to do is pull or push the paddle and get full suction all the time.

Paul

 
Nice idea and the CNC-trick is also special. I was thinking of something similar but combined with a sort of flat cyclone. It should have the dimensions of a Systainer 2 or 3.
One thing is puzzling me. My technical instinct tells me that one hole in the paddle should be sufficient to do the trick. Was there a reason to go for 2 holes?
 
Wim said:
Nice idea and the CNC-trick is also special. I was thinking of something similar but combined with a sort of flat cyclone. It should have the dimensions of a Systainer 2 or 3.
One thing is puzzling me. My technical instinct tells me that one hole in the paddle should be sufficient to do the trick. Was there a reason to go for 2 holes?

Wim,

I have this which I use between the vacuum  
IMG_1158-1.jpg
.
I am working on a square one to sit below my Kapex.

The reason I use two holes was to reduce the travel of the paddle.
 
Paul,

Nifty device.  A couple of questions:  Have you experienced any dust/debris buildup in the enclosed cavity?  If so, has it affected performance?  It looks like the top of the unit is screwed in place, maybe an accessable lid for maintenance, if required?

I can see a leaner/meaner adaptation of your idea in my future for field use.  Thanks.

Dan
 
Dan Rush said:
Paul,

Nifty device.   A couple of questions:  Have you experienced any dust/debris buildup in the enclosed cavity?  If so, has it affected performance?  It looks like the top of the unit is screwed in place, maybe an accessable lid for maintenance, if required?

I can see a leaner/meaner adaptation of your idea in my future for field use.  Thanks.

Dan

Dan,

So far I have not experienced any buildup, the performance is not affected.  The top and bottom are both screwed on for access, but I do have an idea to incorporate a handle and make access far quicker.

Here are some pics now that I have finished the switcher.

Switcher027.jpg


Switcher028.jpg


Paul
 
Thought you would of had a chrome sockets not a cheap white!  Jokes

Looks good thought! Made me wanna make something like it properly try and make something my self now but with a festool systainer instead so I can also put the hoses inside for storage.

Would make life a lot easier!

Cheers for sharing!

JMB
 
Sorry for being so inquisitive, but are the toggles holding down the plate firmly. I thought the toggles had small flexible fingers at the sides to clip into the vertical channel of the Systainer. The front of the toggle is just hanging over the teeth of the Systainer lid or bottom. How did you manage to prevent the toggles from falling backwards?
 
jmbfestool said:
Thought you would of had a chrome sockets not a cheap white!   Jokes

Looks good thought! Made me wanna make something like it properly try and make something my self now but with a festool systainer instead so I can also put the hoses inside for storage.

Would make life a lot easier!

Cheers for sharing!

JMB

JMB,

All I had was the plastic job or a silver metal one, but that had round corners that didn't work with the dry lining box. I did think about using a festool systainer
but I didn't fancy spending £40 on a box, hacking it to bits , then not working........em where is that gold plated socket  :-\

Wim said:
Sorry for being so inquisitive, but are the toggles holding down the plate firmly. I thought the toggles had small flexible fingers at the sides to clip into the vertical channel of the Systainer. The front of the toggle is just hanging over the teeth of the Systainer lid or bottom. How did you manage to prevent the toggles from falling backwards?

Wim, They seem fine, they stay clipped on after dragging it around the workshop for a couple of days.
 
Paul,

You've done an amazing job there!

Just one question tough; isn't it possible to insert the hoses and the plugs into one of the vertical panels of the switcher and so make it possible to put a stack of systainers on top again?

Looking forward to your square Kapex project.
 
Back
Top