Rolling Kitchen Island Cart

Joined
Dec 7, 2011
Messages
73
Thought I would share this before I started another project- made awhile earlier this year for my wife, while I was doing the video contest, just been too busy with my shop rebuild (pretty much done... pics to come)!

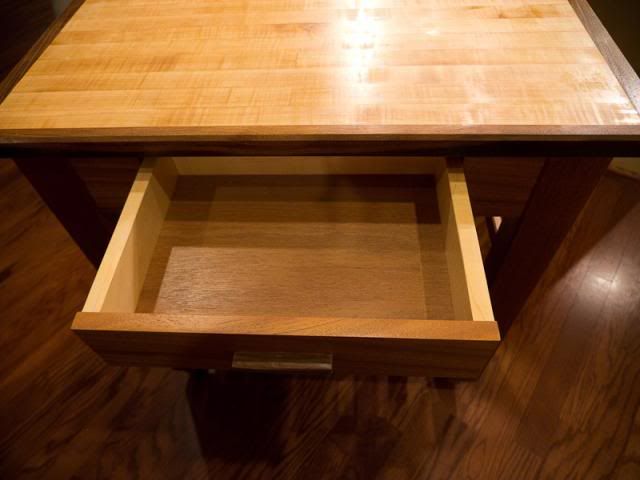
It's a rolling prep cart/station, complete with maple edge grain top.
P1010245_zps64a3195b.jpg


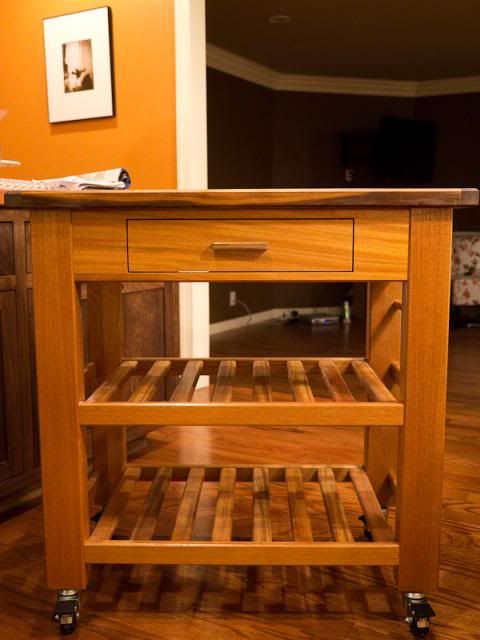
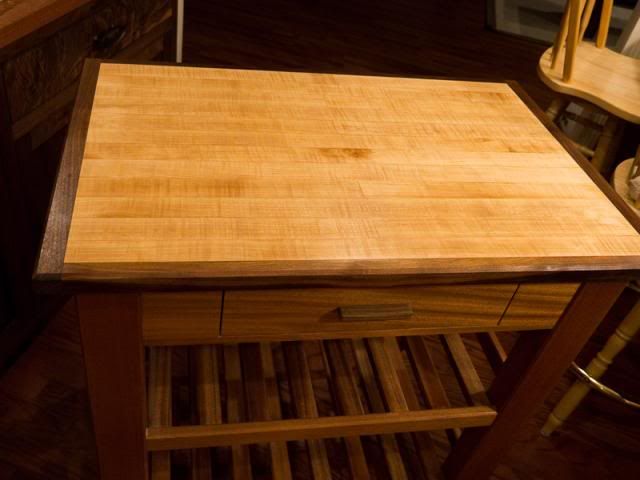
Top is hard maple, looks to have some nice figure; edged and breadboard ended with walnut.
P1010246_zps2eb9ee05.jpg


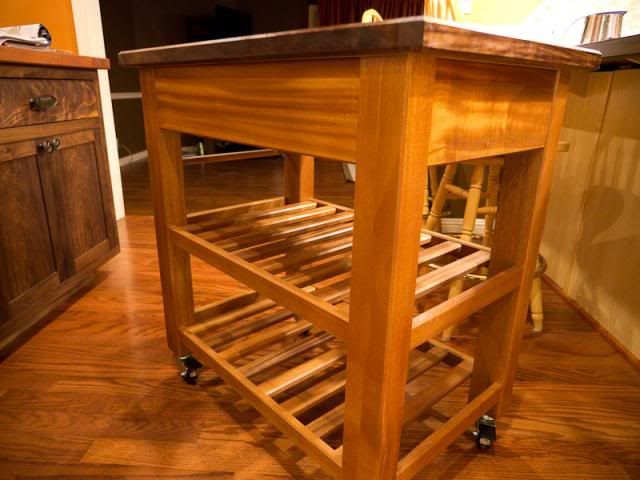
Base is all african mahogany, the main apron has spectacular ribbon striping.
P1010251_zpsc9b8dfd6.jpg


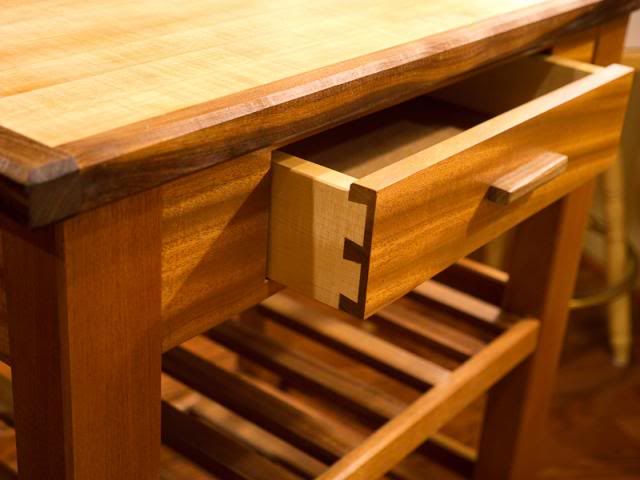
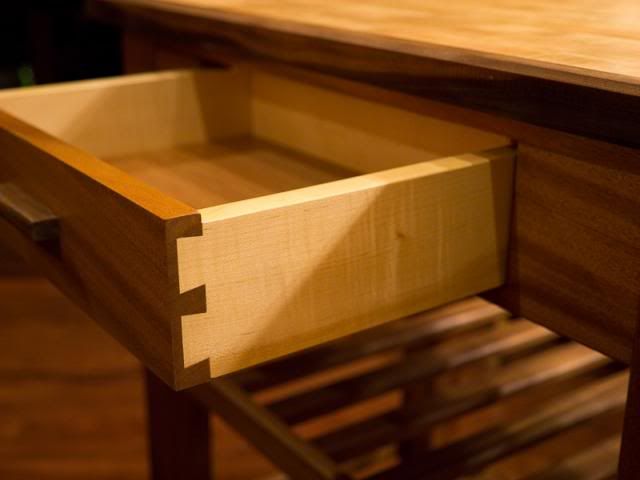
Drawer front was cut out from the front apron for continuity, rest of drawer is quartersawn maple, all dovetailed, one piece drawer. Meranti ply bottom. Drawer handle was shaped with a handplane from a small, piece of walnut (I dominoed it before shaping it). 3 5mm dominos used here.
P1010248_zps4f6918a7.jpg

P1010247_zpse2062b7f.jpg

P1010252_zps03383d1f.jpg

P1010253_zps984367f7.jpg


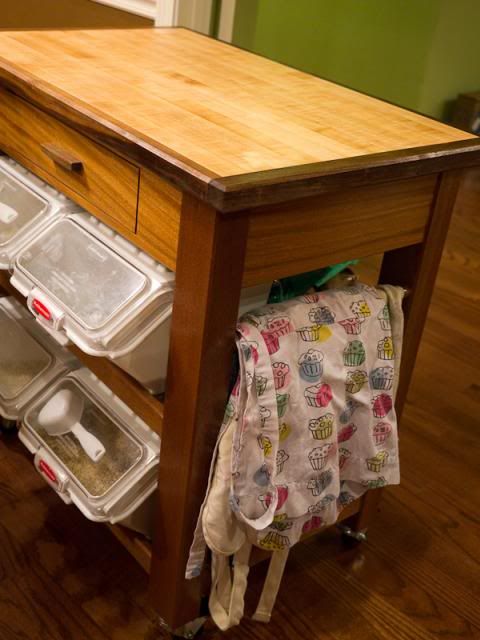
I also turned a towel bar for one of the ends and that was tenoned and glued into the side.
P1010254_zpsade8fb77.jpg


Joinery for the base is all domino, domino for the slats too (the trim stop was incredible here). The web frame that the drawer glides on is also dominoed- the domino fence made setting the offset for the inset drawer a breeze, was nice to get a consistent reveal.

Even the top is held in place with a loose domino in the topside of the upper drawer frame. The top was cut with the wider domino setting to allow for movement; no glue- the friction from the dominos allows it to hold steady. This is so the top can be pulled off to be washed in the sink.
P1010250_zps35f3fed4.jpg

P1010249_zps14fbe69d.jpg


Breadboard ends and trim were also attached with the domino, breadboard ends are loose dominoed (no glue) and pinned in elongated holes to allow movement.

The whole thing rolls on dual locking casters from Rockler, works pretty well even under load. I had to unload everything to take pics and realized just how much weight this thing was carrying- the four bins with flour, sugar, etc was pretty hefty.
P1010255_zps2eb5df66.jpg

P1010256_zpsb1f9f132.jpg


Routing done with OF1010, finish sanded with ETS 150 and RO90. Finish is GF Enduro Var Satin, mineral oil for the top. Enjoy!

 
Wow!  Is there some forum feature the can hide this thread from my wife?  [big grin]  Love it!
 
Very nice work [wink]

Tell me, how are those little wheels on your timber floors?

Kev
 
Tinker said:
Corwin said:
Wow!  Is there some forum feature the can hide this thread from my wife?   [big grin]  Love it!

Ditto on that  ;)

Set up something like NetNanny and configure FOG as a custom blocked site [wink]
 
Great looking rolling island!!  did you also make the base cabinets that are visible on the left side of the first 4 pictures, those too look really nice.. what type of wood/finish are on the base cabinets?

Great job, cant wait for the shop pics

John
 
this is a fantastic job....You have created an excellent work station for the kitchen, the layout and finish are great...... [not worthy]

Sal
 
Corwin said:
Wow!  Is there some forum feature the can hide this thread from my wife?   [big grin]  Love it!
Thanks! Haha yeah... but..... how would we justify our festool purchases then?
 
Kev said:
Very nice work [wink]

Tell me, how are those little wheels on your timber floors?

Kev
They're 2.5" casters, the material is actually slightly soft/rubbery so they glide very smoothly, and don't ding up the floor.
Um... in a feat of ultimate laziness, I did however, when I was adjusting one of the casters, accidentally tip the unit enough that a walnut cutting board I left on top fell onto the floor.  [eek]
Left a 1/2" deep gouge and I earned my wife's utmost respect....  [embarassed]
Had to rout away the plank with the OF1010 attached to guide rail (festool to the rescue again!) and put a new one in. Lesson learned!
 
NERemodeling said:
Great looking rolling island!!   did you also make the base cabinets that are visible on the left side of the first 4 pictures, those too look really nice.. what type of wood/finish are on the base cabinets?

Great job, cant wait for the shop pics

John
Thanks! Good eye- it's actually a stationary island... yes I did make it...
In fact the rolling cart's base was mainly the cutoffs from the 8' african mahogany boards I used to make the top. The slats shelves, supports, and legs were all made from the 8/4 boards.

I found the post from last year. I need to take pictures of the shelving on the back, sides and the insides... will update those later if you're curious. All black walnut, door panels were resawn and bookmatched from a figured board I liked. That was nervy since I needed 8 slices from a 4/4 board, to have 4 doors. Ended up with an extra slice!
http://festoolownersgroup.com/member-projects/black-walnut-island/

 
thebicyclecafe said:
NERemodeling said:
Great looking rolling island!!   did you also make the base cabinets that are visible on the left side of the first 4 pictures, those too look really nice.. what type of wood/finish are on the base cabinets?

Great job, cant wait for the shop pics

John
Thanks! Good eye- it's actually a stationary island... yes I did make it...
In fact the rolling cart's base was mainly the cutoffs from the 8' african mahogany boards I used to make the top. The slats shelves, supports, and legs were all made from the 8/4 boards.

I found the post from last year. I need to take pictures of the shelving on the back, sides and the insides... will update those later if you're curious. All black walnut, door panels were resawn and bookmatched from a figured board I liked. That was nervy since I needed 8 slices from a 4/4 board, to have 4 doors. Ended up with an extra slice!
http://festoolownersgroup.com/member-projects/black-walnut-island/
I checked out the post of your stationary island, all I can say is that thing is gorgeous.  What a piece of walnut!!!    If you don't mind I would absolutely love to see some more details.  Lets get that old thread back to life  the piece definitely deserves some more attention!

John
 
Thanks John,
No prob- I updated that thread with pics!

dicktill,
The drawer was cut out with a very steady hand and a Trion jigsaw.  [wink]
Actually it's a bit less glamorous than that... I took the board, and sawed off two strips along the length of the board on the table saw, and set those aside. Then took the resulting board, and cut off two squarish pieces from each end at the miter saw. The remaining piece is the drawer front itself, and I kerfed off two edges on that board.

Taking the pieces I set aside, I glued everything back together back to the look of the original board. (used dominos for alignment) Then the drawer front looks as if it were cut out from the center of the apron... and the saw kerfs became the reveal on the drawer inset.
 
thebicyclecafe said:
dicktill,
The drawer was cut out with a very steady hand and a Trion jigsaw.  [wink]
Actually it's a bit less glamorous than that... I took the board, and sawed off two strips along the length of the board on the table saw, and set those aside. Then took the resulting board, and cut off two squarish pieces from each end at the miter saw. The remaining piece is the drawer front itself, and I kerfed off two edges on that board.

Taking the pieces I set aside, I glued everything back together back to the look of the original board. (used dominos for alignment) Then the drawer front looks as if it were cut out from the center of the apron... and the saw kerfs became the reveal on the drawer inset.

Oh, really neat!!!!  [thanks] for the tip.
 
Back
Top