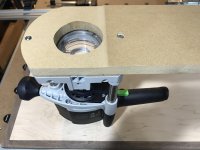
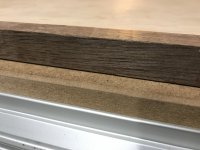
Since I already have edge banding on all 4 sides of my first shelf, the tall fence for router table or table saw methods wouldn’t work so I decided to build a jig for my OF1400. While it didn’t turn out terrible, and it’s mostly fine, I’m not completely sold that it’s how I’ll trim edge banding in the future.
I got a slightly damaged 2’ x 4’ sheet of MDF from HD for $5. I ripped a piece as wide as the router and cross cut it to about a foot long. I traced the front of the router to the board and cut it off with a jigsaw for better appearance. I then removed the bottom plate of the router, traced the 2 bolt and center holes, and drilled/cut them out. Finally, I put a piece of painters tape on my jointer and ran the MDF through the jointer until the back lined up with the tape, shut the jointer off, lowered it for a deeper cut, and repeated a few times until I’d removed about 2mm from the front half of the jig.
View attachment 1View attachment 2View attachment 3
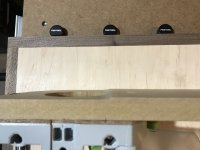
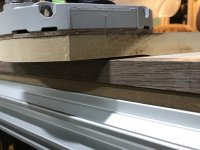
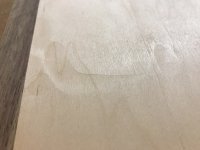
For the most part the jig works amazing and finished the edge banding very nicely; however, the edge banding has a few places were it’s not completely smooth and there’s a few small marks in the plywood veneer. I’m not sure if it’s because the plywood is not perfectly straight or because the router has a tendency to tilt forward and I didn’t hold the back down hard enough.
I can hand plane / sand most of the marks, and the systainers will cover most of the shelf anyways, but if I had to do this again, I’d try to mitigate these issues by making the jig a little longer so I didn’t have to work so hard to hold it down (the bit was only 1/2” wide, I couldn’t see well through the dust hood, and corners take some finagling so it took several minutes to complete).
View attachment 4View attachment 5
That said, it would be much quicker and take far less muscle to take one or two passes down the table saw with a tall fence, which I can really appreciate, so I’ll try this method on next few shelves and post my progress so everybody can see the results.
Stay tuned ...
 for the input. Everyday there’s something new to learn. [cool]