Seneca domiplate...I know I’m slow but

Df1k1

Member
Joined
Sep 12, 2013
Messages
154
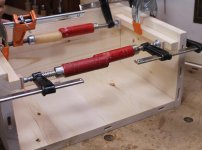
So I’ve started playing with the domino I’ve had it for a while but have not done much with it but after reading reviews got the Seneca Domiplate. Well-built well constructed etc. However I’m having a heckuva time getting the joints to line up. One thing I keep reading is the reference face. Is there a SIMPLE way someone can explain this to me?  And why it even matters?
All I’m simply trying to do a simple butt joint for a cabinet... is the reference face now backwards because I’m using the domiplate on the bottom of the machine vs the fence?  And then the right part of my brain says what does it even matter?!! But clearly it does...I just can’t wrap my head around it.
 
On thing to keep in mind when using a domino is to always reference from the same face (or plane, in case that helps) or the mortice won't align correctly and the parts will not join as you intend. Put the two pieces you want to join next to each other (in the position they should have in the end), draw a line over the seam, separate the pieces and use the faces with the line to put the fence on, with the point where the line intersects the edge as the reference.

In case you reference with the pins/paddles (not with a mark): always reference with them from the same side.
https://www.festoolusa.com/-/media/...nloads/manuals/domino_df_500_supplemental.pdf should contain everything you need to know about a domino and how to use it, it's specific for the 500 but the ideas are identical for a 700 XL.
 
I thought I did that maybe not. Because they’re definitely not lining up.  a good 16th of an inch off just very frustrating
 
What is the actual thickness of the sheet goods you’re using?
18 mm or 3/4” (19 mm)?
Seneca makes a metric Domiplate for 12 or 18 mm sheet goods.

Seneca has a video on their website by Halfinchshy they think explains the plate:
 
With the reference face it’s worth remembering there are generally two important references.

The first is the side your pin, paddle or template is referencing off eg the left side of the stretcher and right side of the leg (eg same face), but also the face which the domino plate is referencing off (top of shelf, bottom of shelf, etc).

Then you make sure you transfer those references consistently.

For instance an early mistake I made with a table-top glue up (using biscuits not dominoes, but same principle) was to reference the biscuit cutter plate off the top of the table-top, but then glue-up with the table right-side up - so the clamps were referencing off the bottom of the table top, but I’d cut the biscuits referenced off the top. Hence when the table pieces were flat on the clamps the biscuits didn’t exactly line up. Had I turned it over it would have been fine, and any small misalignment would be underside, not top side.

Hope that makes sense and helps.

Sent from my iPhone using Tapatalk
 
[member=23333]Df1k1[/member] On a butt joint the reference face remains the same as when using the Domino fence, i.e., you will register the Domiplate off the outside face of the piece into which you are plunging mortises along its edge.  In cases like this, I would just double check that your edges are square (if they are not, that could explain the misalignment), and that your machine is fully seated flat on the wood especially when doing the vertical plunges. 
 
There're some outstanding after-market Festool inventions and accessories (the TSO guide rail square is one of them), but in my opinion, the domiplate is an unnecessary addition for an average domino joiner user.

For one thing, even if you owned all three different versions of the product, you could handle in theory only a limit of 6 different types of thicknesses in the way the accessory is designed for or to work with. But most importantly, it adds an unnecessary layer of confusion to operating the machine such as relearning how to use the machine as designed by Festool when you need to use it without the dominoplate -- say, doing a mid-panel butt joint.

The best way to master the domino joiner or any tool is to watch how people use it, use it yourself, do enough projects (and make enough mistakes along the way), and consolidate your experience. I do butt joints, mid-panel joints, offset joints, angled joints and even three-way mitre joints with the DF500 as is -- without using any after-market accessories. It shows how well the machine is designed (of course even perfect machines can be improved over time). The image shows part of a project being dry fit this week using dominoes and everything you need to make all those joints is covered in the manual.
 

Attachments

  • IMG_0842.jpg
    IMG_0842.jpg
    331.7 KB · Views: 575
Stan Tillinghast said:
What is the actual thickness of the sheet goods you’re using?
18 mm or 3/4” (19 mm)?
Seneca makes a metric Domiplate for 12 or 18 mm sheet goods.

Seneca has a video on their website by Halfinchshy they think explains the plate:

3/4 inch plywood. And I watched his video but again it doesn’t seem to be working
 
Sage video did it. Clearly I was going off the wrong face. thanks all for the help.
Now if I could only figure out a way to get the freaking domino in the hole when it’s cut at the narrow setting!
I live in Florida but have an air-conditioned shop. I have to trim every single domino to get it into the tight fitting.  I’m wondering does anyone keep one domino tight and the rest loose or for just simplicity use the middle setting only for all dominos when assembling case goods?
 
Df1k1 said:
Snip.

  I’m wondering does anyone keep one domino tight and the rest loose or for just simplicity use the middle setting only for all dominos when assembling case goods?

All tight dominoes on one board and on the mating board, first domino tight (for alignment purposes) and the rest mortised at the middle setting.

To reduce moisture, microwave the dominoes (in a paper bag)15 to 30 seconds (depending how many dominoes there are in each batch) before completing the assembly.
 
ChuckM said:
Df1k1 said:
Snip.

  I’m wondering does anyone keep one domino tight and the rest loose or for just simplicity use the middle setting only for all dominos when assembling case goods?

All tight dominoes on one board and on the mating board, first domino tight (for alignment purposes) and the rest mortised at the middle setting.

To reduce moisture, microwave the dominoes (in a paper bag)15 to 30 seconds (depending how many dominoes there are in each batch) before completing the assembly.

Yes.  Except for a very simple joint having both sets of mortises all tight can make for a frustrating glue-up without adding much to the strength of the joint.  So all tight on one piece, one tight and the rest middle width on the other piece is usually a good technique. 

When inserting the tenon with glue the glue usually provides some lubrication to help the fit.  For dry-fitting it is helpful to have a set of tenons with the edges and even the faces sanded a bit, mark these with big Xs to ensure they are only used for dry-fitting. 

In the video I think Sedge uses a hand plane to take the edge off the tenon, this work for the final joint because it doesn't affect the faces which control the alignment.
 
Jeff Zanin said:
Snip.

  mark these with big Xs to ensure they are only used for dry-fitting. 

In the video I think Sedge uses a hand plane to take the edge off the tenon, this work for the final joint because it doesn't affect the faces which control the alignment.

Indeed it's a good idea to have a set of trimmed or sanded dominoes for dry-fitting purposes. However, I don't use trimmed dominoes in any actual glue-up as the alignment can be between ends rather than between faces, as shown in the image.
 

Attachments

  • IMG_0885.jpg
    IMG_0885.jpg
    51.5 KB · Views: 383
I searched for tips on how to created better butt joints with my DF500, and found Sedge's video. Excellent stuff. Will try out his techniques and see if this helps
 
sammy.se said:
I searched for tips on how to created better butt joints with my DF500, and found Sedge's video. Excellent stuff. Will try out his techniques and see if this helps

My procedure for making butt joint is to make the joint the primary operation then trim the parts to final size after.

I place the parts to be joined less than a kerf width apart then make a cut with the track saw. That makes the miter and bevel angles complimentary, especially forgiving when you’ve changed the bevel on the saw and haven’t had time to ensure that it is perfectly 90 degrees.

Then mortise for Dominos and assemble. If appropriate I also mortise and add pocket screws which are especially helpful if the assembly needs to be dry (not glued) until a later time.

Finally I trim the edges if needed so the assembled component is correct.

 
Guess I’m slow too. I didn’t understand if the “offness” was up and down or side to side.

I never rely on the Domino paddles if mating narrow to narrow mortises. Just too risky. I always do narrow to medium. Tap tap and I get a perfect joint. I always use pencil marks to locate mortises. It’s simple and I don’t get reverence surfaces mixed up.
 
I believe the the center of the domino is approximately 10mm from the base of the DF 500 but can be a bunch of different distances from the fence of the DF 500 as it moves up and down. 

That said, the reference face matters because the domino isn’t centered in the middle of a board.  Imagine the Domino is 20mm from the fence and you wish to join two 30mm boards together.  If you use the fence on the top of one board and bottom of the other board, when assembled, because the Domino isn’t centered, there will only be 10mm of material which is aligned with 20mm of each board hanging proud of the top and bottom.  I’ve exaggerated to help illustrate the point that you want to reference with the same tool surface for both cuts and the line technique is to help you see the wood surface you need to reference from.

For example, if you join two 40mm boards together, and the
 
Back
Top