ear3
Member
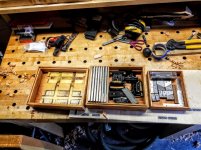
Changing over my tool cabinet got me inspired to put some order into my sharpening gear, which was distributed among a couple of small cardboard boxes or just loose in one of the drawers of a metal filing cabinet under my bench.
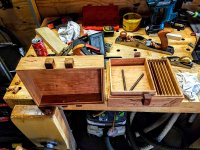
So I decided to construct a wooden box that would hold everything I needed in one place. I had a bunch of cherry scrap left over from the office desk I built last summer, so this project was also a good opportunity to cut into the scrap pile.
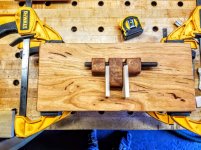
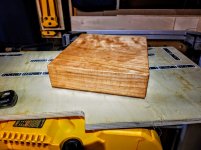
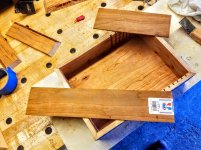
Box joinery was just glued mitered edges, after planing the wood down to 1/2" for the outer box, and 1/4 for the inner tray:
View attachment 1
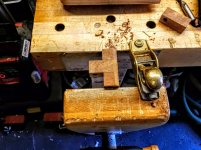
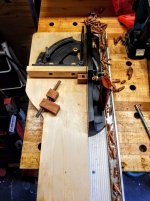
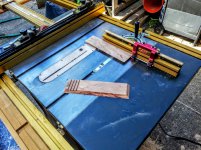
I used my Incra miter gauge on the table saw to cut 1/8" slots for the dividers to keep the sharpening stones separated:
View attachment 2
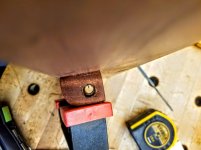
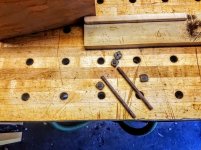
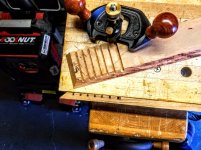
Used a router plane to remove the v-ridge from the bottom the kerf left by the table saw blade, and create a flat bottom for the dividers:
View attachment 3
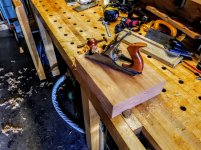
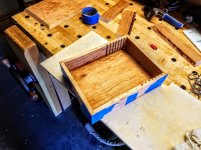
Nice thing about mitered joints, especially on thinner wood, is that they can just be glued with blue tape:
View attachment 4
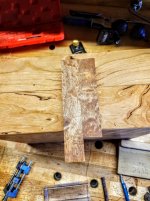
I was so excited that for a couple of the dividers I got to use up this 24" x 3" x 1/8" cherry plank that has been in my shop now for 15 years:
View attachment 5
Back in 2003-4, when I was just starting to get into carpentry, I was looking to go beyond the pine and poplar lumber that I used for my first few projects, but didn't yet have any machinery that would allow me to thickness wood. So I picked up this thin cherry plank at an art supply store on Canal street in Manhattan -- I forget now what I had in mind when I got it, but obviously never used it for anything. I would run into every few years when rearranging my shop (it sat for the longest time in a plastic crate in the loft), hold it in my hands for a bit wondering if I should toss it, then put it back where I found it for another few years. See? It pays off in the end to hold on to your scrap.
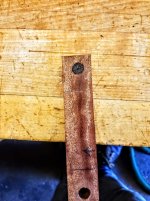
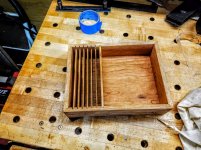
Dividers (the rest of which were thicknessed to 1/8" on the planer -- and 1/4" for the middle one) were ripped to sit a bit lower than the case to give better access to the stones:
View attachment 6
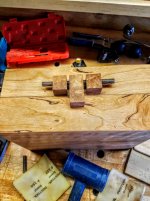
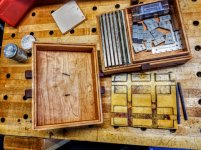
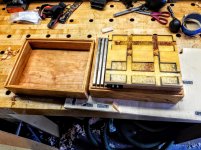
Used same mitering treatment to make a tray that sits in the box next to the dividers, so that I could create two levels for my sharpening equipment -- the lower one for the Veritas MKII, which was my first sharpening system, and the upper for the LN honing guide that I now use most:
View attachment 7
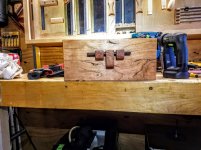
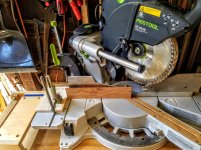
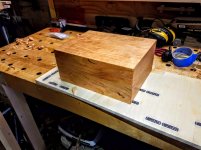
Finally, I made a top identical in dimensions top the bottom in all except height. Used a rabbeting bit on the router table to create a rabbet so that the top fits over the bottom:
View attachment 8
View attachment 9
Cleaned up the exterior surfaces with a smoothing plane and finished with Osmo:
View attachment 14 View attachment 15
I've been trying to use smoothing plane rather than sander more recently, as the surface ultimately pops much more when planed. The grain of this cherry was cooperative, and did not frustrate my efforts at all like other woods sometimes do.
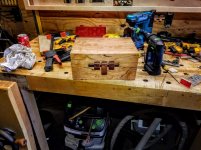
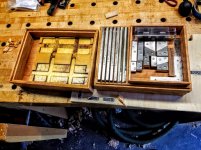
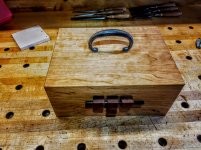
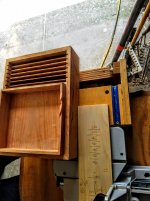
Here is the assembled box, with components added:
View attachment 10 View attachment 11 View attachment 12
View attachment 13
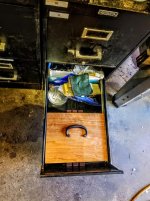
That board stuffed in the lid is the stone holder. I still have to add some latches to keep the top and bottom of the box secured and a handle to move it around, as it will for the moment still live in the metal filing cabinet. I'm just trying to decide on some decent, inexpensive hardware. I may also add stops on the top of the box to set the angles on the LN honing guide. Right now I have a piece of plywood with all the stops that is just a bit too big for the box, but for now I will continue working with it.
So I decided to construct a wooden box that would hold everything I needed in one place. I had a bunch of cherry scrap left over from the office desk I built last summer, so this project was also a good opportunity to cut into the scrap pile.
Box joinery was just glued mitered edges, after planing the wood down to 1/2" for the outer box, and 1/4 for the inner tray:
View attachment 1
I used my Incra miter gauge on the table saw to cut 1/8" slots for the dividers to keep the sharpening stones separated:
View attachment 2
Used a router plane to remove the v-ridge from the bottom the kerf left by the table saw blade, and create a flat bottom for the dividers:
View attachment 3
Nice thing about mitered joints, especially on thinner wood, is that they can just be glued with blue tape:
View attachment 4
I was so excited that for a couple of the dividers I got to use up this 24" x 3" x 1/8" cherry plank that has been in my shop now for 15 years:
View attachment 5
Back in 2003-4, when I was just starting to get into carpentry, I was looking to go beyond the pine and poplar lumber that I used for my first few projects, but didn't yet have any machinery that would allow me to thickness wood. So I picked up this thin cherry plank at an art supply store on Canal street in Manhattan -- I forget now what I had in mind when I got it, but obviously never used it for anything. I would run into every few years when rearranging my shop (it sat for the longest time in a plastic crate in the loft), hold it in my hands for a bit wondering if I should toss it, then put it back where I found it for another few years. See? It pays off in the end to hold on to your scrap.
Dividers (the rest of which were thicknessed to 1/8" on the planer -- and 1/4" for the middle one) were ripped to sit a bit lower than the case to give better access to the stones:
View attachment 6
Used same mitering treatment to make a tray that sits in the box next to the dividers, so that I could create two levels for my sharpening equipment -- the lower one for the Veritas MKII, which was my first sharpening system, and the upper for the LN honing guide that I now use most:
View attachment 7
Finally, I made a top identical in dimensions top the bottom in all except height. Used a rabbeting bit on the router table to create a rabbet so that the top fits over the bottom:
View attachment 8
View attachment 9
Cleaned up the exterior surfaces with a smoothing plane and finished with Osmo:
View attachment 14 View attachment 15
I've been trying to use smoothing plane rather than sander more recently, as the surface ultimately pops much more when planed. The grain of this cherry was cooperative, and did not frustrate my efforts at all like other woods sometimes do.
Here is the assembled box, with components added:
View attachment 10 View attachment 11 View attachment 12
View attachment 13
That board stuffed in the lid is the stone holder. I still have to add some latches to keep the top and bottom of the box secured and a handle to move it around, as it will for the moment still live in the metal filing cabinet. I'm just trying to decide on some decent, inexpensive hardware. I may also add stops on the top of the box to set the angles on the LN honing guide. Right now I have a piece of plywood with all the stops that is just a bit too big for the box, but for now I will continue working with it.
Attachments
-
 20190627_155732.jpg578.7 KB · Views: 376
 -
 20190628_174543.jpg471.6 KB · Views: 256
 -
 20190628_085053.jpg645.2 KB · Views: 255
 -
 20190628_182101.jpg452.1 KB · Views: 260
 -
 20190628_182024.jpg587.8 KB · Views: 332
 -
 20190628_182013.jpg607.9 KB · Views: 324
 -
 20190628_181957.jpg603.7 KB · Views: 317
 -
 20190628_164647.jpg392.1 KB · Views: 230
 -
 20190628_161101.jpg636.4 KB · Views: 246
 -
 20190627_163606.jpg667.9 KB · Views: 355
 -
 20190627_170511.jpg558 KB · Views: 328
 -
 20190627_174822.jpg566.2 KB · Views: 272
 -
 20190627_175038.jpg606.1 KB · Views: 264
 -
 20190627_195344.jpg624.6 KB · Views: 328
 -
 20190628_132344.jpg521.7 KB · Views: 272