ear3
Member
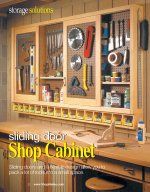
So I was browsing through Shop Notes magazine when I came across this:
[attachthumb=1]
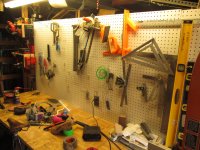
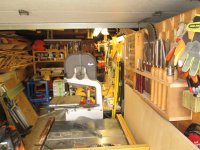
Thought it would be a good compromise solution to employ my pegboard more judiciously. My shop was originally setup according to a configuration devised by my Dad some 25 years ago, and so it has taken me a long time to rethink its design and use since I took over the house. That process is ongoing. Previously, the wall above my "workbench" looked like this:
[attachthumb=2]
Also had pegboard along the back wall, where there used to be a another workbench:
[attachthumb=6]
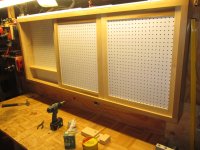
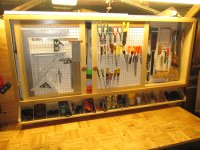
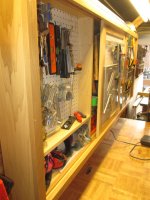
Now it looks like this:
[attachthumb=3]
[attachthumb=4]
[attachthumb=5]
[attachthumb=8]
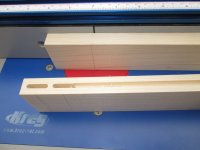
It's a pretty basic construction -- 1x2 face frame over 1x6 carcasse, frame and panel sliding doors, everything in poplar and the original white pegboard I took off the wall. Made a stopped dado on the frame to inset the panel:
[attachthumb=10]
And then assembled the doors with dominoes:
[attachthumb=11]
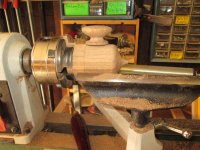
The one extra touch were the knobs, which I turned from a hickory blank I had lying around:
[attachthumb=7]
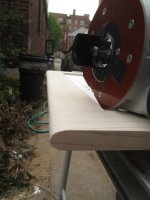
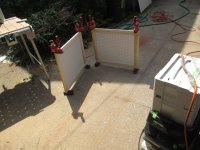
The original plans called for an aluminum track in which the doors could slide, but they seemed so light that sliding wood on wood, even when fully loaded, did not appear to pose a problem. Just to be safe I rounded off the bottoms to reduce friction:
[attachthumb=9]
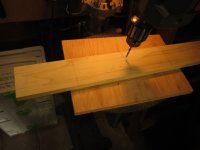
I made a shelf pin jig/board to put evenly spaced holes along the sides for interior shelving all the way up:
[attachthumb=12]
[attachthumb=13]
...though I doubt I'll use more than the one shelf along the bottom right now. I'm eventually going to redo the workbench, so I left a small gap under the dividers so I can continue to slide wide boards underneath if I'm sanding or clamping, but will later design something more integrated into the cabinet. Was also able to fit all the tools hanging on the back pegboard in the cabinet. As a bonus, the top of the cabinet is the perfect size to fit my ≤75" rails.
Next up in the reorganization...chaos wall?
[attachthumb=1]
Thought it would be a good compromise solution to employ my pegboard more judiciously. My shop was originally setup according to a configuration devised by my Dad some 25 years ago, and so it has taken me a long time to rethink its design and use since I took over the house. That process is ongoing. Previously, the wall above my "workbench" looked like this:
[attachthumb=2]
Also had pegboard along the back wall, where there used to be a another workbench:
[attachthumb=6]
Now it looks like this:
[attachthumb=3]
[attachthumb=4]
[attachthumb=5]
[attachthumb=8]
It's a pretty basic construction -- 1x2 face frame over 1x6 carcasse, frame and panel sliding doors, everything in poplar and the original white pegboard I took off the wall. Made a stopped dado on the frame to inset the panel:
[attachthumb=10]
And then assembled the doors with dominoes:
[attachthumb=11]
The one extra touch were the knobs, which I turned from a hickory blank I had lying around:
[attachthumb=7]
The original plans called for an aluminum track in which the doors could slide, but they seemed so light that sliding wood on wood, even when fully loaded, did not appear to pose a problem. Just to be safe I rounded off the bottoms to reduce friction:
[attachthumb=9]
I made a shelf pin jig/board to put evenly spaced holes along the sides for interior shelving all the way up:
[attachthumb=12]
[attachthumb=13]
...though I doubt I'll use more than the one shelf along the bottom right now. I'm eventually going to redo the workbench, so I left a small gap under the dividers so I can continue to slide wide boards underneath if I'm sanding or clamping, but will later design something more integrated into the cabinet. Was also able to fit all the tools hanging on the back pegboard in the cabinet. As a bonus, the top of the cabinet is the perfect size to fit my ≤75" rails.
Next up in the reorganization...chaos wall?
Attachments
-
 Sliding Door Cabinet_Page_1.jpg391.2 KB · Views: 2,763
 -
 IMG_4661.JPG665.7 KB · Views: 1,081
 -
 IMG_4721.JPG531.7 KB · Views: 1,442
 -
 IMG_4741.JPG629.4 KB · Views: 1,284
 -
 IMG_4744.JPG612.7 KB · Views: 1,284
 -
 IMG_4664.JPG597.6 KB · Views: 1,014
 -
 IMG_4724.JPG622.3 KB · Views: 737
 -
 IMG_4727.JPG547.1 KB · Views: 1,506
 -
 IMG_4714.JPG360.1 KB · Views: 665
 -
 IMG_4706.JPG393.4 KB · Views: 847
 -
 IMG_4711.JPG637.2 KB · Views: 671
 -
 IMG_4669.JPG296.3 KB · Views: 576
 -
 IMG_4671.JPG429.4 KB · Views: 649