rmwarren
Member
- Joined
- Jul 11, 2010
- Messages
- 3,063
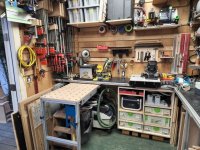
I’ve spent a lot of the winter/spring decluttering and reconfiguring my small (120SF) shop. There is a lot of background & me babbling contained in two threads on the shop itself & a large MFT/SYS cart I’d built. Turns out that having space for materials and to be able to stand/move makes a shop much more functional…
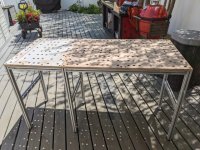
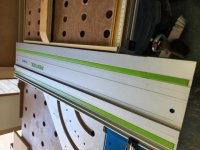
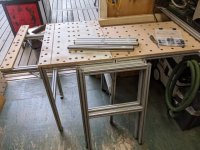
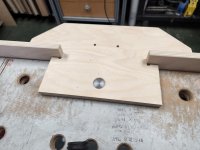
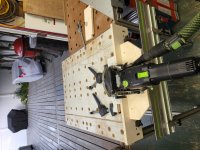
After weeding out some of the less necessary tools, I replaced the big cart with what I’m calling my “Break-Down (BD) MFT” (modular-ish MFT tops and 80/20 frames) and relocated a lot of tools and shop supplies. The idea behind the BD MFT is to setup in minutes in whatever configuration the work requires yet knocks down for storage. Photos are from various stages while I was figuring this out.
[attachimg=1]
[attachimg=2]
[attachimg=3]
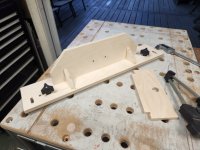
The setup is “modular” in the sense there are consistent sizes that can be configured differently (576mm increments & 768mm). Currently I have 3 sections of top and 4 or 5 sets of legs with several different lengths of 1515 extrusion to connect them together. 2 sets of legs + 4 extrusions make of a single unit that is sturdy yet very lightweight. adding one more leg + connectors extend for each additional top section, i.e. one top requires two leg units, two tops require three legs, etc. The system is workable but still a work in progress. It takes 5-10 minutes to set up depending on how many sections are used, and everything stores in about the same cubic footage as a single Festool MFT.
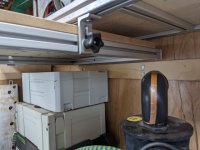
I have one semi-permanent (base) section attached to the underside of a wall mounted 16” deep worksurface, it is ~44” long and slides in/out as needed to save floor space. The base setup only needs one leg section and the connection to the worksurface makes it steadier than a free-standing MFT. One goal was to be able to totally knock this down when I switch over to welding larger projects, the base setup can be removed & a 24" by 48" welding cart rolled out and left until the project is finished.
[attachimg=4]
[attachimg=5]
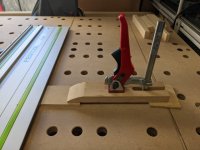
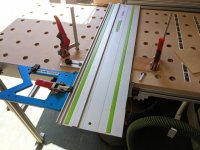
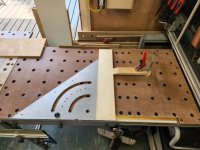
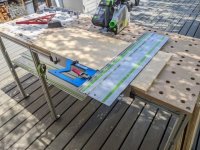
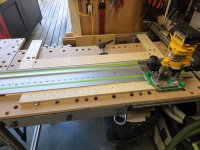
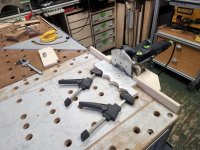
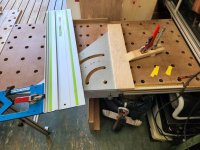
Lastly, I just finished up v1.0 of a precise setup on the MFT for track saw use. The setup relies on a TSO guide rail square, which is my go-to setup for anything related to the track saw. After a lot of fiddling around this is working perfectly. For the record, I (1) have zero interest in using an MFT-style hinge setup and (2) do not want to just roll out the table saw for simple cuts.
[attachimg=6]
[attachimg=7]
[attachimg=8]
[attachimg=9]
[attachimg=10]
[attachimg=11]
[attachimg=12]
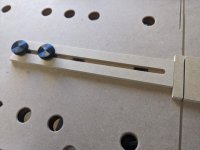
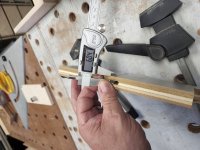
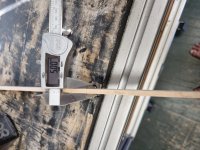
This setup uses a height-adjustable fence on the front edge of the MFT to both square to the material and locate the guide rail repeatably. The fence prevents the guide rails from tipping on narrow stock & a rear support is available when needed. The Incra track provides accurate measurement & using the triangle handles rips when the material is too narrow for the front fence to give me an accurate 90 degree setup. Various stops/clamps round out the setup. There isn’t much I can’t cut accurately now, including things typically more suitable for a chop saw or table saw.
I’m interested in feedback or suggestions on improvements.
Thanks.
RMW
After weeding out some of the less necessary tools, I replaced the big cart with what I’m calling my “Break-Down (BD) MFT” (modular-ish MFT tops and 80/20 frames) and relocated a lot of tools and shop supplies. The idea behind the BD MFT is to setup in minutes in whatever configuration the work requires yet knocks down for storage. Photos are from various stages while I was figuring this out.
[attachimg=1]
[attachimg=2]
[attachimg=3]
The setup is “modular” in the sense there are consistent sizes that can be configured differently (576mm increments & 768mm). Currently I have 3 sections of top and 4 or 5 sets of legs with several different lengths of 1515 extrusion to connect them together. 2 sets of legs + 4 extrusions make of a single unit that is sturdy yet very lightweight. adding one more leg + connectors extend for each additional top section, i.e. one top requires two leg units, two tops require three legs, etc. The system is workable but still a work in progress. It takes 5-10 minutes to set up depending on how many sections are used, and everything stores in about the same cubic footage as a single Festool MFT.
I have one semi-permanent (base) section attached to the underside of a wall mounted 16” deep worksurface, it is ~44” long and slides in/out as needed to save floor space. The base setup only needs one leg section and the connection to the worksurface makes it steadier than a free-standing MFT. One goal was to be able to totally knock this down when I switch over to welding larger projects, the base setup can be removed & a 24" by 48" welding cart rolled out and left until the project is finished.
[attachimg=4]
[attachimg=5]
Lastly, I just finished up v1.0 of a precise setup on the MFT for track saw use. The setup relies on a TSO guide rail square, which is my go-to setup for anything related to the track saw. After a lot of fiddling around this is working perfectly. For the record, I (1) have zero interest in using an MFT-style hinge setup and (2) do not want to just roll out the table saw for simple cuts.
[attachimg=6]
[attachimg=7]
[attachimg=8]
[attachimg=9]
[attachimg=10]
[attachimg=11]
[attachimg=12]
This setup uses a height-adjustable fence on the front edge of the MFT to both square to the material and locate the guide rail repeatably. The fence prevents the guide rails from tipping on narrow stock & a rear support is available when needed. The Incra track provides accurate measurement & using the triangle handles rips when the material is too narrow for the front fence to give me an accurate 90 degree setup. Various stops/clamps round out the setup. There isn’t much I can’t cut accurately now, including things typically more suitable for a chop saw or table saw.
I’m interested in feedback or suggestions on improvements.
Thanks.
RMW
Attachments
-
 PXL_20220430_161817961 1.jpg227.1 KB · Views: 3,840
 -
 PXL_20220414_181714692.MP 1.jpg155.8 KB · Views: 3,668
 -
 PXL_20220414_181658459 1.jpg166.4 KB · Views: 3,706
 -
 PXL_20220412_225424559 1.jpg188.6 KB · Views: 3,722
 -
 PXL_20220430_135401952 1.jpg183.9 KB · Views: 3,715
 -
 20220704_145441.jpg138.9 KB · Views: 3,671
 -
 20220704_145519.jpg135.8 KB · Views: 3,662
 -
 20220704_145526.jpg154.3 KB · Views: 3,696
 -
 PXL_20220421_214759458 1.jpg162.2 KB · Views: 3,735
 -
 20220519_200411.jpg182.6 KB · Views: 3,763
 -
 PXL_20220421_220728346 1.jpg57.3 KB · Views: 3,790
 -
 PXL_20220430_171007768.MP 1.jpg61.6 KB · Views: 3,803


")