Show how you store your track saw guide rails

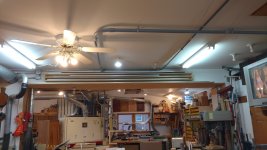
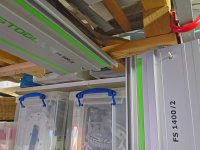
My 75" and longer rails are on shelves on a header divider.
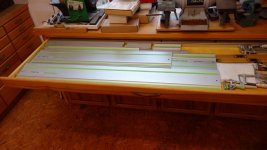
My 55 & shorter are in a drawer.
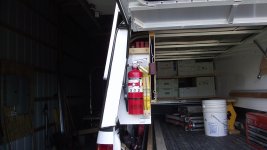
In my work truck they are in a sleeve mounted to a tool box.
 

Attachments

  • IMG_20190124_160055129.jpg
    IMG_20190124_160055129.jpg
    1.5 MB · Views: 2,082
  • IMG_20190124_160152055.jpg
    IMG_20190124_160152055.jpg
    1,013.6 KB · Views: 1,773
  • DSCF2280.JPG
    DSCF2280.JPG
    495.3 KB · Views: 1,675
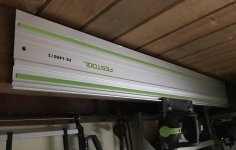
I store my 1400 tracks in the Makita bag, which is nicely padded. The shorter ones are on hooks/screws hanging on the side of a shop cabinet for quick access.
 
Nail #1: 2 X 1400 and an 800.
Nail #2: Holy rail and FSK 420.

I don't think a photo is needed ;)
 
I was going to grab the video link, but [member=66216]GoingMyWay[/member] did that already (thx!)

As for the torsion spring, I had those on my door for many years before needing some other garage door work done. The guy saw the added rails and tensioned up the spring to make it balance perfectly. It worked fine for years, but after balancing it, it likely took a load off the opener.

As for heat and cold, while we don't have long cold spells in Arizona, we do at least hit freezing, but we also exceed 100º for most of the year. It has never bothered it. Really, it's aluminum, it won't melt even if the Arizona sun tries its best.
 
I'm tempted to keep my slowly-growing collection of rails hanging vertically on a wall, which might be best use of space in my situation; I can't help wondering if the longer ones might sag a little over time if stored horizontally (flat, rather than on edge) and not supported along the length.

O/T
Paul-Marcel: thank you for all the videos you've done in the past - I've found them entertaining, informative and inspiring.
But are we going to see a conclusion to 'Angle Madness' at some juncture?
 
Just a couple of carefully placed nails in a rafter.
 

Attachments

  • ED0E323C-3A63-47D8-A6A1-364D91F89724.jpeg
    ED0E323C-3A63-47D8-A6A1-364D91F89724.jpeg
    2 MB · Views: 3,856
I have five rails that vertically hang from peg board hooks, 1900 by itself as I use it the most. Two holey 1400s on anther and a 1080, 800 on another hook.  My 3000 hangs horizontally using the foam braces from the shipping packages that are inserted into aluminum U channel. 
 
  Up to 1900 (75") are hanging vertically. 3000 (10') is on a shelf just below the surface of 10' long cutting table.

[attachimg=1]

Seth
 

Attachments

  • DSC00114 - 1.jpg
    DSC00114 - 1.jpg
    21.6 KB · Views: 11,791
Thanks, Euclid! I put Angle Madness in a corner; I refuse to work on it off-camera. Some remodeling snowballed so I'm trying to finish that off before completing Angle Madness, which will be on camera. Fortunately, the project name lets me use the excuse that I caught the madness...

Euclid said:
O/T
Paul-Marcel: thank you for all the videos you've done in the past - I've found them entertaining, informative and inspiring.
But are we going to see a conclusion to 'Angle Madness' at some juncture?
 
I have mine hanging vertically. I put up a strip of plywood and used screws to hang from the factory holes in the rails.  The heads of the small socket head Kreg screws fit perfectly.
b8ff1e71636b3fe0cd9860cb80205c00.jpg


Sent from my iPhone using Tapatalk
 
Not very visible, but I made some flexible storage for the rails using a French cleat system.
The cleats can be moved from left to right to fit several length rails.
Each "cleat" can hold 3 rails
 

Attachments

  • WP_20161004_20_49_21_Pro.jpg
    WP_20161004_20_49_21_Pro.jpg
    4.1 MB · Views: 1,499
NL-mikkla said:
Not very visible, but I made some flexible storage for the rails using a French cleat system.
The cleats can be moved from left to right to fit several length rails.
Each "cleat" can hold 3 rails

I don't trust myself to store them in the weak axis like that, I could destroy them all simultaneously.
 
Originally thought of putting it on my garage but was getting a little too cluttered. Simply attach to the wall works fine for me
 

Attachments

  • 127047B5-0176-419A-9518-DAC78EF578AD.jpeg
    127047B5-0176-419A-9518-DAC78EF578AD.jpeg
    2.6 MB · Views: 1,097
  • 60E72F22-8B26-4DD3-A7FA-1336F53D4C93.jpeg
    60E72F22-8B26-4DD3-A7FA-1336F53D4C93.jpeg
    1.9 MB · Views: 1,121
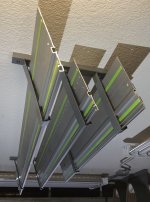
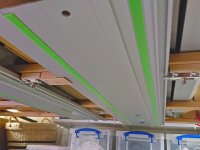
I welded up these ceiling brackets to store mine.  The shorter ones are just some 1/8" x 1.5" flat bar bent in sort of a J shape with rubbler lining to protect the rails.  The 3000mm rail sits across several another type of bracket I welded out of 1 1/2" x 1/2" rectangular tubing, again with rubber cemented to the top to protect the rail.  Both are handy for me, yet out of the way and protected from damage.
 

Attachments

  • Festool Rail Overhead-2.JPEG
    Festool Rail Overhead-2.JPEG
    181.4 KB · Views: 767
  • Festool Rail Overhead-1.JPEG
    Festool Rail Overhead-1.JPEG
    473.3 KB · Views: 3,118
Hi guys,

New on this forum. Nice to read the messages and see the pictures. Here is how I store my guide rails. I have a small garage with ample space (Amsterdam). I have 2 guide rails that I can easily store at the bottom-side of my self-made wood storage.
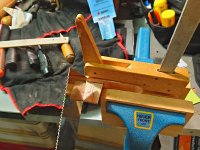
I made 2 beech clamps to hold each rail in place (when they are "asleep").
When I'm actively using them, a simple hook allows me to hang the rails in between sawing.
Let me know if this is unclear ;-)
 

Attachments

  • 2019-04-04_18-53-41_HDR.jpg
    2019-04-04_18-53-41_HDR.jpg
    682.9 KB · Views: 1,327
  • 2019-04-04_18-54-08_HDR.jpg
    2019-04-04_18-54-08_HDR.jpg
    711.7 KB · Views: 1,287
And here are my rail clamps, readily available.

Off-topic: It also shows one of my mostly used tools: a klemmsia clamp. I would buy stocks of the company and give as a present to all of you guys if I could....
Swedish quality. Sometimes very unpractical, because you need 2 hands or good skills to clamp.
But is is so versatile, so powerful and so simple.... The cork does not move, is square (rather than round) and because the clamps are square too, you can clamp another clamp on it..... Let me know if you want to see more pictures (and accessoiries!!)
 

Attachments

  • 2019-04-10_19-56-27_HDR.jpg
    2019-04-10_19-56-27_HDR.jpg
    876 KB · Views: 1,112
  • 2019-04-13_14-51-19_HDR.jpg
    2019-04-13_14-51-19_HDR.jpg
    897.9 KB · Views: 1,112
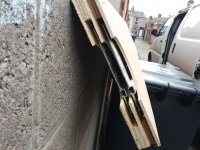
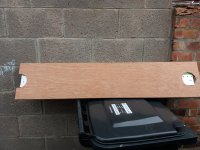
I made a box using 12mm plywood as spacers which allows the rail to slide into the box and 6mm between eaxk rail and on the outside.
Still got to add another layer so it carries three rails and attach it to inside of my van. Oh and when its done I'll do a cut so all the edges are tidied up.
I used a holecutter to make holes so the rails dont get stuck in there and I can get my fingers in as needed.
 

Attachments

  • 20190324_125916.jpg
    20190324_125916.jpg
    3.8 MB · Views: 1,298
  • 20190324_125903.jpg
    20190324_125903.jpg
    5.3 MB · Views: 978
Back
Top