Hi!
I've been quite for a couple of days as things have been pretty busy around here and early Monday morning work continued on the fiber optic and gas handover points.
Around 7 AM two workers showed up to drill through my basements outer wall and to install the handover points.
They brought the smallest SDS-Max type rotary hammer from DeWalt along with Hilti drill bit and core drill bit. I felt sorry for the machine, the chuck and drill bits were dry as f*rts, some unidentifiable thick black liquid dripped out of the gearings... Clearly not the right tool for the job - but they had nothing else - and I was surely not giving them my 5 KG SDS-max rotary hammer after seeing how poorly they treat their tools.
The drilling itself took pretty long with this underpowered (max. diameter 43mm) machine but it got through eventually.
After that they were back up to their original speed. The gas handover point was fitted. It's fit through the wall and then a foam collar is added.
On top of that foam collar another plastic collar is fitted - from both sides.
From the outside, a cement mixture of very runny consistency that hardens within minutes is filled through a funnel. This serves to fix the handover point and to seal the wall again.
A product called Tangit is used to place and seal the fiber optic handover point. It's a 2-components expansion resin.
Then they had finished their part and told me a second team would arrive shortly to connect the gas line.
While I was waiting for them, I decided to use the time to clean out the hole of my basement window. This resulted in a rescue mission:
This little guy right here had somehow managed to fall through the light grid above said window/hole. His very lucky day, 2nd birthday if you want - I only very rarely open those light grids...
I set him free in the backyard where he took off right for the neighbors pond.
Shortly after this, the 2nd team arrived.
They brought a special welder.
To weld/melt the gas tube connections. All connection pieces feature metal lines on the inside, than when connected to the welder get hot and weld/melt the plastic tubes together.
But first things first:
Piping/tubing is laid out and cut
The connector to the main line is installed
Realizing they should have placed the connector the other way around.
")
Turned around.
EVERYTHING gets wiped down with some alco-pads.
Connectors are placed. They feature a barcode that can serve different purposes. If necessary it can be used to trace it back to the manufacturer and the worker that installed it. In this case, they are used in conjunction with the welder - which then automatically detects how long it has to run for the type of connector.
Barcode scanned.
Welding.
Worker writes something on the connector...
This procedure is now repeated for all connections.
In the meantime the 2nd worker places a mechanical barrier on the gas handover point.
This is what it looks like
Placed on the handover point.
Now, the magic happens. Did I mention that the gas line is life over the whole time?
A bolt is inserted to the side of the T-connector and turned. Inside the T-Connector a cutter moves closer to the gas main line with each turn and opens it eventually. The bolt is unscrewed, the cutter head moves back in its original position and the gas can flow freely through the tubing. By that time the second worker opens the mechanical barrier to get all of the air out till he sniffs some gas. You can see the cutter in the first picture, the copper thingy inside the cut out.
Then it is also sealed.
The second connector, connecting the hose to the T-connector serves also as a flow switch.
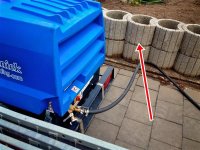
By the end of day it looked like this:
I then proceeded to cover up the damage inside with some plaster and re-placed my shelvings.
Kind regards and I hope you guys are enjoying the journey so far,
Oliver

")


