six-point socket's tidbits of Home Improvement, small projects and other stuff.

  • Thread starter Thread starter six-point socket
  • Start date Start date
Status
Not open for further replies.
Hi everyone!

Another gap filler. In more ways than one.

As you know I'm working a lot on all the "little stuff" that got postponed or had to wait because of more important projects. When I was at the DIY store last time, I wanted to buy Basalt joint filler 0-2mm. As I have come to know many times already, they didn't have it. 2-5mm or coarse wouldn't have been a problem to buy on the spot and take it home. But they don't have the fine, almost sand like stuff.

Background: It was time to clean the seating area in the rear part of the garden, and the joints need a re-fill from time to time. Especially now that I was going to use the pressure washer, I knew I would have to re-fill the joints. Especially when using the dirt blaster, it plows through the joints and everything is gone. That's why I didn't use it except for testing it on a couple of stones. I used the surface cleaner instead, that is way more gentle on the joints, but still gets the job done.

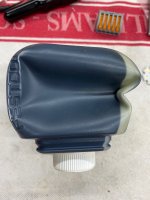
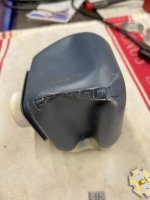
Directly from a German quarry.

38534219ez.jpeg


38534221ex.jpeg


38534224gx.jpeg


38534225lm.jpeg


Neat packaging, put a smile on my face. They really embrace the online selling of their products.

Everything else is told rather fast:

Get surface cleaner, take "before" picture:

38534271fl.jpeg


This was my test area with the dirt blaster. You can see how well it works, but also that it clearly shot a lot of the filler from/ out of the joints.

38534272ny.jpeg


Surface cleaner it is.

38534273fx.jpeg


Let it dry for a bit, and enjoying the results.

38534274qg.jpeg


38534275xx.jpeg


Then I could go about re-filling the joints

38534276ur.jpeg


Once the Basalt joint filler dries, it gets this dark-grey/black color.

38534277zp.jpeg


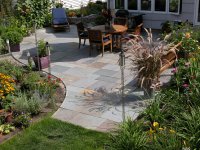
And thats what the whole area looks like after. Of course, it still has to dry some more.

38534278pw.jpeg


Kind regards,
Oliver
 
Oliver, The round patio area with the basalt joints looks great!  Did you install the pavers or were they there when you moved in? 

Is there any adhesive mixed in with the basalt or is it just the stone?  In the past, I've used the expensive bags they sell here with an adhesive, but found it really didn't hold up much better than just plain sand.

Thanks, Mike A.

 
Hey Mike,

thank you! We had the pavers installed by a pro, many years ago. The basalt is just that, nothing added.

It was done differently for the entry. Here a two-component product was used, sand and a type of hardener. But not epoxy/resin hard, more like clay, so you can still dent it with a finger, or a woman wearing heels can leave an imprint in it. It's supposed to be that way, as it can absorb water/ let water pass trough. And it still has a nicer/ more natural look than cement type joint fillers.

It's "high maintenance", because of the sandy/abrasive like surface/structure - especially if used on a north side like in our case, and again especially after the winter. It's all green and needs proper cleaning and treatment with a special anti-green/ anti-algae solvent.

You can also spot the difference between the area that is protected from the weather (canopy) and the unprotected area.

38536790zn.jpg


But the joints do not wash out, they are 100% solid.

Kind regards,
Oliver
 
Oliver,

That's a great looking entry! I'm a big fan of the circular pattern.  Whatever that clay-like substance is, it looks pretty good - almost like a mortar.  Did they give you any more information on it?

Like you, we've also had to use an anti-algae spray on the north side sandstone patio of our home and even the roof to get rid of moss and the "green" stuff.

Thanks, Mike A.
 
six-point socket II said:
I've posted this in a different forum, and got the reply that my concern isn't one. The cartridges hold up well, even when re-used. No accidents/bursts.

Hey Oliver [member=61712]six-point socket II[/member] does this look familiar?  [poke]

This happens all the time, it's annoying but other than that it's normal.  [smile]

[attachimg=1]

[attachimg=2]
 

Attachments

  • 8904.JPG
    8904.JPG
    540.2 KB · Views: 430
  • 8905.JPG
    8905.JPG
    472.4 KB · Views: 460
Hey Mike [member=30413]mike_aa[/member]  I've used SandLock and have been very satisfied with the results. After exposure to moisture it turns into a almost plastic like consistency yet it still allows standing water to drain. Better yet, no weeds appear.  [smile]
https://www.pavetech.com/sandlock-2-lb-tub

It's best to mix it with granite sand, that stuff works really well. The granite sand has very sharp edges which tends to lock or wedge  in the pavers/bluestone, very similar to class 5. I think it's very similar to Oliver's basalt.

Regular sand has soft/rounded grains that don't lock in like granite sand does.

The blue stone patio I installed 15 years ago still does not have any weeds peeping through the cracks.  [smile]

[attachimg=1]
 

Attachments

  • DSCN2161.JPG
    DSCN2161.JPG
    677 KB · Views: 476
Hi [member=44099]Cheese[/member]

thanks for the pictures of that Surfix cartridge, looks indeed familiar - I'm at ease about that now! Thank you! :)

Oh, and beautiful patio/garden!

Kind regards,
Oliver
 
Hi!

So today was the day I used the telescopic arm with surface cleaner attached on the roof over our patio. A-M-A-Z-I-N-G! This sooo beats climbing up and crawling over the beams, scrubbing the twin-wall roofing panels left and right by hand, climbing down, climbing back up, crawling on another beam and again scrub two of the panels ...

Now I only need to re-position the ladder three times, and adjust the telescopic arm depending on my position. Such a breeze. I love it! I didn't use the supplied solvent, I need to find out that it is not harmful first. Since the water goes into the gutter and from there into our rain-water-collection.

38542449kx.jpg


If you're on the edge to get such a surface cleaner and telescopic arm for similar situations, go get it. It's incredible. I was done so fast, had the pressure washer cleaned and put everything back within 30 to 45 minutes. Otherwise I would have spent at least 2.5 to 3 hrs cleaning the roof.

Another thing that is going great, is my intermediate/prototype dirt-filter for our little decorative water well.

I posted about it earlier in this thread, here:https://www.festoolownersgroup.com/home-improvement-other-projects/'quick-and-dirty'-basement-door-repair/msg583077/#msg583077

This is what it looks like after weeks without any attention, and the pump still runs flawless and keeps the water flowing in that decorative well.

38542516lk.jpeg


38542517nv.jpeg


And here is the seating area after another day of drying.

38542529va.jpeg


38542531gv.jpeg


38542532di.jpeg


Now, that beautiful picture [member=44099]Cheese[/member] posted, inspired me to show you guys a little more of "where the magic happens" at the casa de six-point socket II.

So this is where most of the projects start. Planning, material & tool selection. Additionally, as [member=167]neilc[/member] already had anticipated earlier, this is where great memories with friends & family are made, it's the coziest place to spent every minute possible from spring to autumn. We can add chairs or place a bigger table that we keep stored away. And we have a beautiful marquee we can set up, either there or somewhere else. (I will post a picture next time we set it up.) This was also another reason behind getting the LotusGrill XXL, we can move it to this area for a BBQ, so we don't have to split on future parties and get-togethers. (The other, permanently installed/ not moveable BBQ is in the front, right next to the roofed patio ...)

38542552pp.jpeg


38542553rx.jpeg


These views are well known around this thread and my lengthy Festool DTS 400 REQ review from quite a few years ago.

38542570im.jpeg


38542571bc.jpeg


These not so much, to the right.

38542577ls.jpeg


38542578bz.jpeg


And here's a little more "total" view. Although still quite a bit distanced from the roofed patio, which would be in my back, obviously. That little decorative well would be to the right.

38542625lq.jpeg


38542626cx.jpeg


Hope you guys enjoyed that little tour. :)

Kind regards,
Oliver
 
Checking something off the list, every day. Even if it's just the small stuff.

Servicing the (low) pressure sprayer.

Neuralgic parts for failure:

Nozzle, that little plastic thingy causing the water to swirl so you get that fine, very wide spray - and the pressure indicator/ safety release valve.

38569560yf.jpeg


I'm using a food safe grease to lubricate/conserve threads and keeping the o-rings soft, that is commonly used for valves & fittings in faucets. It's a great product for everything that needs grease and comes into contact with water/food/nature in some way. ->https://www.fermit.de/en/products/s...t/grease/glissa-valve-and-fitting-grease.html

I think I have shown it before while I was servicing the pump we use on our rain collection tanks.

38569561ym.jpeg


Serviced and cleaned, ready to use.

Kind regards,
Oliver

 
As usual: very nice.

Regarding Surfix: Use less muscles?
I found that squeezing more frequently and less hard removes the issue with the 'handle' of the applicator loosing shape.
 
Thanks Gregor!

I just used 3 fingers, more or less  [scared] [eek] [blink]  [big grin] [wink]

But yeah, I will see if I can adjust the pressure/force used a bit next time.

Kind regards,
Oliver
 
Hi!

We got some catching up to do, on a little something from way past.  [big grin]

I had this situation:

six-point socket II said:
[blink] [eek] [scared]

32909038na.jpg


[eek] [eek] [eek]  [sad] [crying] [mad]

32909039lz.jpg


There's always something to do ...  [smile] [big grin] [wink]

Kind regards,
Oliver

And I rectified it.

six-point socket II said:
Yeah, I've heard that before [member=10952]leakyroof[/member]  [big grin]

--

So, a new plug was easily installed.

32910569ue.jpg


32910570il.jpg


--

(...)

Kind regards,
Oliver

So a couple of days ago I inspected that socket/plug again and guess what, the rubber had worn and didn't offer any ingress protection anymore.

38651698ts.jpeg


38651699aw.jpeg


So I decided to get something more rugged/protected. IP54 ingress protected and Made in Germany. ->https://www.abl.de/global/downloads/kataloge/ABL_SCHUKOprofessional_folder_EN.pdf They claim it's the only IP54 ingress protected Schuko-Connector/Plug available. I haven't fact checked that. It even comes with a LED to let you know it's live (or not).

First delivery from Bauhaus was a miss.

38584589cw.jpg


Then, finally, they delivered a complete unit.

38651693kg.jpeg


38651694qy.jpeg


38651695sn.jpeg


This is actually pretty nifty, the connector/terminal is held inside the case/housing by a single screw, that only needs to be slightly turned.

Screw retracted, connector/terminal can be removed

38651700vg.jpeg


Screw protruding, connector/terminal is locked.

38651701dj.jpeg


Also a great idea:

Cap unscrewed, sealing/flexible part of the cable sleeve (gland) inside case/housing is open.

38651706qd.jpeg


Cap tightened down, sealing/flexible part of the cable sleeve (gland) inside case/housing is closed/sealed against the cable.

It looks a little like what we call a "Panzerverschraubung" or "Kabelverschraubung" in German -> gland or cable screw in English, as far as I know. But due to the flexible sealing and screw mechanism it's way more sophisticated.

38651707yg.jpeg


And installed.

38651721fe.jpeg


Kind regards,
Oliver
 
I had (have..) one just like the one receptor you show here wrecked.
It’s poor quality, seeing yours just confirms it - mine started to rust early, and then the heat..

Most shops still sell them, I steer away and buy more costly - it one of those: - no, I want the expensive one  [big grin]

Edit: While I’m at it, be aware of Craftomat Forstner bit. I returned 2 bits with terrible runout.
My very cheap (think the whole set of 5 cost less than one Craftomat) Lidl‘s Powerfix was exemplary compared to Craftomat. So there are exceptions  [wink]
 
Hi!

Here's a minor/small sign of life from the "basement project".

Tomorrow will be the day for starting either on the new pedestal for washing machine and dryer or the two-component flooring in the laundry room. So this old doorframe had to go, as there will be a couple of bricks added (only 1 brick in height of course) to form a new water edge in case of another flooding.

Best tool for the job? Wera's "screwdriver chisel". Clean the head of the screw from paint, drive it in with a few strokes of a hammer and turn.

38699060it.jpeg


38699061di.jpeg


38699069lb.jpeg


What I didn't really expect was the type of anchors used. These have a little, flat, tail that sticks out on the other side of the wall. Thats why I wasn't able to loosen them with a hammer and then turn-and-pull them with vise grips. This is also a lesson learned for the other frames, I had no idea what these little tails were good for, before I removed the frame.  [big grin] (Of course I did try to bend them back into a more straight shape and drive them through with a hammer, when I understood how they work. But that didn't work, either.)

38699067bn.jpeg


What was left to do was to cut the anchors flush. I used the Spyder Products MultiCutter (3x3) blades 10TPI on one, 14 TPI on the other side. (https://www.spyderproducts.com/tools/3x3-blades/ ) They are made in Germany by MPS Saegen:https://www.mps-saegen.de/en/  //https://www.mps-saegen.de/en/innovation-multicutter-saebelsaegeblaetter/  And these are really great! Demolition work without having to change the blade every 5 minutes ... As I already pointed out, they are double edged, in this case 10 TPI on one, 14 TPI on the other side. And they can be used for easy plunge cuts. 14 TPI was a perfect fit, thats why I'm holding the saw upside down. Inside the Snap-On cover works a tried-and-true Metabo 12V reciprocating saw, including the fantastic quick-release, multi chuck that can hold reciprocating saw blades as well as T-shaft jigsaw blades.

38699062ae.jpeg


38699063hr.jpeg


38699064di.jpeg


38699065hg.jpeg


38699066dm.jpeg


Kind regards,
Oliver
 
Would not have thought that Snap-on would have a reciprocating saw.  I guess that is in their bodywork line?

Double sided blades is a great idea.  Definitely can see the benefit and will try to find them here in the states.

So those are essentially threaded inserts with a flat lip on the back side that then have a flat head screw that goes into them.  I've seen them for knock-down furniture, but never for larger construction.  I guess you could not easily have driven them back through the wall?

Thanks for sharing more tool inspiration!  and house progress!
 
Hi Neil,

Snap-On has a very neat selection of 14.4V and 18V cordless tools. And sometimes, when you know who the manufacturer behind certain models is, it makes sense to buy them and stick to the batteries.https://shop.snapon.com/product/14.....4-V-MicroLithium-Cordless-Reciprocating-Saw-(Tool-Only)/CTRS761ADB

As I said, it's basically a Metabo:https://www.metabo.com/de/de/maschi...powermaxx-ase-602264750-akku-saebelsaege.html

And it will be interesting to see, if they are going to upgrade to the newer, brushless, variant:https://www.metabo.com/de/de/maschi...axx-sse-12-bl-602322500-akku-saebelsaege.html

And the Metabo/Snap-On is so interesting because of the "multi chuck" that accepts reciprocating saw blades and T-shaft jigsaw blades.

38704968dd.jpg


38704972fw.jpg


38704975ur.jpg


38704978xq.jpg


38705031di.jpg


You shouldn't have any trouble finding the Spyder products 3x3 multi cutter reciprocating saw blades, as Spyder products is the US re-seller.http://spyderproducts.com They sell a lot of the high-quality MPS sawing products.

38705021ma.jpg


Here are some pictures that speak for themselves. The big brown chunk of wood in the last pictures is incredibly dry and hard Bongossi/Azobee. The saw blade I used yesterday, was exactly the one that I had used for testing and evaluation here. And I think that speaks for both, the 14.4V cordless reciprocating saw, and the 3x3 multi cutter saw blades.

38705056ya.jpg


38705057ws.jpg


38705058et.jpg


38705059tx.jpg


38705060iv.jpg


38705061jp.jpg


38705062kn.jpg


38705063le.jpg


Kind regards,
Oliver
 
Hello Oliver

I would have liked to have those blades back in the days I was doing remodel and demo work. The best blades I ever found for demo were made by Hilti and had a profile like lumberjack cross-cut saw.  Man those things could chew through wood and other materials.
 
Hello Oliver

That looks similar, although I could swear the Hilti brand looked even scarier  [eek] [scared] .  I wonder if I still have any in the shop... will have to take a look.
 
Status
Not open for further replies.
Back
Top