six-point socket's tidbits of Home Improvement, small projects and other stuff.

  • Thread starter Thread starter six-point socket
  • Start date Start date
Status
Not open for further replies.
Time to finish painting by applying two coats of paint to the other side of the door, today.

Coat #1.

Difference between primer "white" and RAL 7035 "Lightgrey".
38838844nu.jpeg


38838862gl.jpeg


38838847pl.jpeg


38838848jr.jpeg


Coat #2.

38838873hf.jpeg


38838874ww.jpeg


38838875go.jpeg


38838876gx.jpeg


38838878xk.jpeg


38838879vi.jpeg


Tomorrow I will re-install the door, after the paint had time to dry thoroughly.

Kind regards,
Oliver
 
No insects stuck in the wet paint! How is this possible? (Just kidding — great job!)
 
Thank you very much Bert!

Here's the finished project.

Transport cover for the edge.
38847075xu.jpeg


Installed. Spring loaded, self-closing mechanism works. I had to make a minor touch up the upper side of the door frame, that's why there is some fresh paint reflecting in the picture.
38847076no.jpeg


Before:

38847140ss.jpeg


The only thing missing is the floor, I guess we'll be doing that during the week.

Kind regards,
Oliver
 
Today the inner tensioning rope of our sunshade needed to be replaced.

While opening it, I saw this.  [scared] [eek] [blink] [wink]
38862116cq.jpeg


38862117bi.jpeg


Checking diameter of the rope and getting a new one.
38862120nz.jpeg


Removing two screws to check out what would be under the cover.
38862124lv.jpeg


Not bad. No problem.
38862132tz.jpeg


38862133vk.jpeg


Laying down the sunshade and removing everything.
38862154bh.jpeg


38862157fr.jpeg


38862159as.jpeg


I thought it made sense to try to pull the new rope in while pulling the old one out. So I disassembled the other side, too.
38862167kb.jpeg


38862168xv.jpeg


Melting both ropes together, and adding a little duct tape for good measure. This was flexible enough so it would easily glide through the pipes and over the guides/bearings.
38862174lh.jpeg


38862176oa.jpeg


38862177im.jpeg


Then putting everything back together and the sunshade works again/ has a new tensioning rope.

What I sadly didn't take a picture of was the crankshaft. I got a little "nervous" in the process and stopped taking pictures. The rope is simply put through the shaft and then a knot is tied so it can't pull back out. This needs to be fumbled back into the pipe, where the rope is coiled. No reel. Just directly on the crankshaft.

38862200kk.jpeg


What fired back a little is that when I re-painted the sunshades foot quite some time ago, I forgot to use some primer/ rust blocker - so next season I will have to do it all over. For this season, some proper cleaning will have to do.

Kind regards,
Oliver
 
Nice work, Oliver! As usual. :)

What an interesting looking caliper you have there!
Would you mind sharing the make/details? [emoji41]
 
Thanks!

The calipers. Oh, that's a freebie/giveaway from Austrian company Schnabl.http://www.schnabl.works

It was part of a larger package they send my way after requesting some samples for the basement project, as I will be installing conduit/ wires that are totally kept separate from the new ceiling's substructure. You don't have to use screws with their system. It's drill-a-hole and push-in only. Very neat!

The calipers are basically a plastic "knock off" of the one and only, the original, "Messograf" from Cleo:https://shop.cleo-skribent.de/Kollektion/Messograf/

38869725ac.jpeg


38869726im.jpeg


38869727lb.jpeg


38869728hq.jpeg


If you want to know more, please check this thread:http://www.holzwurmtreff.de/viewtopic.php?f=67&t=2362 This is where I'm elaborating a bit more on the system.

Kind regards,
Oliver

 
six-point socket II said:
The calipers. Oh, that's a freebie/giveaway from Austrian company Schnabl.http://www.schnabl.works

It was part of a larger package they send my way after requesting some samples for the basement project, as I will be installing conduit/ wires that are totally kept separate from the new ceiling's substructure. You don't have to use screws with their system. It's drill-a-hole and push-in only. Very neat!
LOL, in the same boat. Great! Was exactly looking for something like this [big grin] [thumbs up] (completely unknown brand to me).
 
Noooooooooooo ;)

With your usual tool taste I was expecting a SnapOn branded Mitutoyo to be behind the nifty gadget. ;)

I am not sure if I am willing to spend the pennies on the plastic pen. Maybe I will also start a request in Austria. [emoji41]
 
I‘ve seen the Cleo, but was held back by some comment of „less than expected quality“.

If I stumble upon one in person, I will take a closer look and see if I might be persuaded. [emoji56]
 
Hi!

It's peanutbutter jelly, never mind, epoxy time!  [big grin] Using Bodenversiegelung (Floor sealing/sealant) (epoxy) BLF in RAL 7032 "Pebble grey" von CDS Polymere. (https://www.cds-polymere-shop.de/p/cds-versiegelung-blf-10-kg-haerter-s-standard-ral-7032-kieselgrau )

In this instance with standard hardener/curing agent S, which allows for about 45 minutes of processing time at 20°C. There is a speciality hardener/curing agent FH for quicker hardening/curing and/or lower temperatures, but that would also mean only 20 minutes of processing time at 20°C. With the standard hardener/curing agent and 20°C temperature you can walk on it after 18 hours. It's completely hard/cured after 7 days.

Hardener/curing agent S: minimum temperature 15°C; maximum temperature 35°C
Hardener/curing agent FH: minimum temperature 5°C; maximum temperature 25°C

Everything else is described in the products documentation:https://cds-polymere.de/produkte/versiegelungen-markierung/cds-versiegelung-blf/

As usual masking/taping and using the vacuum.

38880561sq.jpeg


38880562zb.jpeg


While taping/masking we'd almost made a mistake, since we - at first - had measured from the underside of the pedestal's board which is leveled/square. Since the floor is not, that would have resulted in 3 stripes of totally different heights around the feet of the pedestal. That would have looked totally off. Glad we caught that. (Explanation for the two stripes of masking tape around the feet of the pedestal)

Then the floor sealant/epoxy is mixed from base product (A) and hardener/curing agent (B).  Mix ratio 78 (A) / 22 (B).

CDS has an app for that, available on the App or GooglePlay Store. The app lets you chose the product, then you enter the amount needed and it shows you the needed amounts of base product and hardener/curing agent in kilograms, correct to two decimal places. Important notice: The mix ratio is only upheld when using kilograms, it can't be used with liters.

The floor sealant BLF is primer and finish in one product.

This is what the app looks like:

38880631mu.jpg


Using the stuff as primer you need 350g per square meter, using it as finish its 250g per square meter. We have round about 10 square meters, so it's 3.5 kg and 2.5 kg.

To be safe we mixed 4 kg of finished product to use as primer.

Once we started mixing I didn't take pictures anymore, as we only had 40 minutes to apply it.

38880718mn.jpeg


38880719xa.jpeg


That's it for today.

Kind regards,
Oliver
 
Thanks guys!

Well, after the 2nd coat/finish is applied, that room will be done. It already has a large shelf and a cabinet for storage. That's it.

Next part/ or better one of the next parts of the ongoing basement project will be to give this,

(Don't mind the cables, that was done by a so called "professional" "German master electrician" back in the day. (...)
38884965cl.jpeg


which, when seen whole, looks like this,

38884942fa.png

(Heizkörper = radiator)

a more friendly, much lighter in color, all around better appearance.

But I'm not yet sure how to pull that off, especially since I do not want to tear it down completely and rebuild from scratch.

I have a brainstorming type thread going on, in a German woodworking forum.

If someone wants to contribute here, I'll be all ears.

My current idea is:

Remove all the thin, dark material, and replace with 5mm birch plywood. Use the same 5mm birch plywood to fill the dark doors. (Simply glue on top). Re-use the hardware. (Hence the 5mm limit) Remove frame and grate in front of radiator, re-use. Everything gets sanded and finished with a clear coat.

Some more details.

Thickness of all thin materials used.
38884995bt.jpeg


Old hinges. (Actually screwed to the substructure, inside the cabinets)
38885002qk.jpeg


Recessed filling of doors, hence the idea to simply glue in 5mm sheets of plywood.
38885015rm.jpeg


Overall thickness of trim around doors.
38885025qj.jpeg


Backside of door.
38885030os.jpeg


Kind regards,
Oliver
 
That’s actually a very good idea Oliver.. to remove and replace thin material - as I understand isn’t hard to remove easily. To dress it up in new birch ply, you’ll have a lot of finishing choices.

Well, ahh - you may need to know that your “stuff” and your pictures of alike is sending us not so well contained hunting for ie: a pen with caliper capabilities.. We’re getting poorer, an mildly restless  [scared]
[big grin] [big grin]

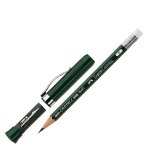
Suppose you have one of these as well...
The Perfect Pencil: I absolutely love all mine!
[attachimg=1]
 

Attachments

  • 43C064AC-3190-418A-9AD6-42892CC25FCB.jpeg
    43C064AC-3190-418A-9AD6-42892CC25FCB.jpeg
    48.4 KB · Views: 585
Status
Not open for further replies.
Back
Top