Speaker stand round over - how to do it?

sebr023

Member
Joined
May 18, 2022
Messages
176
Location
Montreal, Canada
Hi all!

I’m building 6 speaker for my home theater.
I will build the bookshelf speaker a stand each.

I designed the whole thing to look like this:
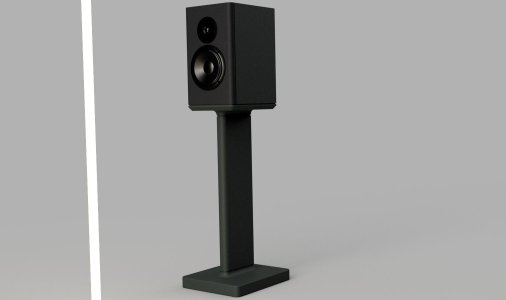
Solen Mura 5B v26-06.jpeg


It will be painted 3/4 mdf.

The stands are made like this:
-single 8x10 plate,
-3/4 inch for a round over
-Legs: 2 laminated piece of 3/4, 6x22 inch long piece.
-3/4 inch plate for round over,
-2 thickness of 3/4 10x12in.

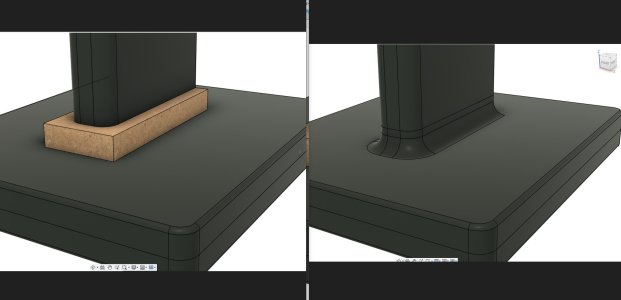
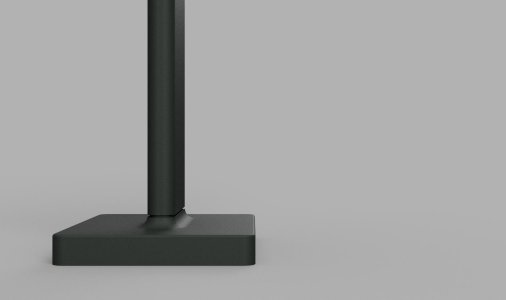
I’m not quite sure how I would do this part:
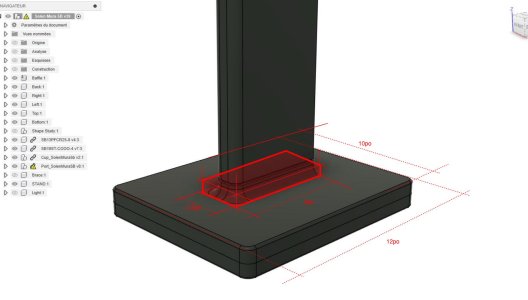
Capture d’écran 2025-05-13 200615.jpegCapture d’écran 2025-05-14 035829.jpeg


Note that the vertical legs have a round over, and between the leg and the base plate there’s a round over.

Hopefully it come across clearly on the pictures.
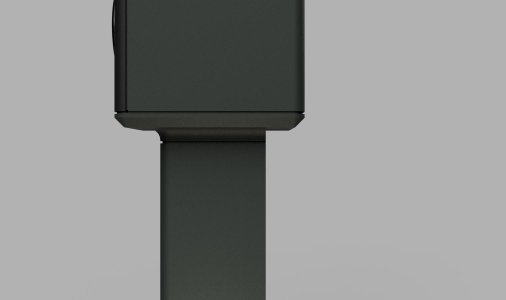
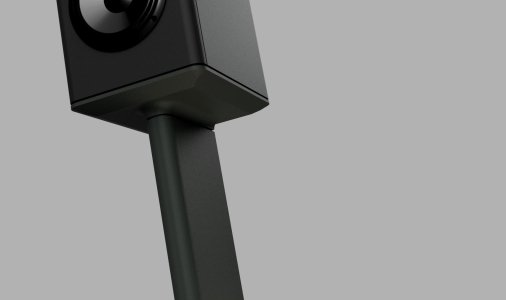
Solen Mura 5B v24-08.jpegSolen Mura 5B v26-03.jpeg
Solen Mura 5B v24-04.jpeg


So yeah, how would you guys tackle this?

I’m planning on using domino to joint everything together.

I also have a 3d printer if it’s easier to come up with a solution.
 
You could use a juice groove or round nose bit in a router table - https://bitsbits.com/?s=juice+groove&post_type=product&dgwt_wcas=1

They also make them with bearings - https://bitsbits.com/?s=cove+bit&post_type=product&dgwt_wcas=1

Nice design on the stand!
Thank you! Something I really let go my imagination (not that this design is exceptional) but when it come the time to make it im like, damn, how am i going to do this. haha

the only thing, is I dont see or find any 1/2 radius (1in diameter) with a bearing.

i've thought of using the ring that drop in the base of the router, but I have No idea on how that works
 
if I understand right, the 'vertical' round over wouldnt be possible, am I right ?
You are going to need two bits. The first one for doing the round over of any outside corners. Then you need one to do the inside cove for that "transition" piece at the base. if you are looking for 1/2" radiuses there are tons of bits on amazon from super cheap to Freud and better. The round over with bearing and the cove with or without depending on the thickness of that "transition" piece (you need something for the bearing to rub against) unless you use a router table.

Petert
 
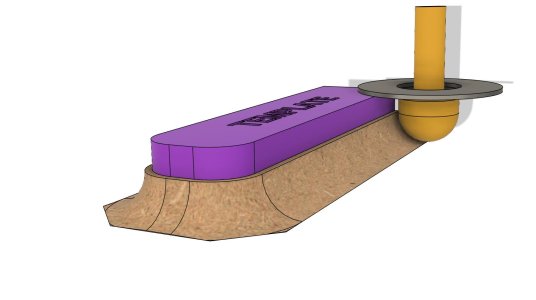
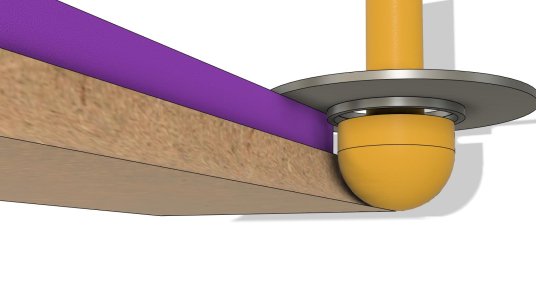
I think I came up with something.. interessting ? Viable ?

I would use the guide bushing that came with my OF1400. Get a cutter that is 1'' diameter. the guide bushing will run along a 3d printed template. As I'm planning on using domino to connect the base plate, round over plate, and vertical legs, I would include the domino hole in the template, and I would do the mortise in the round over piece before hand. That way the alignement after would be top notch. I can even let a 1/32in for sanding to make sure its flush with legs.
Round Over test v2.jpg
Round Over test v2-02.jpg
 
That would work, but just think in advance how small that purple pattern will be and how little area you have for the base of your router to rest on.

Peter
That was exactly my point, about making a jig/template. I would make it big enough to completely cover the part, then have an opening that matches the shape. Reference the inside of the opening, rather that the outside of that tiny pattern.
A cove bit that large has quite a lot of surface area in contact with the material, especially when you get deep enough the use the whole profile. Stability matters a lot.
 
I would mortise that coved section into the base by ⅛ or ¼" because if you dont, the cove will leave a razor thin edge that will break. Also, make an oversized rectangular "ring" around the perimeter of the coved section to support the base of router. Clamp it so it doesnt move.
 
That was exactly my point, about making a jig/template. I would make it big enough to completely cover the part, then have an opening that matches the shape. Reference the inside of the opening, rather that the outside of that tiny pattern.
A cove bit that large has quite a lot of surface area in contact with the material, especially when you get deep enough the use the whole profile. Stability matters a lot.
I understand. Also why I initially recommended a router table - stability.
 
Just a quick drawing to illustrate. The large rectangle would be the main template, small circle would be the copy ring (bushing or bearing, which ever you have. The big circle is the router base and the little shape in the middle is the desired result.
My guess for this was 1.5" x 5.5" To do that particular size the router base had to be larger than the usual 6", to keep it from falling in. I went with 7", but it doesn't really matter, just more than 6". This is as very stable, fully supported. I would cut down most of the way with a smaller straight bit, to get some of the center waste, out of the way. Then follow with the cove bit.

The outer round over could work out to be more challenging. It just depends on how much flat surface there is between the cove and the edge. A trim router with a small base is probably going to be needed there.
 

Attachments

  • Screenshot 2025-05-15 194234.jpg
    Screenshot 2025-05-15 194234.jpg
    135.4 KB · Views: 5
Look at a bowling bit.

I would make a “top” template make a fixture to hold the base to the table, place the template over the base, route.

Remember, even if you can’t find a top bearing bit you can add your own bearings and collar.

This is what the bit looks like, there are other radius bits;


You could easily 3D print that piece, the program you designed in will process the drawing to the slicer.

Tom
Yeah, I know about the 3d printed piece, but I’d like it to be mdf, so 3d printing the cove will be very last remedy.

The thing with bowling bits is they have a flat base, and very short radius. I started my design using 5/8 round over everywhere. Found the making “round” bit for the cove, but then I reduce to 1/2, radius.

How do you add you own bearing? I don’t know that
 
Just a quick drawing to illustrate. The large rectangle would be the main template, small circle would be the copy ring (bushing or bearing, which ever you have. The big circle is the router base and the little shape in the middle is the desired result.
My guess for this was 1.5" x 5.5" To do that particular size the router base had to be larger than the usual 6", to keep it from falling in. I went with 7", but it doesn't really matter, just more than 6". This is as very stable, fully supported. I would cut down most of the way with a smaller straight bit, to get some of the center waste, out of the way. Then follow with the cove bit.

The outer round over could work out to be more challenging. It just depends on how much flat surface there is between the cove and the edge. A trim router with a small base is probably going to be needed there.
Aaahh 😯 didn’t think of this, but that’s a good idea.

When I was drawing the other type of template I was like damn, that won’t be very stable, but didn’t think of doing the negative.

What is the outer round over that would be more challenging?
 
Yeah, I know about the 3d printed piece, but I’d like it to be mdf, so 3d printing the cove will be very last remedy.

The thing with bowling bits is they have a flat base, and very short radius. I started my design using 5/8 round over everywhere. Found the making “round” bit for the cove, but then I reduce to 1/2, radius.

How do you add you own bearing? I don’t know that
Bearings and collars. You order the ID of the bearings to fit the shaft size, the OD what ever you need. The retainer/collar to fit the shaft.

You can also get shims for the bearings. I have some bits with 2 bearings stacked.


Tom
 
103416855.jpg
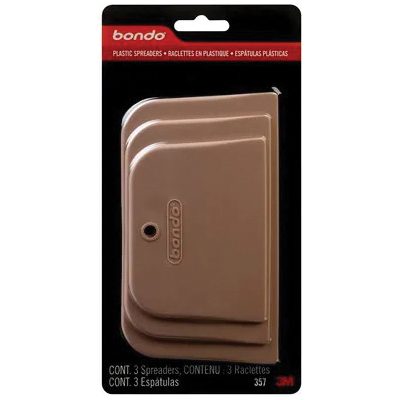
Fill the cove with Bondo and shape it before it hardens with a shaping tool.
The thickest I have used Bondo is about 1/4”, but I think it will work with the cove. Sand and paint after curing.
 
Bearings and collars. You order the ID of the bearings to fit the shaft size, the OD what ever you need. The retainer/collar to fit the shaft.

You can also get shims for the bearings. I have some bits with 2 bearings stacked.


Tom
Oh
Wow! Today I learned! Thanks!
 
Back
Top