Table saw rips not even

ColossusX

Member
Joined
Jan 18, 2018
Messages
225
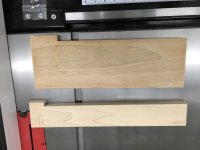
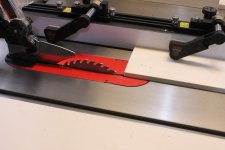
So I've been ripping cleats from 1/2 ply for my van racking system. I have a Hitachi C10RJ 10" jobsite saw.  I've checked the blade was parallel to the fence.  No fancy measuring devices but my tape measure measurements was the same front, middle, and back of the blade and also matched the fence measurement. (1 1/4 inch if it makes a difference). My systainer racks are 13" deep.  However I'm getting about 1/8 to 1/4 difference on my rips at 13". I'm thinking it's my technique since before this I've only used a table saw for rough framing and sub floors. I dont do that anymore since purchasing my track saw.

Any ideas what I'm doing wrong?

Thanks.

Steve
 
Are you keeping pressure against the fence during the cut?  You may be moving slightly without noticing.  Also are you measuring from fence to side of blade closest to the fence.
 
Push the fence over to the blade and see if there is a gap on the front or rear. Use a square from the body of the saw to blade. Then check the body of the saw to the fence. I have a Bosch 4100 contractors saw and it isn't hard to rack the fence when tightening it down. Your square should be able to find if that is happening.

Tom's suggestion is a good one too!

As also suggested above make sure you are pushing smoothly and against the fence.
 
I'll double check the fence and pick up a new blade.  I think I'm having issues keeping it against the fence.  It seems to be the right measurement at the beginning of the piece but it's off when I finish the cut.
 
I would wager that it is your technique. Get an infeed and outfeed system going. Large sheets on contractor table saws are very combersome.

Why aren’t you using your track?
 
My technique is poor.  I was using the table saw because the pieces I'm ripping are 1 inch by 13 inches.  Since I needed like 80+ of these I thought the repeatability of the table saw would be faster.  But I ended up using my track saw to cut the last 40ish. More accurate but more time consuming
 
If you are cutting 1" x 13" pieces on any type of table saw and it is not coming out perfect it is most likely the saw, followed by the operator. From what you have said the saw has never been properly set up. It takes some time to do correctly, but the end result is a safer, more accurate and more enjoyable saw. There is no excuse for not being able to cut strips of that size on any table saw unless you are starting with large panels. If so then cut them down to something manageable before moving to the table saw. If you cutting a 1" strip off of a 13"x8' piece of plywood you don't stand a chance unless you have a pull saw option on your table saw which I know you do not.

BTW I highly recommend then Jessum stock guides to anyone with a larger table saw. Excellent design and they move out of the way when they are not needed.
 
Sounds like the fence is deflecting while you apply pressure for the cut. It'll measure fine blade-to-fence with no pressure, but while applying pressure, it'll deflect away giving you a tapered cut. I had that with an old job-site saw when I first started.

To test out the idea, put a piece of blue tape on the saw deck (blade side) right next to the fence. Do a test cut. As you get most of the way through the cut, look at the tape. Is there now a gap between the tape and fence? If so, the fence is deflecting during the cut due to the pressure. The fix for that is to make the fence more rigid perhaps by bolting on a piece of angle iron on the outside edge. A temporary fix if you need to run another 50 parts is to clamp a block up against the far end of the fence so it can't deflect away from the blade.
 
No offense intended to my fellow posters but before you spend any money or make anything more than easy adjustments to your saw I would check your technique. I assume from what you are describing that you are setting the fence to 1.25” and cutting each strip between the blade and the fence? If so then how you hold that piece firmly against the table and against the fence will be crucial. The saw blade will be trying to pull the cut into the blade and away from the fence if it is not held securely. Try another cut and watch the piece as it goes through the saw to see if the whole 13” length says in full contact with the fence. If not, that’s your problem. Are you using your hand on that narrow a piece or are you using some type of push stick? If it is a push stick that only has one small point of contact at the back that might be your problem. Try something that will engage the piece along much of its 13” and maybe even attach (spray adhesive ?) some sandpaper onto the bottom of it so that it has “grab”. In this way you can be sure that the cut off is staying in full contact with the fence the entire way through the cut. Also be really careful because if you are making the 1 1/4” strip cuts between the blade and the fence and you are not holding that piece absolutely securely all the way through the cut you are very susceptible to kick back. As the saw trys to pull the piece into the blade at the back of the blade it is wedging in the front and that is a nice recipe for a kickback. No one wants that😊.

If I making incorrect assumptions about your approach or if you watch the cut and the edge of the cut off stays in full contact with the fence all the way through and the piece is still out of parellel then you are back to many of the recommendations already stated by others.
 
I am using a small push stick that can with the saw.  The 1.25" piece is between the blade and the fence.  I tried it out again today on some scrap and I did notice that as the piece advances it does pull away from the fence towards the blade.  Not every time but enough to throw off the cleats when I attached them to the shelf uprights.
 
Ok, so I think that tells us this is an easy to fix, technique issue. In my opinion what you need is a new push stick. A simple 1x4 or 1x6 with a slice taken off of a portion of the length to leave a “hook” of sorts in the back that will grab your workpiece and pull it through the cut while providing downward pressure along the length of the rip. You just snug the push stick flush with the fence and keep downward pressure down the length of the push stick. In this case the cut would be wider than the push stick so it would not damage the “hook”. If the cut was narrower than the 3/4” wide push stick you just adjust the blade to not protrude too far above the cut and cut right through the “hook”. Eventually the hook will get destroyed and you just toss it and make another one. I doubt that you would need it but if it still lets the workpiece slip at all you can always use spray adhesive to glue a strip of sandpaper onto the bottom of the push stick. This style of push stick is considerably safer then a traditional stick that only contacts the workpiece at the very back edge.

Also, I am going to take a wild guess (please don’t be offended if I’m wrong) that you have removed the blade guard. If that is correct the removal of the splitter that is incorporated into these guards would have probably have prevented this movement and the anti kickback pauls (if applicable)would have made this a much safer cut. If I am visualizing this cut correctly the risk of kickback is high in this particular operation (original operation) as the piece shifts diagonally into the blade.
 

Attachments

  • 73E86DF6-189D-4D08-9B7F-93D4DC1E5973.jpeg
    73E86DF6-189D-4D08-9B7F-93D4DC1E5973.jpeg
    1.8 MB · Views: 441
Alanbach is right about kickbacks.

Use this adjustable push shoe:http://www.leevalley.com/en/wood/page.aspx?p=30067&cat=1,240,45884 (Throw in a replacement parts or pins, and you get free shipping!)

Or, make a similar one (see the attached pdf -- Source: American Woodworker).

The only time I would use a push stick (shop-made narrow stick type) is when I use it with the Jessem Clear Stock Guide for cutting narrow stock in which case the push shoe may get in the way.
 

Attachments

  • Push shoe.pdf
    Push shoe.pdf
    66.9 KB · Views: 132
  • IMG_5399.JPG
    IMG_5399.JPG
    3.7 MB · Views: 451
I've had some kick back issue in the past, so I actually kept the kickback pawls and the blade guard on.  I knew with such narrow pieces it would be hazardous to cut them without the safety gear.  The push stick Hitachi includes leaves much to be desired. Time to make one I think. 

Thanks for all the feedback and suggestions.
 
Ha! I have never been so glad to be wrong! I’m glad you us3d the safety devices on your saw. ChuckM is correct that there are many commercially available push sticks that provide not only the ability to push the work piece into the saw but (exp hold it down and in position at the same time. In addition to the Veritas model he noted and the picture of a home made model there are also very good models made by Kreg, Bench Dog and many more. Like the super simple example I posted the picture of, all that really matters is to firmly help hold the piece in the proper position all the way through the cut. When I make one like the picture I posted, I always make three or four so I always have one around when I need it. Mine is made from scrap and doesn’t take more than a few minutes to make. There are also more expensive ones that are extremely versatile. Look up the Micro jig’s GRR Ripper. It’s really expensive but is super versatile and can be configured to protect you on some of the most hazardous types of cuts. Also Jessem’s clear cut table saw guides are another way to play. Remember that table saw safety devices are all super cheap when compared to the cost of an injury and a visit to the ER.
 
I also have the Grr ripper, mostly for resawing. But some woodworkers don't like the fact that the blade guard is removed whenever it is used for narrow stock, and the fact that the hand (holding the Grr ripper) passes over the blade.

The Jessem’s clear cut table saw guides allows me to cut large plywood sheets accurately on the tablesaw as the angled and one-way rollers keep the plywood edge in touch with the fence at all times. I have since sold my TS75, which was used to break down 4 x 8s.
 
I frequently use two push sticks on my table saw. One used to push the wood through and one to hold the wood down (if necessary) positioned just right outside of the blade guard. My favorite push stick is the Big Horn 10230 Woodworkers Power Hands Safety Push Stick. It’s available from Amazon.
 
What’s the blade height? Should be only 1/4 to 1/2” over stock.

My go to push stick is an ice pick.
The only way to maintain lateral pressure against the fence as the “push stick” passes by the blade.

Another benefit is that small pieces impaled on the pick can be lifted and depsoited away from the blade without getting your hand near the blade.
 
Back
Top